Harman-Kardon HS 500 Brightness Adjustment, Contrast Adjustment, Color and Tint Adjustment

Models: HS 500

1 72
Download 72 pages 37.46 Kb
Page 32
Image 32

INITIAL SETUP

To change any of the video adjustments shown at the top of the screen, use the Navigation Buttons to highlight the “+” to the right of a parame- ter name to increase the setting, or “–” to the left of a parameter name to decrease the setting. Then press the Enter Button to change the value as shown by the number of lines to the left or right of the center line in the temperature bar for the parameter.

When only the dark center line is shown with no blue lines, the setting is at the default midpoint value.

When adjusting the Black Level setting, only two adjustments are available:

“0 to 100” provides a full black level setting, which is indicated by the bar at the midpoint

“7.5 to 100” or “full,” which complies with standards for video with “setup”

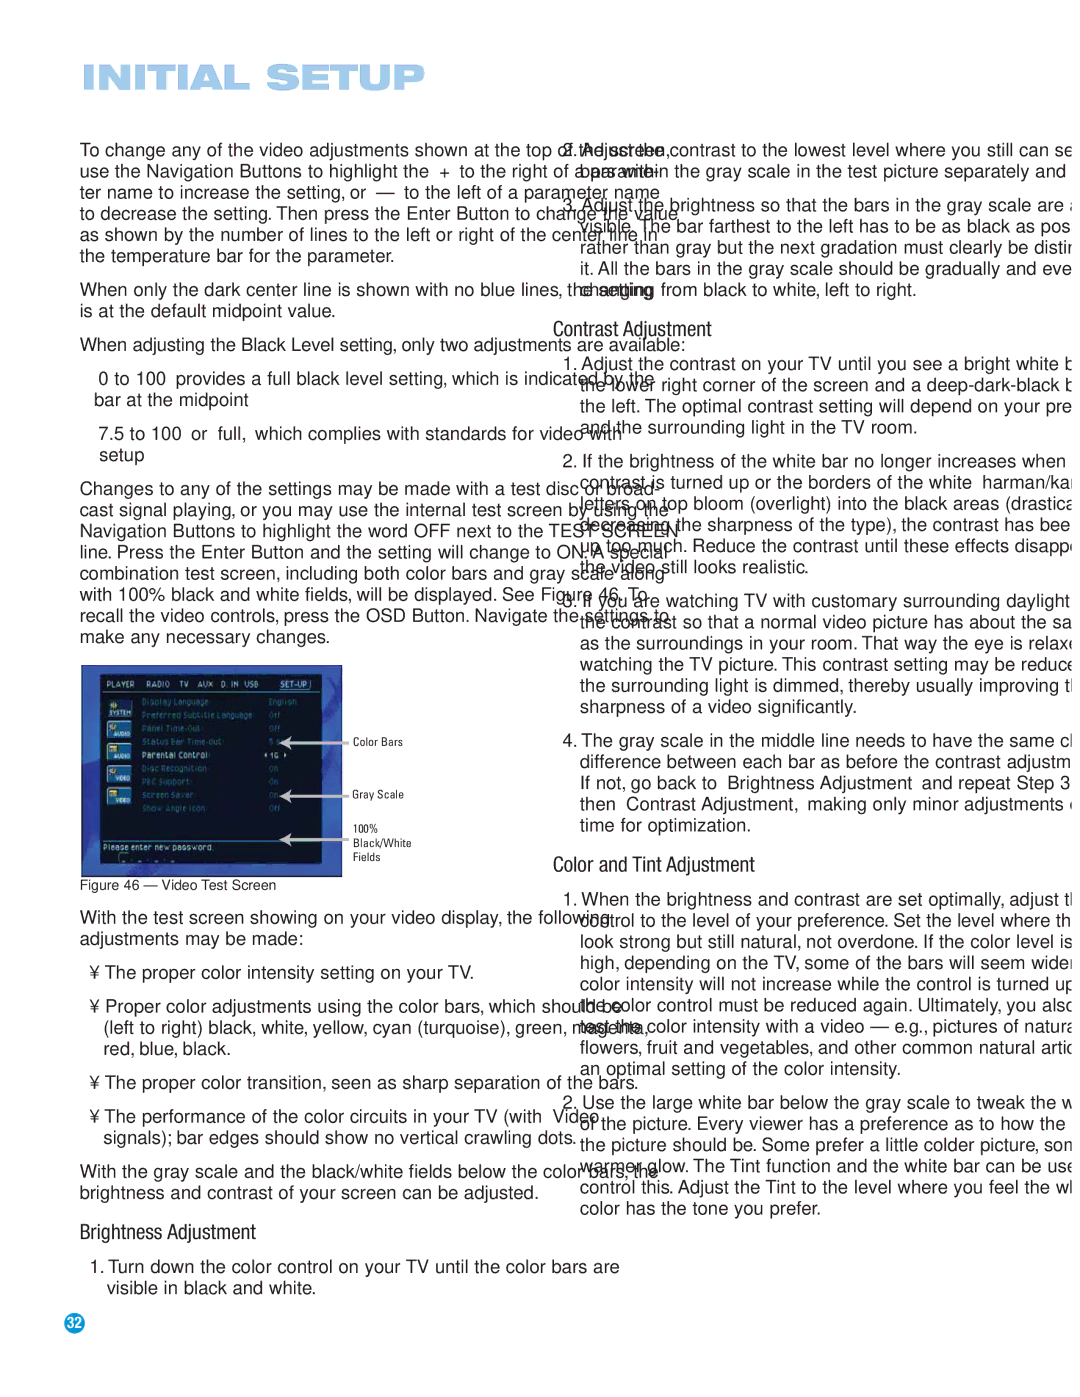
Changes to any of the settings may be made with a test disc or broad- cast signal playing, or you may use the internal test screen by using the Navigation Buttons to highlight the word OFF next to the TEST SCREEN line. Press the Enter Button and the setting will change to ON. A special combination test screen, including both color bars and gray scale along with 100% black and white fields, will be displayed. See Figure 46. To recall the video controls, press the OSD Button. Navigate the settings to make any necessary changes.

Color Bars

Gray Scale

100%

Black/White Fields

Figure 46 – Video Test Screen

With the test screen showing on your video display, the following adjustments may be made:

The proper color intensity setting on your TV.

Proper color adjustments using the color bars, which should be (left to right) black, white, yellow, cyan (turquoise), green, magenta, red, blue, black.

The proper color transition, seen as sharp separation of the bars.

The performance of the color circuits in your TV (with “Video” signals); bar edges should show no vertical crawling dots.

With the gray scale and the black/white fields below the color bars, the brightness and contrast of your screen can be adjusted.

Brightness Adjustment

1.Turn down the color control on your TV until the color bars are visible in black and white.

2.Adjust the contrast to the lowest level where you still can see all bars within the gray scale in the test picture separately and clearly.

3.Adjust the brightness so that the bars in the gray scale are all visible. The bar farthest to the left has to be as black as possible rather than gray but the next gradation must clearly be distinct from it. All the bars in the gray scale should be gradually and evenly changing from black to white, left to right.

Contrast Adjustment

1.Adjust the contrast on your TV until you see a bright white bar in the lower right corner of the screen and a deep-dark-black bar to the left. The optimal contrast setting will depend on your preference and the surrounding light in the TV room.

2.If the brightness of the white bar no longer increases when the contrast is turned up or the borders of the white “harman/kardon” letters on top bloom (overlight) into the black areas (drastically decreasing the sharpness of the type), the contrast has been turned up too much. Reduce the contrast until these effects disappear and the video still looks realistic.

3.If you are watching TV with customary surrounding daylight, adjust the contrast so that a normal video picture has about the same look as the surroundings in your room. That way the eye is relaxed when watching the TV picture. This contrast setting may be reduced when the surrounding light is dimmed, thereby usually improving the sharpness of a video significantly.

4.The gray scale in the middle line needs to have the same clear difference between each bar as before the contrast adjustment. If not, go back to “Brightness Adjustment” and repeat Step 3 and then “Contrast Adjustment,” making only minor adjustments each time for optimization.

Color and Tint Adjustment

1.When the brightness and contrast are set optimally, adjust the color control to the level of your preference. Set the level where the colors look strong but still natural, not overdone. If the color level is too high, depending on the TV, some of the bars will seem wider or the color intensity will not increase while the control is turned up. Then the color control must be reduced again. Ultimately, you also should test the color intensity with a video – e.g., pictures of natural faces, flowers, fruit and vegetables, and other common natural articles for an optimal setting of the color intensity.

2.Use the large white bar below the gray scale to tweak the warmth of the picture. Every viewer has a preference as to how the glow of the picture should be. Some prefer a little colder picture, some a warmer glow. The Tint function and the white bar can be used to control this. Adjust the Tint to the level where you feel the white color has the tone you prefer.

32

Page 32
Image 32
Harman-Kardon HS 500 owner manual Brightness Adjustment, Contrast Adjustment, Color and Tint Adjustment

HS 500 specifications

The Harman-Kardon HS 500 is a captivating all-in-one audio system that merges modern design with exceptional sound performance, making it an ideal choice for audio enthusiasts seeking a comprehensive home entertainment solution. This system effortlessly combines a CD player, a high-quality amplifier, and a digital radio tuner, providing a versatile platform for enjoying various audio formats and sources.

One of the standout features of the HS 500 is its support for high-resolution audio playback. The system accommodates a wide range of audio formats, including MP3, AAC, WAV, and FLAC, ensuring that users can enjoy their favorite music in remarkable clarity and fidelity. Coupled with advanced D/A conversion technology, the HS 500 delivers an impressive dynamic range and minimizes distortion, resulting in an enriched listening experience.

The design of the HS 500 is sleek and modern, characterized by a compact form factor that enables it to fit seamlessly into any home environment. The system's intuitive interface features a large, easy-to-read display and well-placed controls, making navigation a breeze. Harman-Kardon has ensured that both aesthetics and functionality are prioritized, allowing users to engage with their music effortlessly.

Connectivity is another key feature of the HS 500. The system includes multiple inputs such as USB, AUX, and optical digital connections, enabling compatibility with various devices, from smartphones to laptops. Wireless capabilities, including built-in Bluetooth, allow for effortless streaming from compatible devices, giving users the freedom to enjoy their music collection without being tethered by wires.

Additionally, the HS 500 incorporates advanced sound technologies such as Harman's proprietary Digital Signal Processing (DSP) to optimize audio performance. This technology tailors the sound output for different environments, ensuring that rich, balanced sound fills the room, whether you’re enjoying a quiet evening or hosting a lively gathering.

The HS 500 is also equipped with a range of enhancing features, including adjustable EQ settings, multiple listening modes, and a built-in alarm clock, making it a multifaceted device suitable for various audio needs.

Overall, the Harman-Kardon HS 500 stands out as a premium audio system that combines high-quality sound, versatile connectivity, and a stylish design, setting a benchmark for home entertainment devices in its category.