1.Attach the flashing and apply sealant around the edges of the flashing base.
2.Attach the storm collar over the flash- ing joint and apply sealant between the storm collar and vertical pipe.
To seal the roof hole, and to divert rain and snow from the vent system:
•Attach a flashing to the roof using nails, and use a
•Attach a storm collar over the flashing joint to form a
•Slide the termination cap over the end of the vent pipe and rotate the pipe clockwise 1/4 turn.
|
| HORIZONTAL |
|
| OVERHANG |
2 FT. | 2 FT. MIN. | VERTICAL |
MIN. |
| |
| WALL | |
| LOWEST | |
|
| |
| DISCHARGE |
|
TERMINATION | OPENING |
|
|
| |
CAP |
|
|
|
| X |
|
| 12 |
|
| ROOF PITCH |
|
| IS X/ 12 |
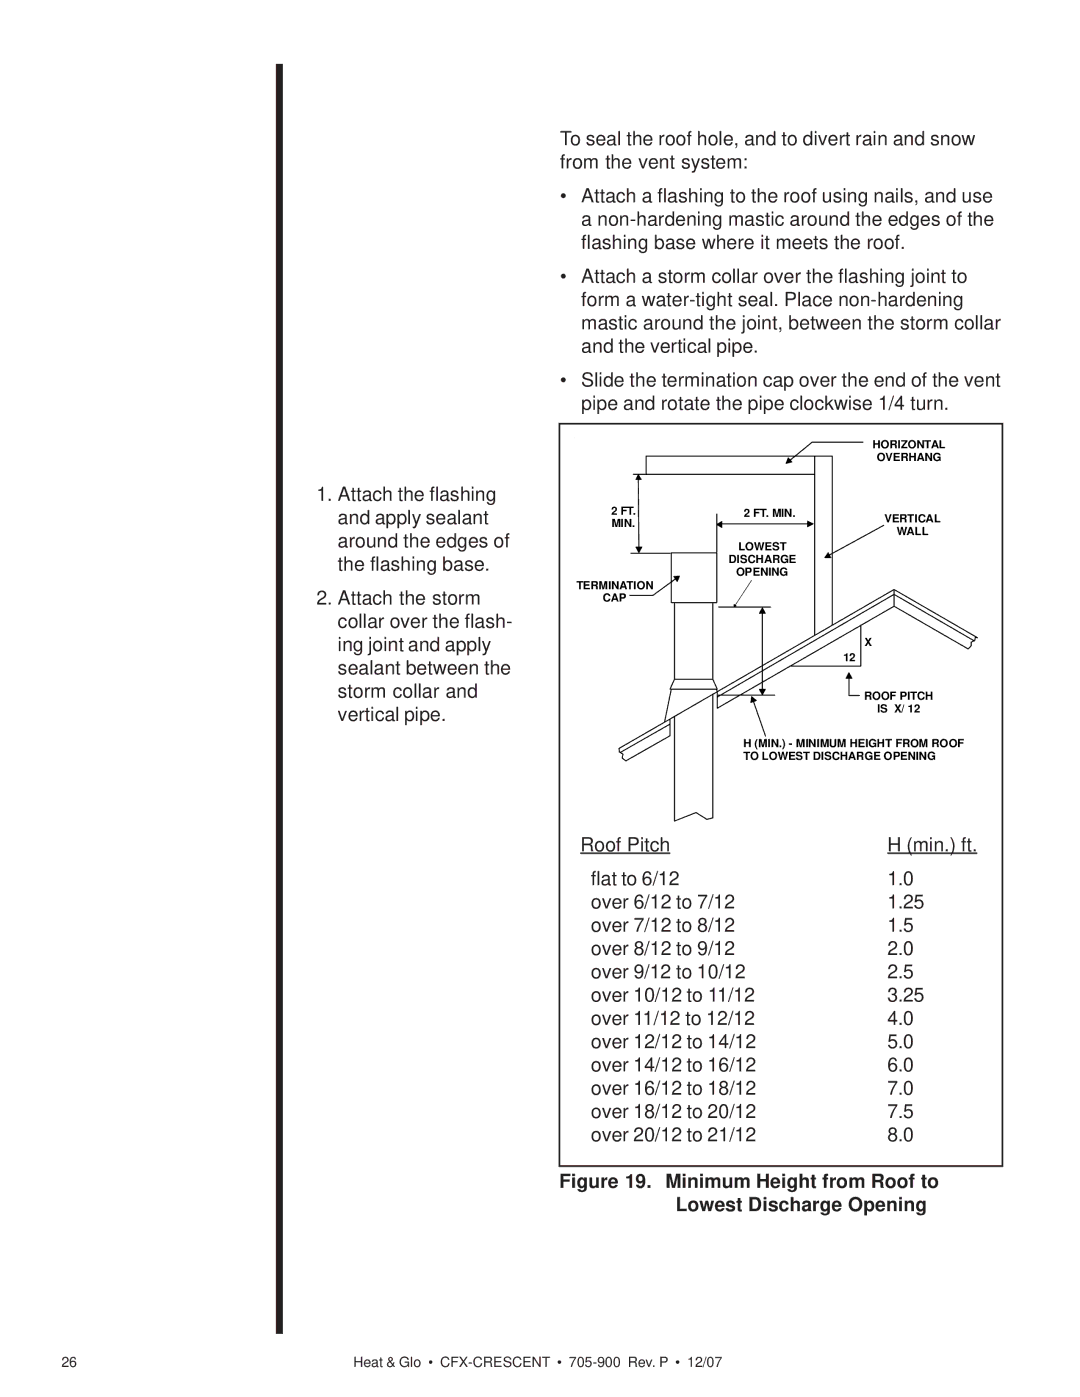
| H (MIN.) - MINIMUM HEIGHT FROM ROOF | |
| TO LOWEST DISCHARGE OPENING | |
Roof Pitch | H (min.) ft. |
flat to 6/12 | 1.0 |
over 6/12 to 7/12 | 1.25 |
over 7/12 to 8/12 | 1.5 |
over 8/12 to 9/12 | 2.0 |
over 9/12 to 10/12 | 2.5 |
over 10/12 to 11/12 | 3.25 |
over 11/12 to 12/12 | 4.0 |
over 12/12 to 14/12 | 5.0 |
over 14/12 to 16/12 | 6.0 |
over 16/12 to 18/12 | 7.0 |
over 18/12 to 20/12 | 7.5 |
over 20/12 to 21/12 | 8.0 |
Figure 19. Minimum Height from Roof to Lowest Discharge Opening
26 | Heat & Glo • |
