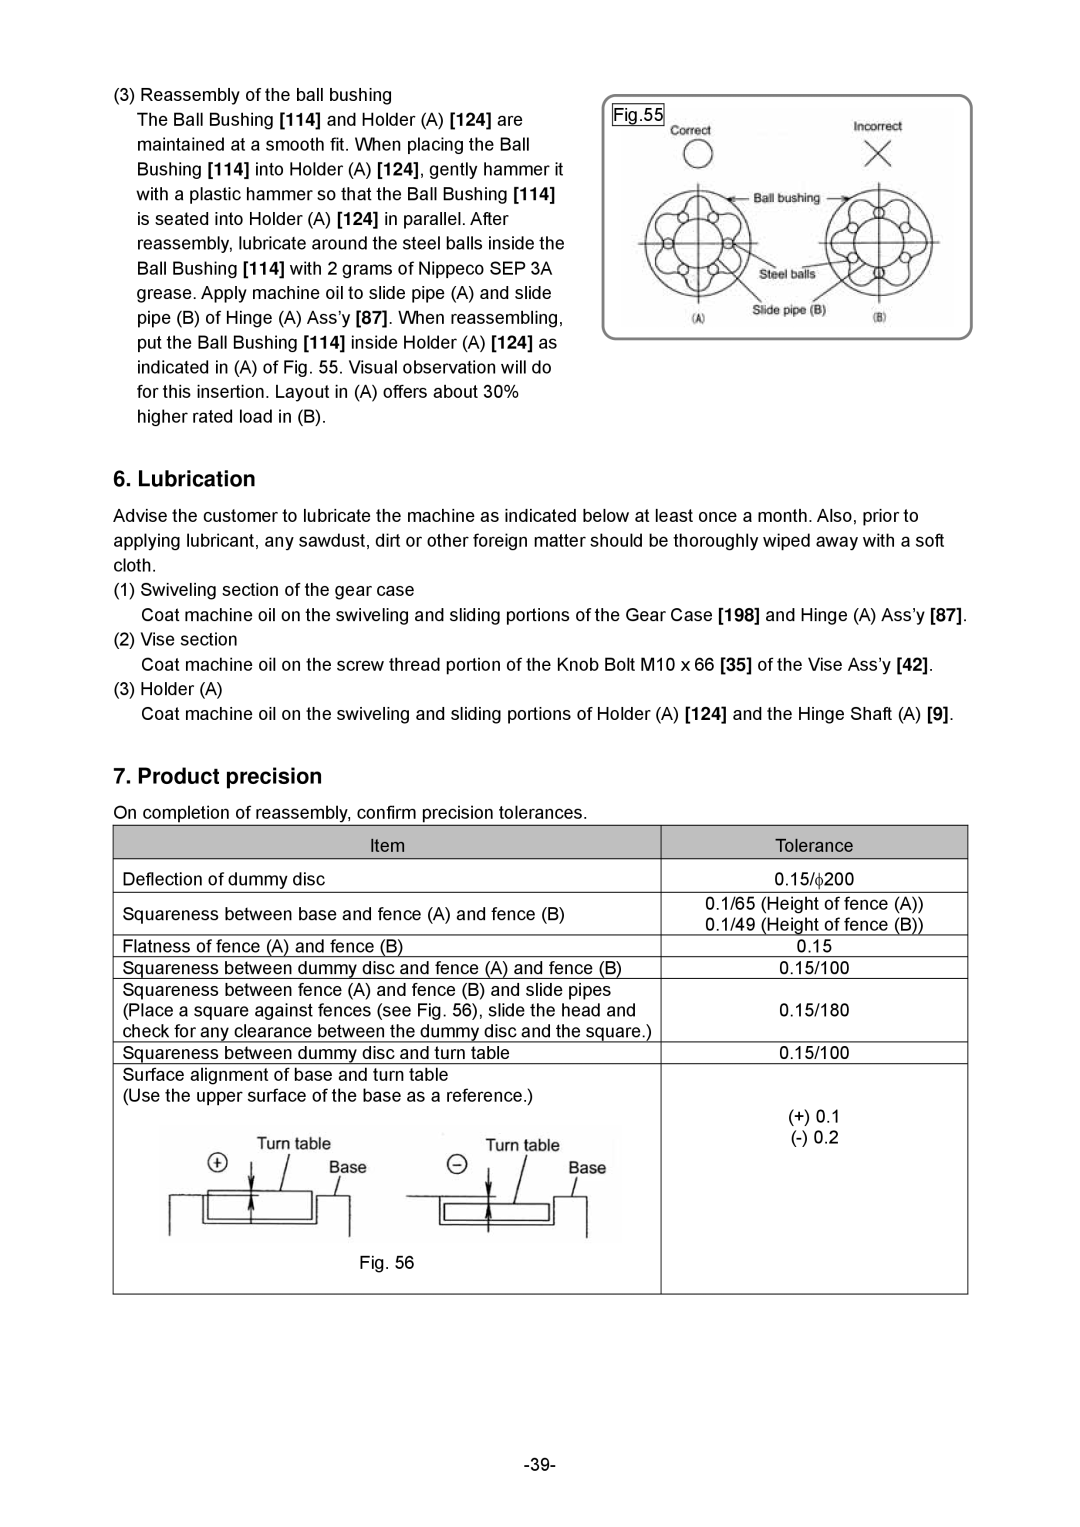
(3) Reassembly of the ball bushing
The Ball Bushing [114] and Holder (A) [124] are maintained at a smooth fit. When placing the Ball Bushing [114] into Holder (A) [124], gently hammer it with a plastic hammer so that the Ball Bushing [114] is seated into Holder (A) [124] in parallel. After reassembly, lubricate around the steel balls inside the Ball Bushing [114] with 2 grams of Nippeco SEP 3A grease. Apply machine oil to slide pipe (A) and slide pipe (B) of Hinge (A) Ass’y [87]. When reassembling, put the Ball Bushing [114] inside Holder (A) [124] as indicated in (A) of Fig. 55. Visual observation will do for this insertion. Layout in (A) offers about 30% higher rated load in (B).
Fig.55
6. Lubrication
Advise the customer to lubricate the machine as indicated below at least once a month. Also, prior to applying lubricant, any sawdust, dirt or other foreign matter should be thoroughly wiped away with a soft cloth.
(1)Swiveling section of the gear case
Coat machine oil on the swiveling and sliding portions of the Gear Case [198] and Hinge (A) Ass’y [87].
(2)Vise section
Coat machine oil on the screw thread portion of the Knob Bolt M10 x 66 [35] of the Vise Ass’y [42].
(3)Holder (A)
Coat machine oil on the swiveling and sliding portions of Holder (A) [124] and the Hinge Shaft (A) [9].
7. Product precision
On completion of reassembly, confirm precision tolerances.
Item | Tolerance | |
Deflection of dummy disc | 0.15/φ200 | |
Squareness between base and fence (A) and fence (B) | 0.1/65 (Height of fence (A)) | |
0.1/49 (Height of fence (B)) | ||
| ||
Flatness of fence (A) and fence (B) | 0.15 | |
Squareness between dummy disc and fence (A) and fence (B) | 0.15/100 | |
Squareness between fence (A) and fence (B) and slide pipes |
| |
(Place a square against fences (see Fig. 56), slide the head and | 0.15/180 | |
check for any clearance between the dummy disc and the square.) |
| |
Squareness between dummy disc and turn table | 0.15/100 | |
Surface alignment of base and turn table |
| |
(Use the upper surface of the base as a reference.) | (+) 0.1 | |
| ||
| ||
Fig. 56 |
| |
|
|
