1<>2/3
Recording (Dubbing) Images
English
Before You Begin
•Before connecting this DVD video camera/recorder to another device, be sure to turn both devices off.
•Insert a recordable disc*1 or card*2 into this DVD video camera/recorder
(see pages 22 and 23).
*1 No photo can be recorded on
*2 Only photos can be recorded: No video can be recorded.
•If you operate the DVD video camera/recorder connected to another device, always power the camera/recorder from AC outlet using the AC adapter/charger.
RECORDING (DUBBING) IMAGES ON OTHER VIDEO DEVICES
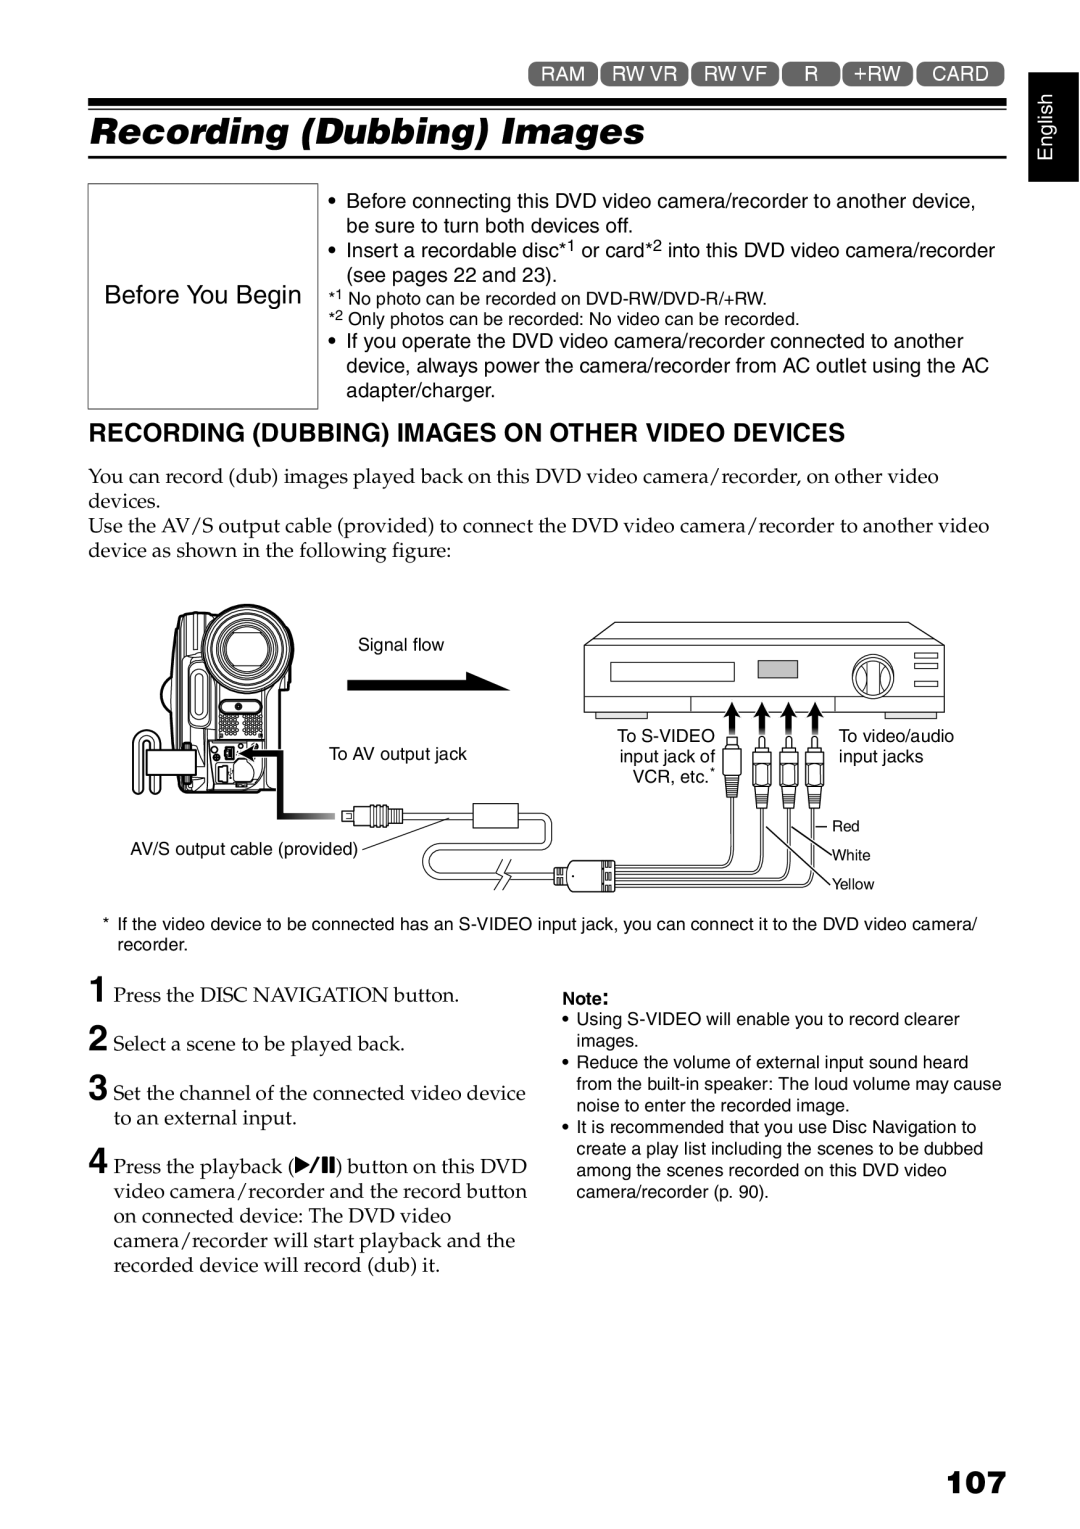
You can record (dub) images played back on this DVD video camera/recorder, on other video devices.
Use the AV/S output cable (provided) to connect the DVD video camera/recorder to another video device as shown in the following figure:
Signal flow
To ![]()
![]()
![]()
![]() To video/audio
To video/audio
To AV output jackinput jack of ![]()
![]()
![]()
![]() input jacks
input jacks
VCR, etc.* ![]()
| Red |
AV/S output cable (provided) | White |
| |
| Yellow |
*If the video device to be connected has an
1
2
3 Set the channel of the connected video device to an external input.
4 Press the playback (A) button on this DVD video camera/recorder and the record button on connected device: The DVD video camera/recorder will start playback and the recorded device will record (dub) it.
Note:
•Using
•Reduce the volume of external input sound heard from the
•It is recommended that you use Disc Navigation to create a play list including the scenes to be dubbed among the scenes recorded on this DVD video camera/recorder (p. 90).