HotBrick Network Solutions
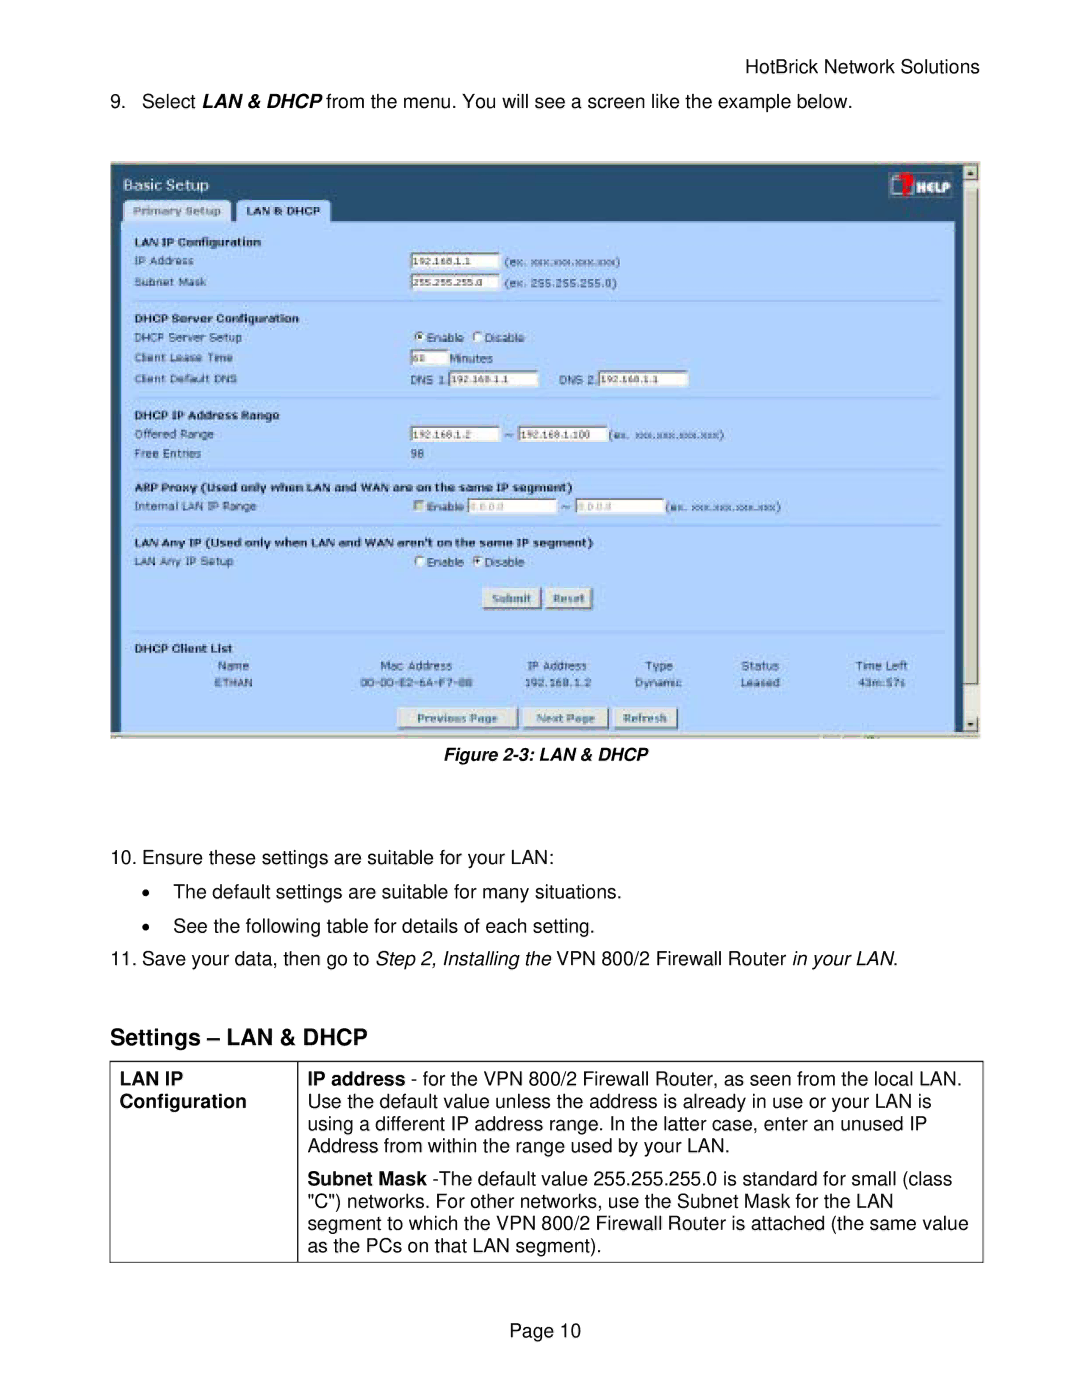
9. Select LAN & DHCP from the menu. You will see a screen like the example below.
Figure 2-3: LAN & DHCP
10.Ensure these settings are suitable for your LAN:
•The default settings are suitable for many situations.
•See the following table for details of each setting.
11.Save your data, then go to Step 2, Installing the VPN 800/2 Firewall Router in your LAN.
Settings – LAN & DHCP
LAN IP Configuration
IP address - for the VPN 800/2 Firewall Router, as seen from the local LAN. Use the default value unless the address is already in use or your LAN is using a different IP address range. In the latter case, enter an unused IP Address from within the range used by your LAN.
Subnet Mask
Page 10