
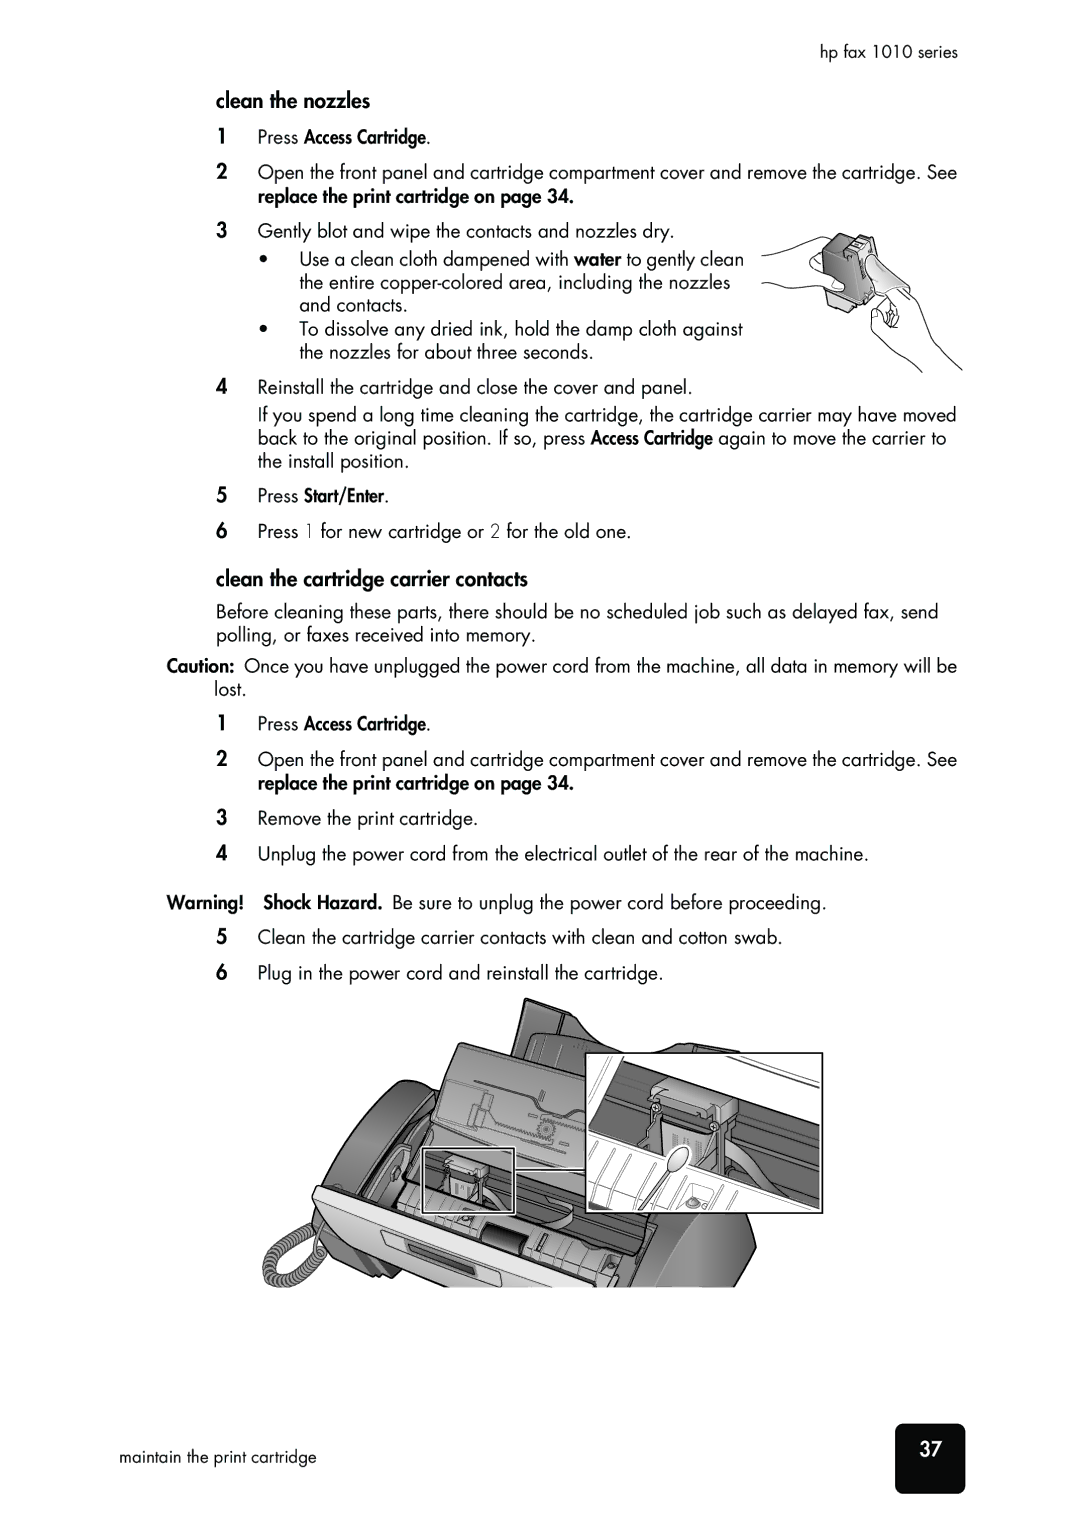
1010 Fax, 1010xi Fax specifications
The HP 1010xi Fax is an efficient and reliable fax machine designed to meet the communication needs of small businesses and home offices. Known for its compact design and user-friendly interface, the 1010xi Fax stands out as a practical solution for transmitting important documents quickly and securely.One of its main features is the high-speed fax transmission, allowing users to send and receive documents in just a matter of seconds. The machine supports a variety of fax formats, ensuring compatibility with other fax systems. The 1010xi comes equipped with a 33.6 Kbps modem, which provides fast transmission speeds while ensuring high-quality fax outputs. This makes it ideal for businesses that frequently send time-sensitive documents over the fax line.
In terms of technology, the HP 1010xi utilizes thermal transfer printing, which delivers clear and sharp text, as well as vivid images. This technology not only produces high-quality prints but also minimizes operating costs, as it uses ink effectively. The machine’s paper handling capabilities accommodate a range of paper sizes, including letter and legal formats, allowing it to support various document needs.
The fax machine features a user-friendly LCD display, which simplifies navigation through its menu options for faxing, printing, and scanning tasks. The interface allows users to store frequently dialed fax numbers, reducing the time spent entering recipients' details. Moreover, the HP 1010xi Fax includes a robust memory storage capacity, which can store multiple incoming faxes, ensuring that no communication is missed even during busy hours.
One notable characteristic of the HP 1010xi Fax is its energy efficiency. It is designed to consume minimal power, making it an eco-friendly option for environmentally conscious users. Additionally, the compact footprint of the machine ensures it occupies little desk space, making it suitable for any office layout.
Finally, the HP 1010xi Fax is designed with reliability in mind. Its durable construction means it can withstand regular use without compromising performance, making it a dependable addition to any office environment. Combining speed, efficiency, and clear output, the HP 1010xi Fax is an essential tool for those needing reliable faxing capabilities in a modern workplace.