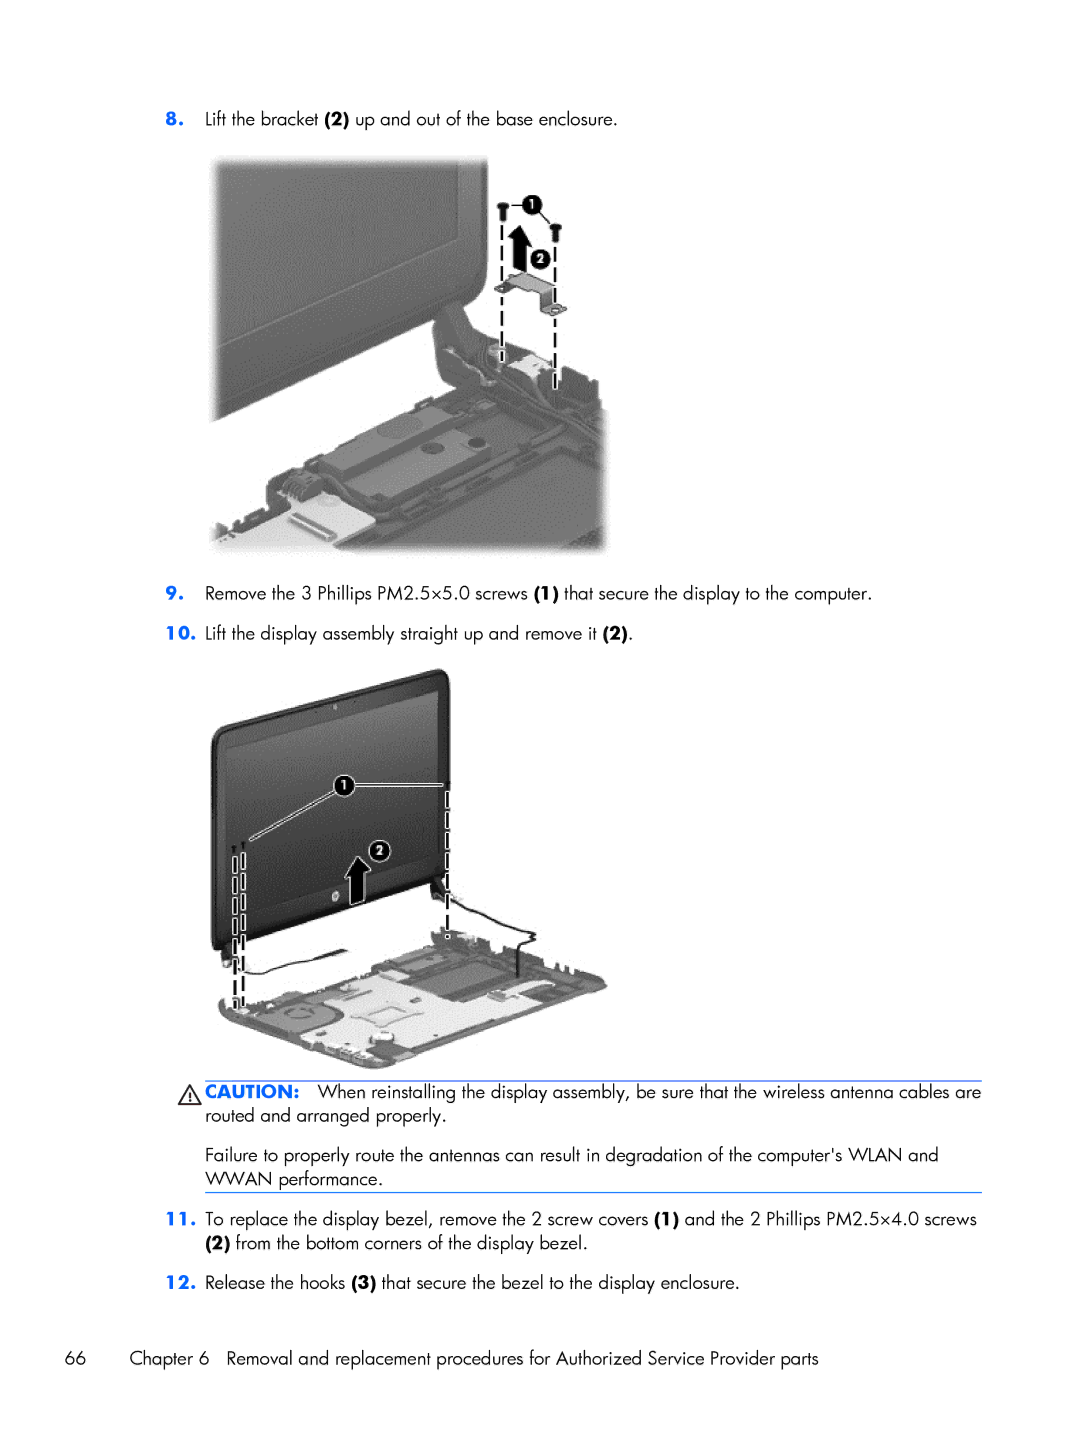
8.Lift the bracket (2) up and out of the base enclosure.
9.Remove the 3 Phillips PM2.5×5.0 screws (1) that secure the display to the computer.
10.Lift the display assembly straight up and remove it (2).
CAUTION: When reinstalling the display assembly, be sure that the wireless antenna cables are routed and arranged properly.
Failure to properly route the antennas can result in degradation of the computer's WLAN and WWAN performance.
11.To replace the display bezel, remove the 2 screw covers (1) and the 2 Phillips PM2.5×4.0 screws
(2) from the bottom corners of the display bezel.
12.Release the hooks (3) that secure the bezel to the display enclosure.
66 | Chapter 6 Removal and replacement procedures for Authorized Service Provider parts |