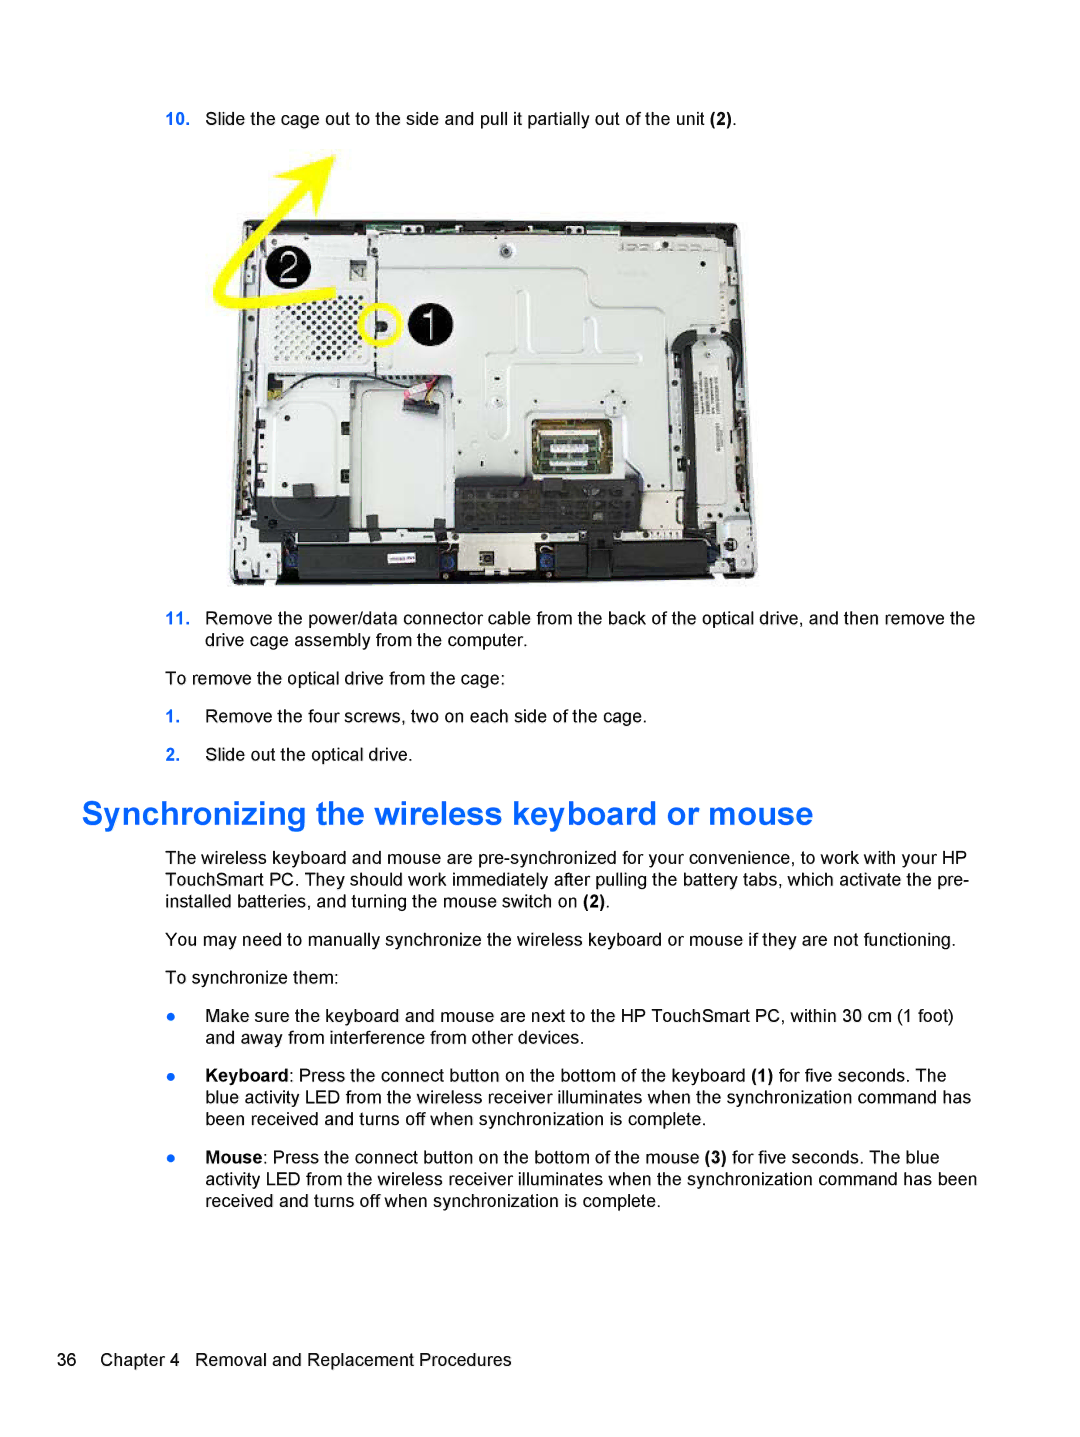
10.Slide the cage out to the side and pull it partially out of the unit (2).
11.Remove the power/data connector cable from the back of the optical drive, and then remove the drive cage assembly from the computer.
To remove the optical drive from the cage:
1.Remove the four screws, two on each side of the cage.
2.Slide out the optical drive.
Synchronizing the wireless keyboard or mouse
The wireless keyboard and mouse are
You may need to manually synchronize the wireless keyboard or mouse if they are not functioning.
To synchronize them:
●Make sure the keyboard and mouse are next to the HP TouchSmart PC, within 30 cm (1 foot) and away from interference from other devices.
●Keyboard: Press the connect button on the bottom of the keyboard (1) for five seconds. The blue activity LED from the wireless receiver illuminates when the synchronization command has been received and turns off when synchronization is complete.
●Mouse: Press the connect button on the bottom of the mouse (3) for five seconds. The blue activity LED from the wireless receiver illuminates when the synchronization command has been received and turns off when synchronization is complete.
36 Chapter 4 Removal and Replacement Procedures
