Hardware Upgrades
13.Connect the data cable to the data connector on the system board.
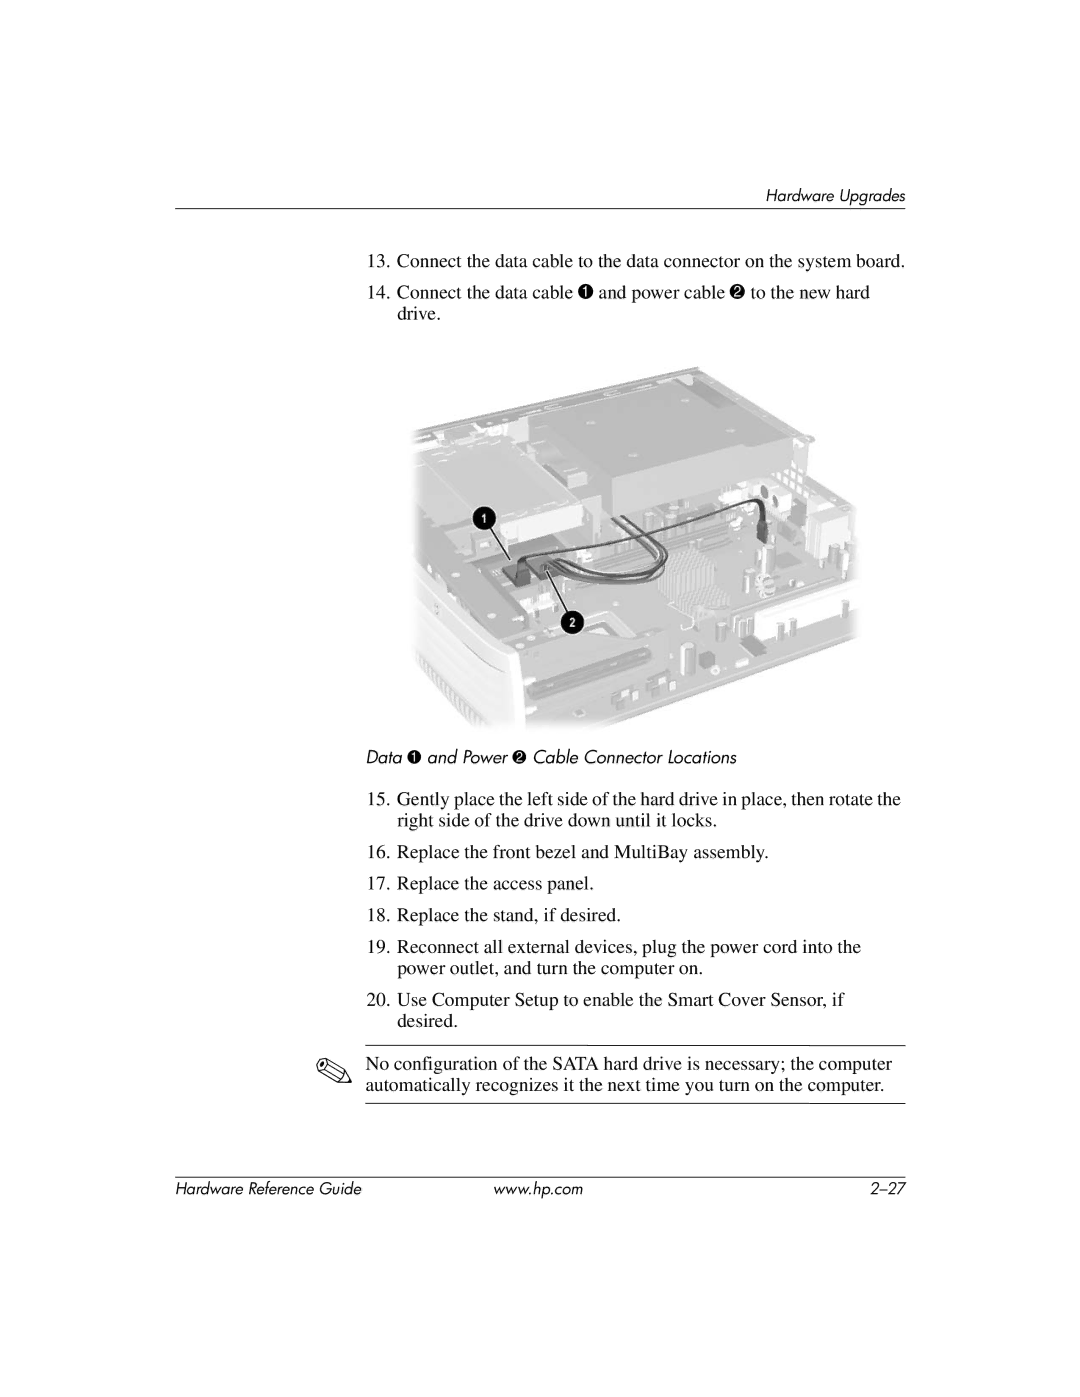
14.Connect the data cable 1 and power cable 2 to the new hard drive.
Data 1 and Power 2 Cable Connector Locations
15.Gently place the left side of the hard drive in place, then rotate the right side of the drive down until it locks.
16.Replace the front bezel and MultiBay assembly.
17.Replace the access panel.
18.Replace the stand, if desired.
19.Reconnect all external devices, plug the power cord into the power outlet, and turn the computer on.
20.Use Computer Setup to enable the Smart Cover Sensor, if desired.
✎No configuration of the SATA hard drive is necessary; the computer automatically recognizes it the next time you turn on the computer.
Hardware Reference Guide | www.hp.com |
