Installing the Switch 208/224
Installation Steps
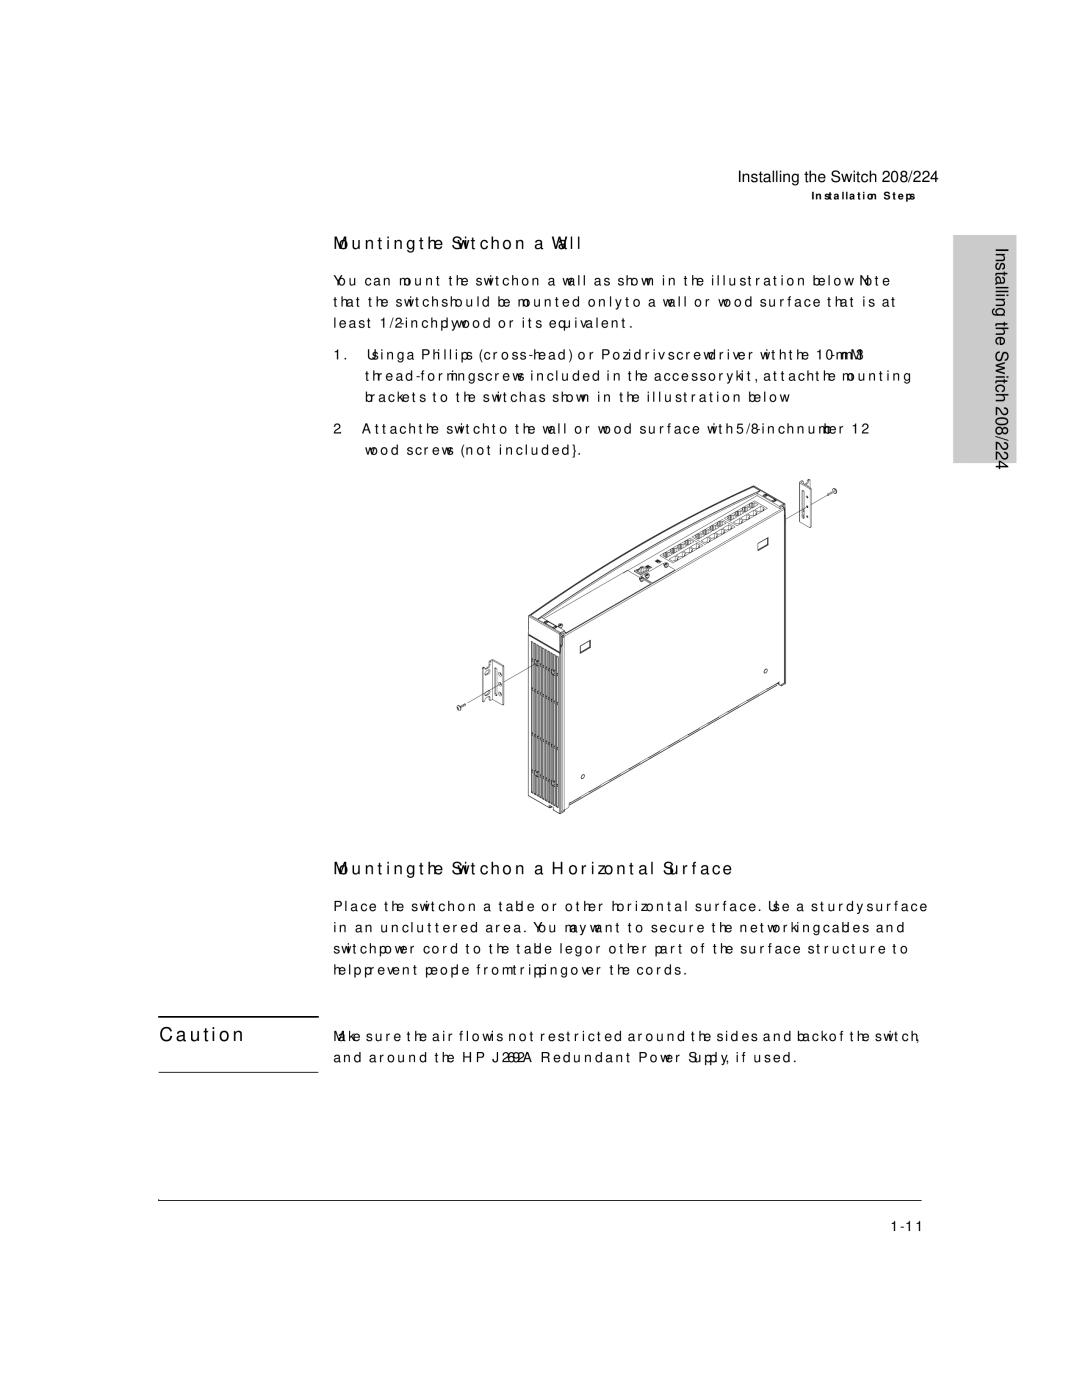
Mounting the Switch on a Wall
You can mount the switch on a wall as shown in the illustration below. Note that the switch should be mounted only to a wall or wood surface that is at least
1.Using a Phillips
2.Attach the switch to the wall or wood surface with
Mounting the Switch on a Horizontal Surface
Place the switch on a table or other horizontal surface. Use a sturdy surface in an uncluttered area. You may want to secure the networking cables and switch power cord to the table leg or other part of the surface structure to help prevent people from tripping over the cords.
C a u t i o n | Make sure the air flow is not restricted around the sides and back of the switch, |
| and around the HP J2692A Redundant Power Supply, if used. |
|
|