Installing the Switch 208/224
Installing the Switch 208/224
Installation Steps
4. Mount the Switch
After the modules are inserted and you have verified that the switch passes self test, you are ready to mount the switch in a stable location. The Switch 208/224 can be mounted in three ways:
■in a rack or cabinet
■on a wall
■on a horizontal surface
Mounting the Switch in a Rack or Cabinet
The Switch 208/224 is designed to be mounted in any
For safe operation, please read the mounting precautions in appendix C, “Safety and Regulatory” before mounting a switch.
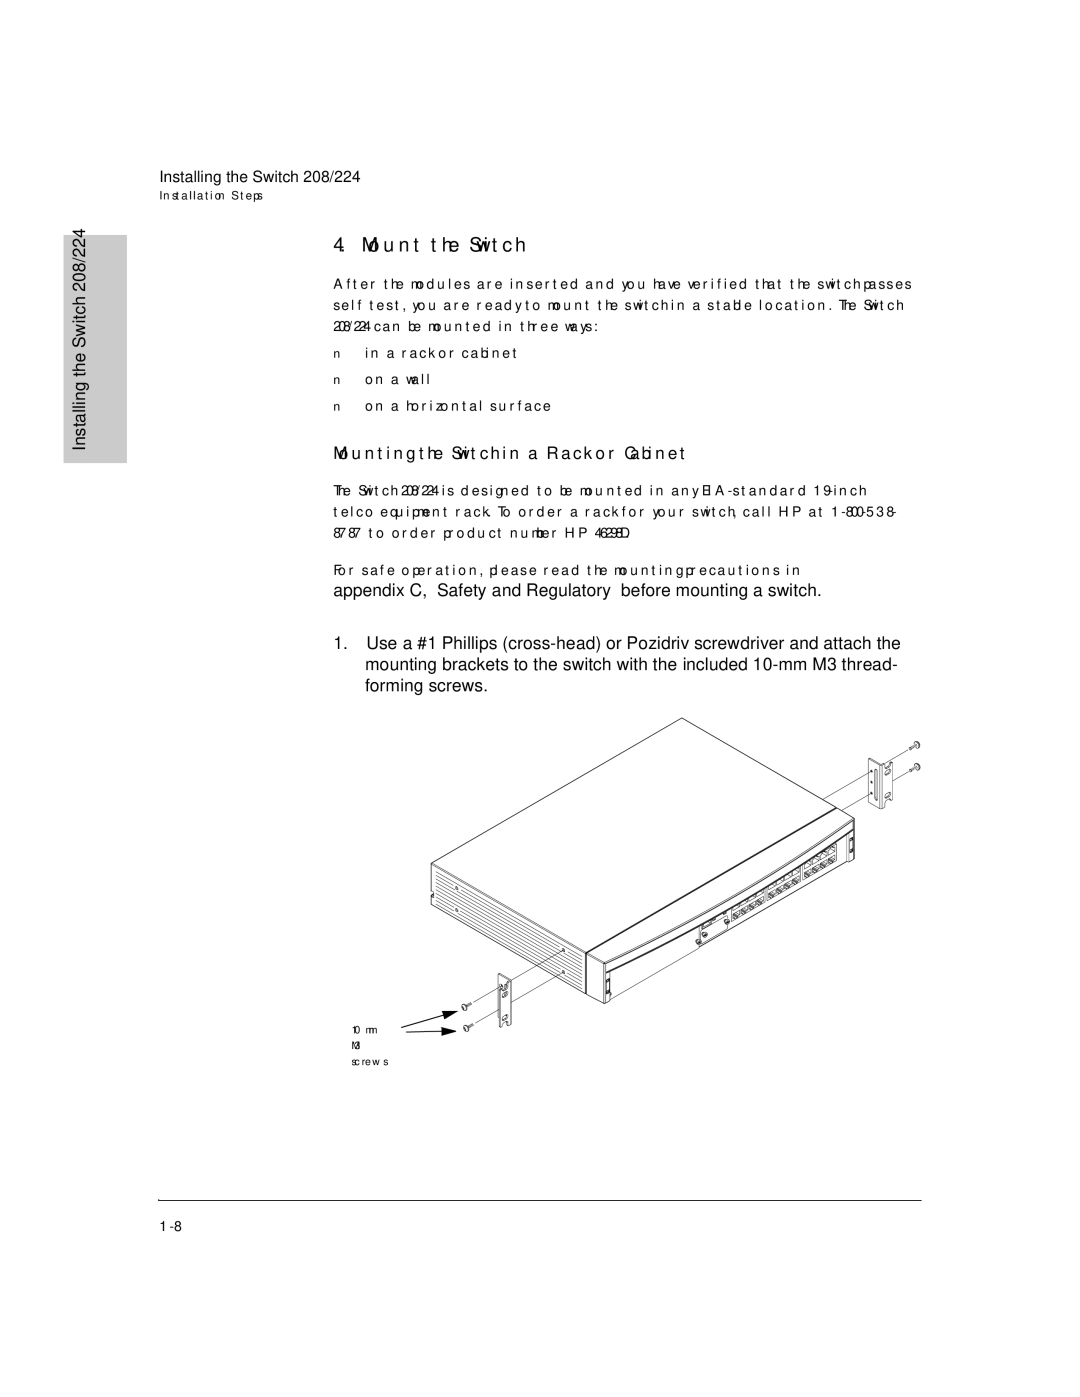
1.Use a #1 Phillips
10mm M3 screws