Removal and Replacement Procedures
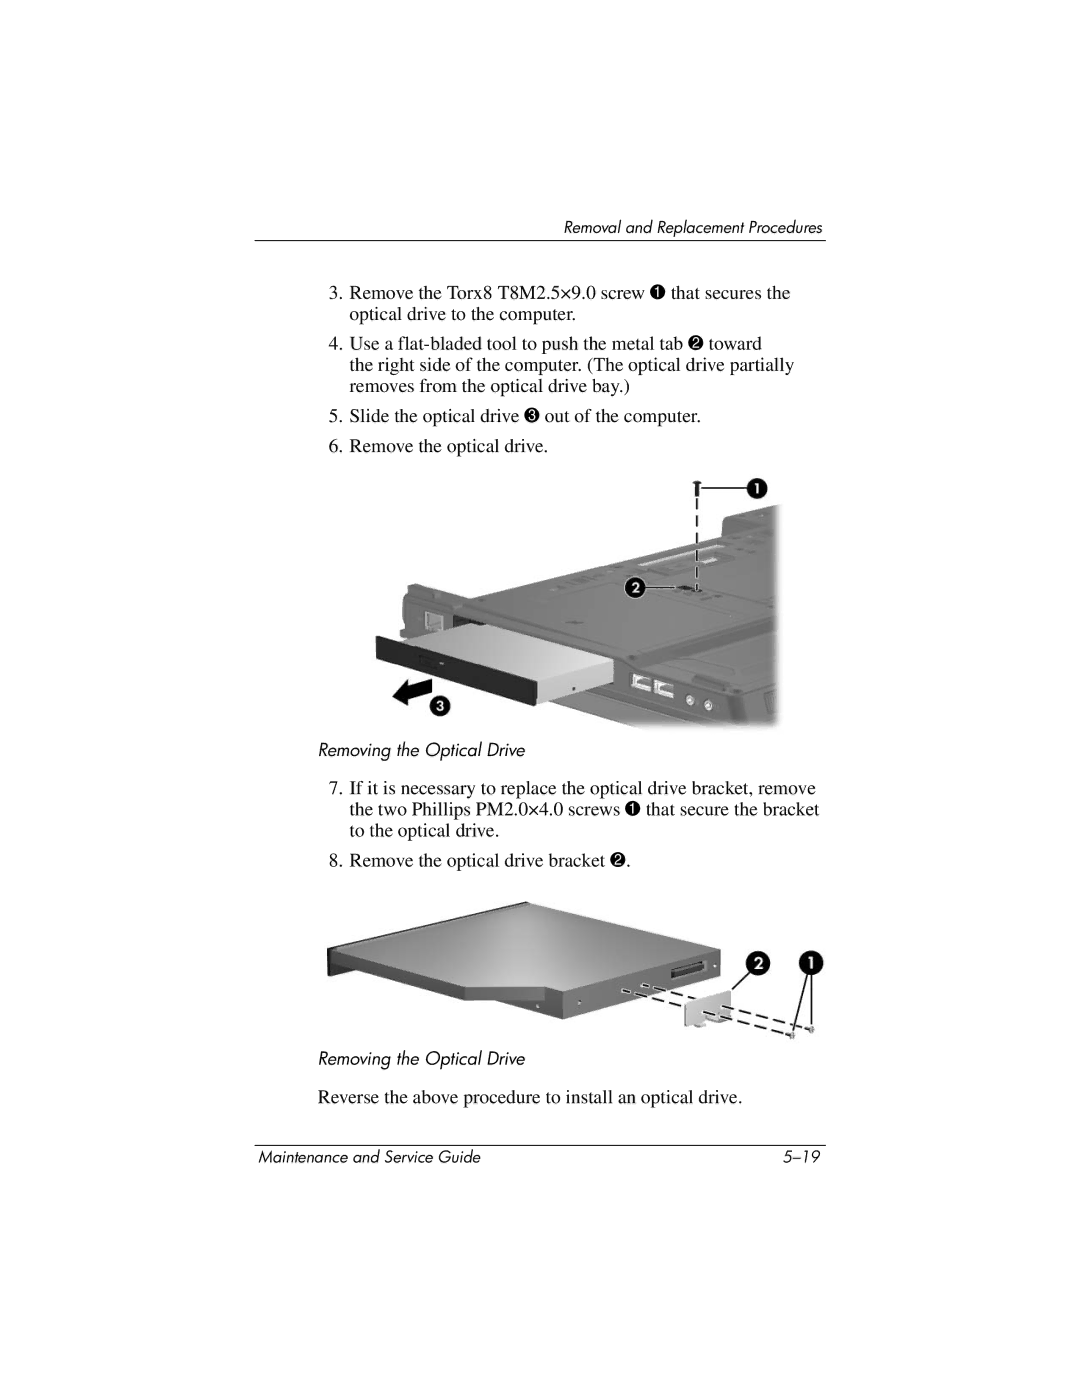
3.Remove the Torx8 T8M2.5×9.0 screw 1 that secures the optical drive to the computer.
4.Use a
5.Slide the optical drive 3 out of the computer.
6.Remove the optical drive.
Removing the Optical Drive
7.If it is necessary to replace the optical drive bracket, remove the two Phillips PM2.0×4.0 screws 1 that secure the bracket to the optical drive.
8.Remove the optical drive bracket 2.
Removing the Optical Drive
Reverse the above procedure to install an optical drive.
Maintenance and Service Guide |
