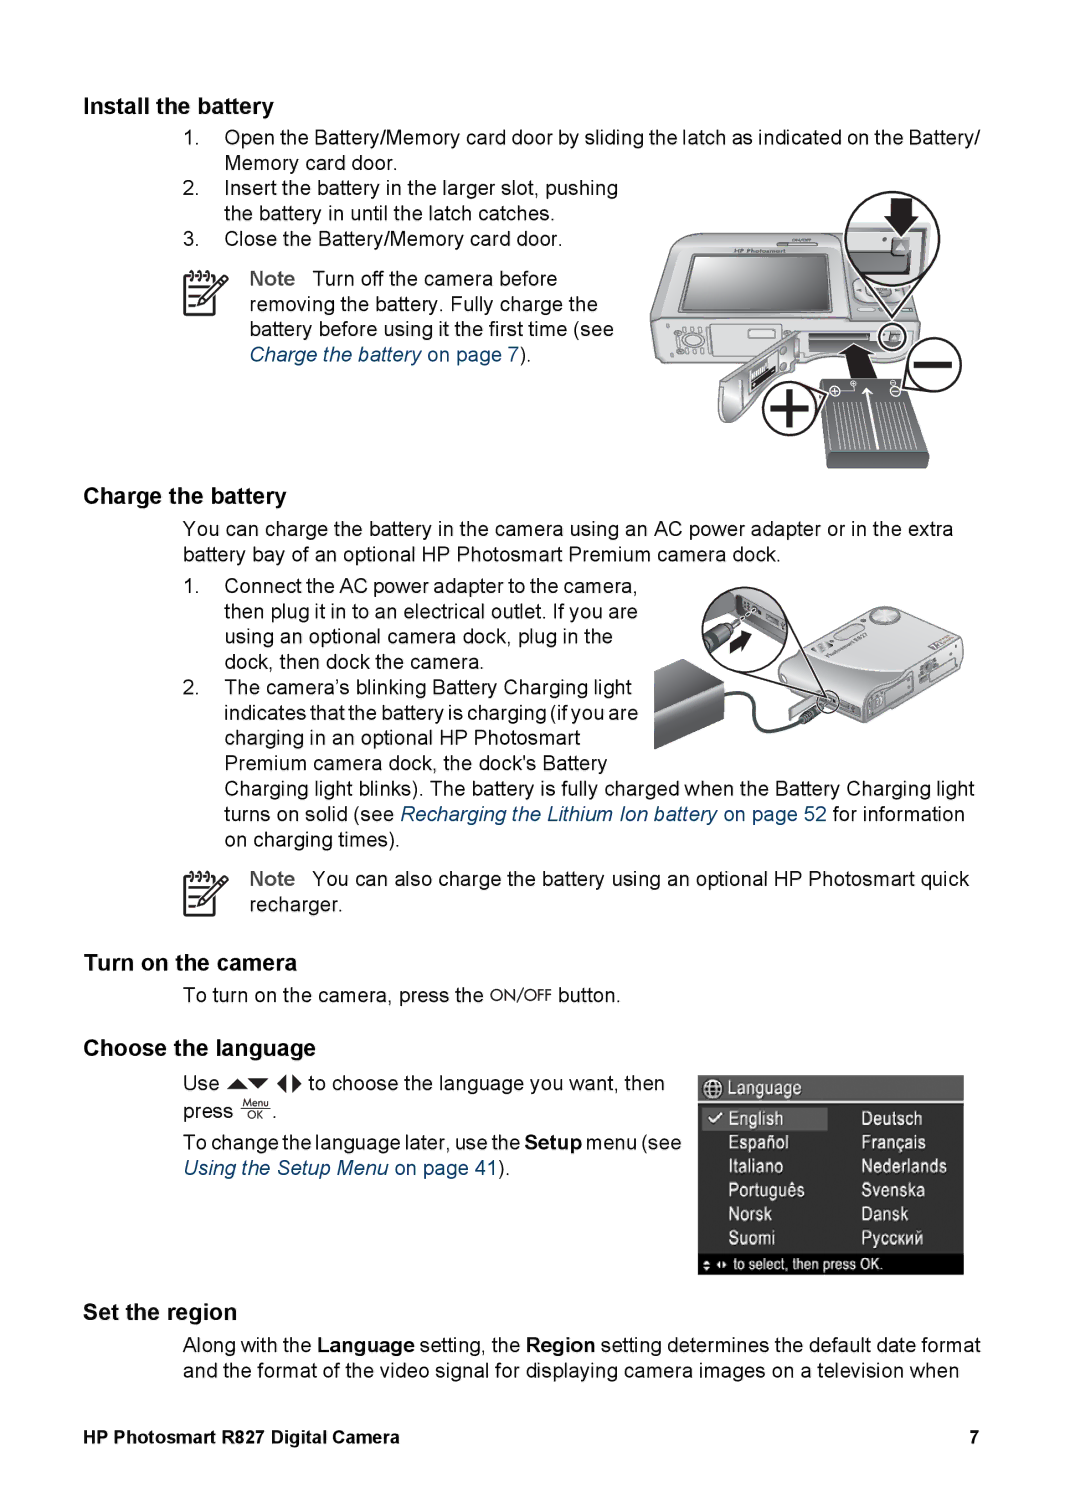
Install the battery
1.Open the Battery/Memory card door by sliding the latch as indicated on the Battery/ Memory card door.
2.Insert the battery in the larger slot, pushing
the battery in until the latch catches.
3. Close the Battery/Memory card door.
Note Turn off the camera before removing the battery. Fully charge the battery before using it the first time (see Charge the battery on page 7).
Charge the battery
You can charge the battery in the camera using an AC power adapter or in the extra battery bay of an optional HP Photosmart Premium camera dock.
1.Connect the AC power adapter to the camera,
then plug it in to an electrical outlet. If you are using an optional camera dock, plug in the dock, then dock the camera.
2. The camera’s blinking Battery Charging light indicates that the battery is charging (if you are charging in an optional HP Photosmart
Premium camera dock, the dock's Battery
Charging light blinks). The battery is fully charged when the Battery Charging light turns on solid (see Recharging the Lithium Ion battery on page 52 for information on charging times).
Note You can also charge the battery using an optional HP Photosmart quick recharger.
Turn on the camera
To turn on the camera, press the ![]()
![]()
![]() button.
button.
Choose the language
Use ![]()
![]()
![]() to choose the language you want, then press
to choose the language you want, then press ![]() .
.
To change the language later, use the Setup menu (see Using the Setup Menu on page 41).
Set the region
Along with the Language setting, the Region setting determines the default date format and the format of the video signal for displaying camera images on a television when
HP Photosmart R827 Digital Camera | 7 |
