Camera Buttons
Button | Description | |
Power | Press the Power button to turn the power on/off. | |
Stabilizer | The stabilizer sets the optimal ISO value according to light levels to compensate for | |
camera shake and help reduce motion blur. Press to set stabilizer on/off. | ||
| ||
Shutter | Press to capture an image or start/stop recording video or audio clips. | |
Zoom | In photo and Movie mode, move the toggle to the W position to zoom out, or T to | |
zoom in. | ||
| ||
Menu | Press to enter or exit menu/submenu. | |
Function/ | In Photo or Video Mode, press to enter function submenu. | |
Delete | In Playback mode, press to delete an image, video or audio clip. |
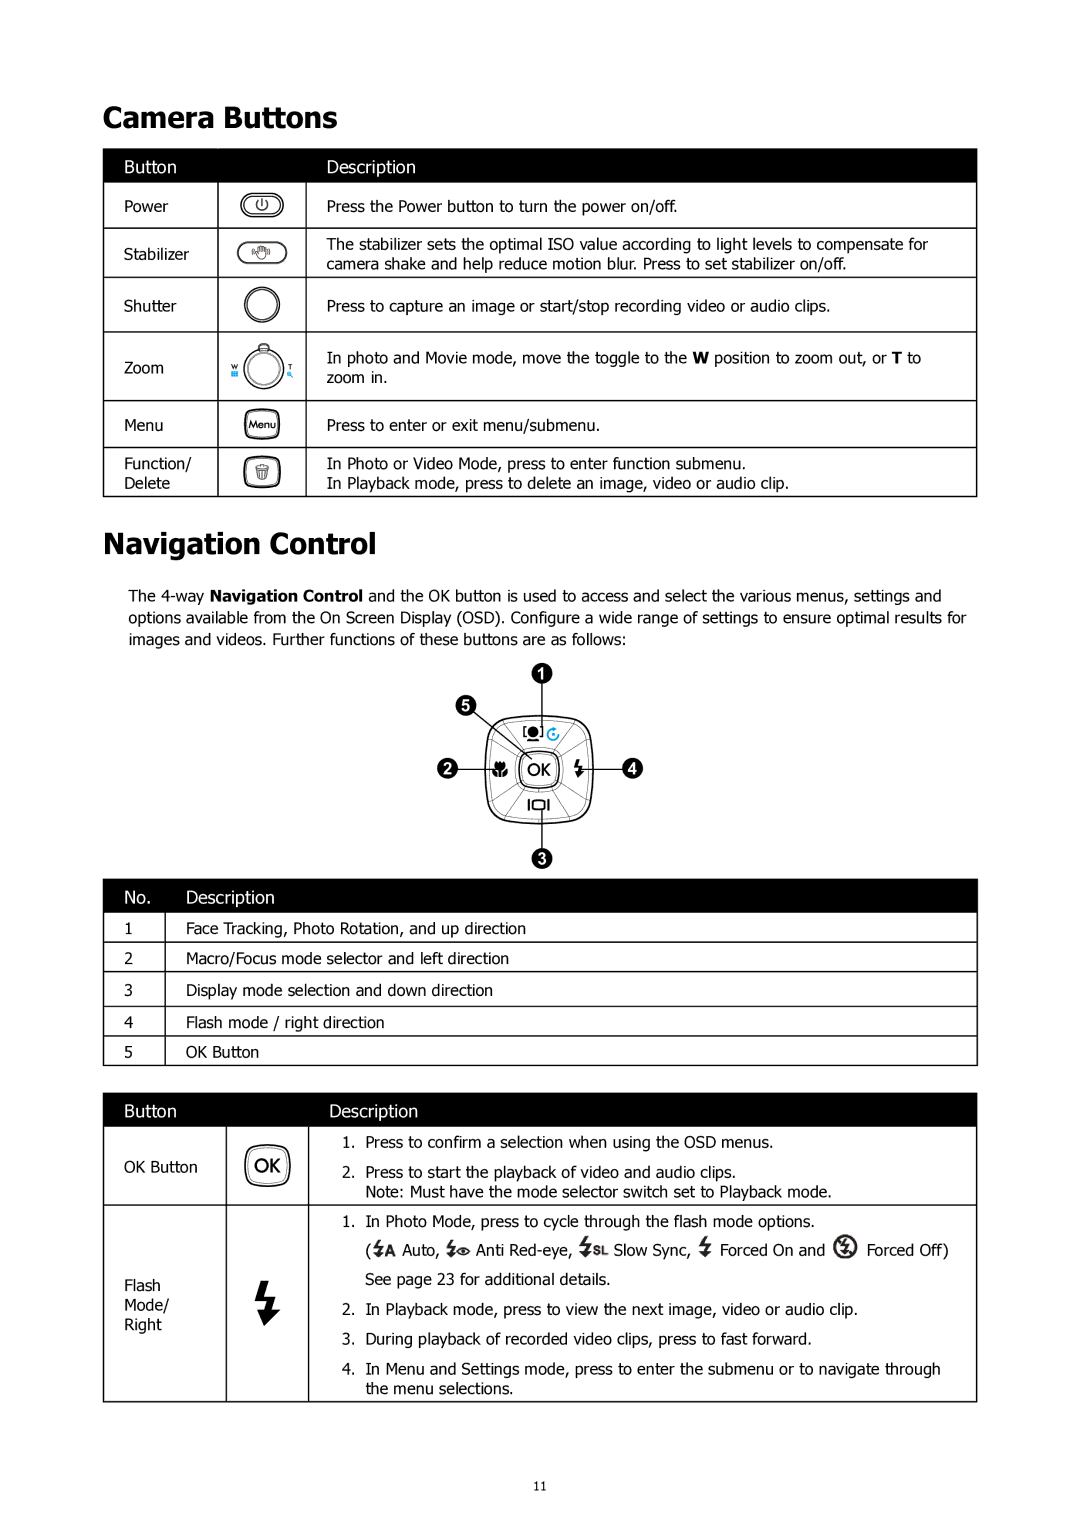
Navigation Control
The
1
5
2 ![]()
![]()
![]()
![]() 4
4
3
No. | Description |
1Face Tracking, Photo Rotation, and up direction
2Macro/Focus mode selector and left direction
3Display mode selection and down direction
4Flash mode / right direction
5OK Button
Button | Description |
1. Press to confirm a selection when using the OSD menus.
OK Button | 2. Press to start the playback of video and audio clips. |
Note: Must have the mode selector switch set to Playback mode.
| 1. | In Photo Mode, press to cycle through the flash mode options. |
| ||||
|
| ( | Auto, | Anti | Slow Sync, | Forced On and | Forced Off) |
Flash |
| See page 23 for additional details. |
|
|
| ||
|
|
|
|
|
|
| |
Mode/ | 2. | In Playback mode, press to view the next image, video or audio clip. |
| ||||
Right | 3. | During playback of recorded video clips, press to fast forward. |
| ||||
|
| ||||||
| 4. | In Menu and Settings mode, press to enter the submenu or to navigate through | |||||
|
| the menu selections. |
|
|
| ||
11
