Installing Additional RAM
Installing Additional RAM
Your notebook has no
You’ll need a small (#0) Phillips screwdriver for these procedures.
To install a RAM expansion module
To increase your notebook’s RAM, you can install a RAM module in the expansion slot on the bottom of the notebook. Use HP PC133 SDRAM modules only.
CAUTION | Your notebook’s chips are extremely sensitive to static electricity, and can be | |
| permanently damaged by it. Handle the RAM module only by its edges. Before | |
| installing the memory module, discharge your body’s static electricity by touching | |
| the metal shielding around the connectors on the rear of the notebook. | |
| 1. | Turn off the notebook: click Start, Turn Off Computer, Turn Off. |
| ||
| 2. | Important: unplug the AC adapter (if present) and remove the notebook’s battery. |
| 3. | On the bottom of the notebook, loosen the screw holding the RAM cover (the cover |
|
| retains the screw), and remove the cover. |
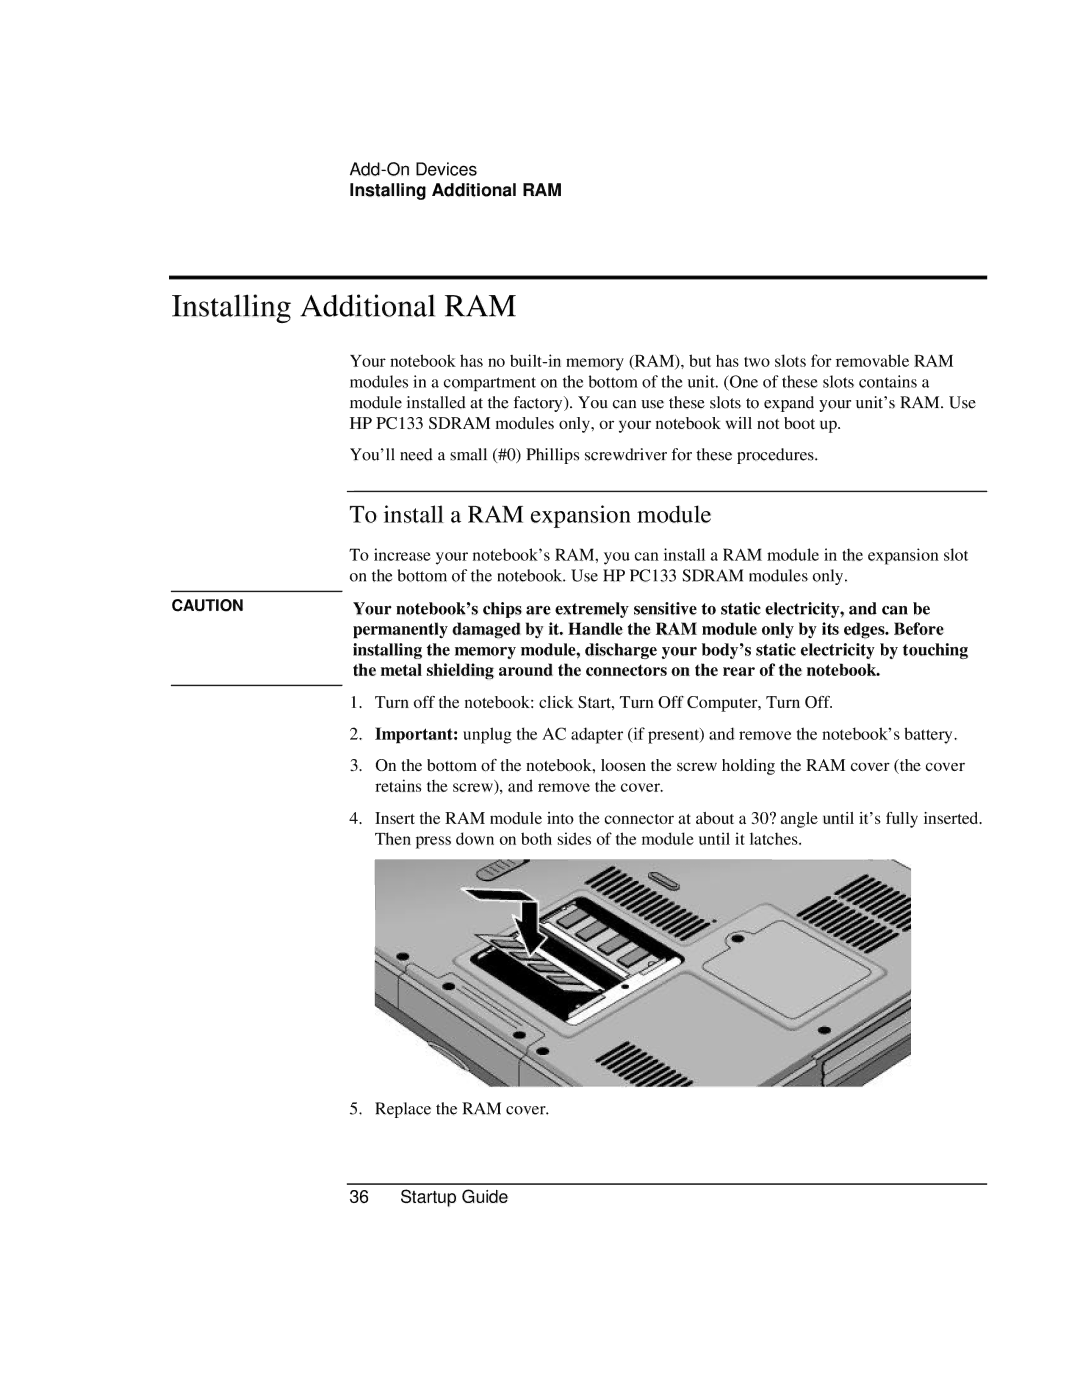
| 4. | Insert the RAM module into the connector at about a 30? angle until it’s fully inserted. |
|
| Then press down on both sides of the module until it latches. |
5. Replace the RAM cover.
