www..reelsche93x Man
5.Set the gimbal bracket aside and drill the four mounting screw holes using a 5/32" (4.0 mm) drill bit.
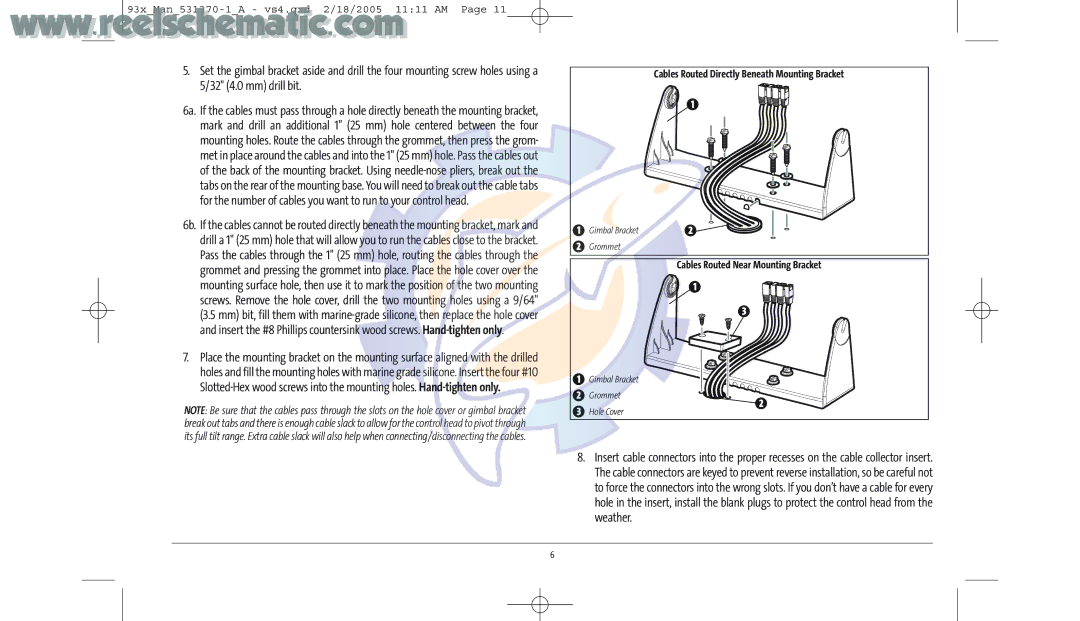
6a. If the cables must pass through a hole directly beneath the mounting bracket, mark and drill an additional 1" (25 mm) hole centered between the four mounting holes. Route the cables through the grommet, then press the grom- met in place around the cables and into the 1" (25 mm) hole. Pass the cables out of the back of the mounting bracket. Using
6b. If the cables cannot be routed directly beneath the mounting bracket, mark and drill a 1" (25 mm) hole that will allow you to run the cables close to the bracket. Pass the cables through the 1" (25 mm) hole, routing the cables through the grommet and pressing the grommet into place. Place the hole cover over the mounting surface hole, then use it to mark the position of the two mounting screws. Remove the hole cover, drill the two mounting holes using a 9/64" (3.5 mm) bit, fill them with
7.Place the mounting bracket on the mounting surface aligned with the drilled holes and fill the mounting holes with marine grade silicone. Insert the four #10
NOTE: Be sure that the cables pass through the slots on the hole cover or gimbal bracket break out tabs and there is enough cable slack to allow for the control head to pivot through its full tilt range. Extra cable slack will also help when connecting/disconnecting the cables.
|
| Cables Routed Directly Beneath Mounting Bracket |
|
| 1 |
1 | Gimbal Bracket | 2 |
2 | Grommet |
|
Cables Routed Near Mounting Bracket
1
3
1 Gimbal Bracket
2 Grommet
![]() 2
2
3Hole Cover
8.Insert cable connectors into the proper recesses on the cable collector insert. The cable connectors are keyed to prevent reverse installation, so be careful not to force the connectors into the wrong slots. If you don’t have a cable for every hole in the insert, install the blank plugs to protect the control head from the weather.
6