TCP/IP Configuration and Reference
Page
TCP/IP Configuration and Reference
Fifth Edition May
Contents
Index
About TCP/IP Configuration and Reference SC41-5420
Vi OS/400 TCP/IP Configuration and Reference V5R1
Operations Navigator
Prerequisite and related information
Viii OS/400 TCP/IP Configuration and Reference V5R1
Page
OS/400 TCP/IP Configuration and Reference V5R1
Summary of changes
Xii OS/400 TCP/IP Configuration and Reference V5R1
What you need to know before you can configure TCP/IP
Configuring TCP/IP
Gathering Information About your Network
Planning for TCP/IP Installation and Configuration
Line Description Parameters Checklist
TCP/IP Planning Checklists
Interfaces to Local TCP/IP Networks
Local TCP/IP Host Information Checklist
25 / Remote System Information
Installing the TCP/IP Application Programs
Tcpadm
Using the TCP/IP Administration Menu
Using the Configure TCP/IP Menu
Cfgtcp
Configure TCP/IP Menu
Configuring TCP/IP using the Command Line Interface
Configuring TCP/IP using the EZ-Setup Wizard
Services table
Protocol table
Configuring a TCP/IP Interface
Configuring a Line Description
Important Note
Internet address
Line description
Subnet mask
Associated local interface
Automatic start
Do you need to add routes at all?
Configuring TCP/IP Routes
Maximum Transmission Unit MTU size
Route destination
Preferred binding interface
Adding TCP/IP routes
Dftroute None
Multiple Default Routes
Normal
NO, *YES
Configuring TCP/IP Remote System Information
Configuring TCP/IP attributes
IP Datagram Forwarding
Adding Remote System Information
PVC
None NONE, *REQUEST, *ACCEPT
Lind 15, *LIND, *TRANSMIT
Adding an Entry to the Host Table
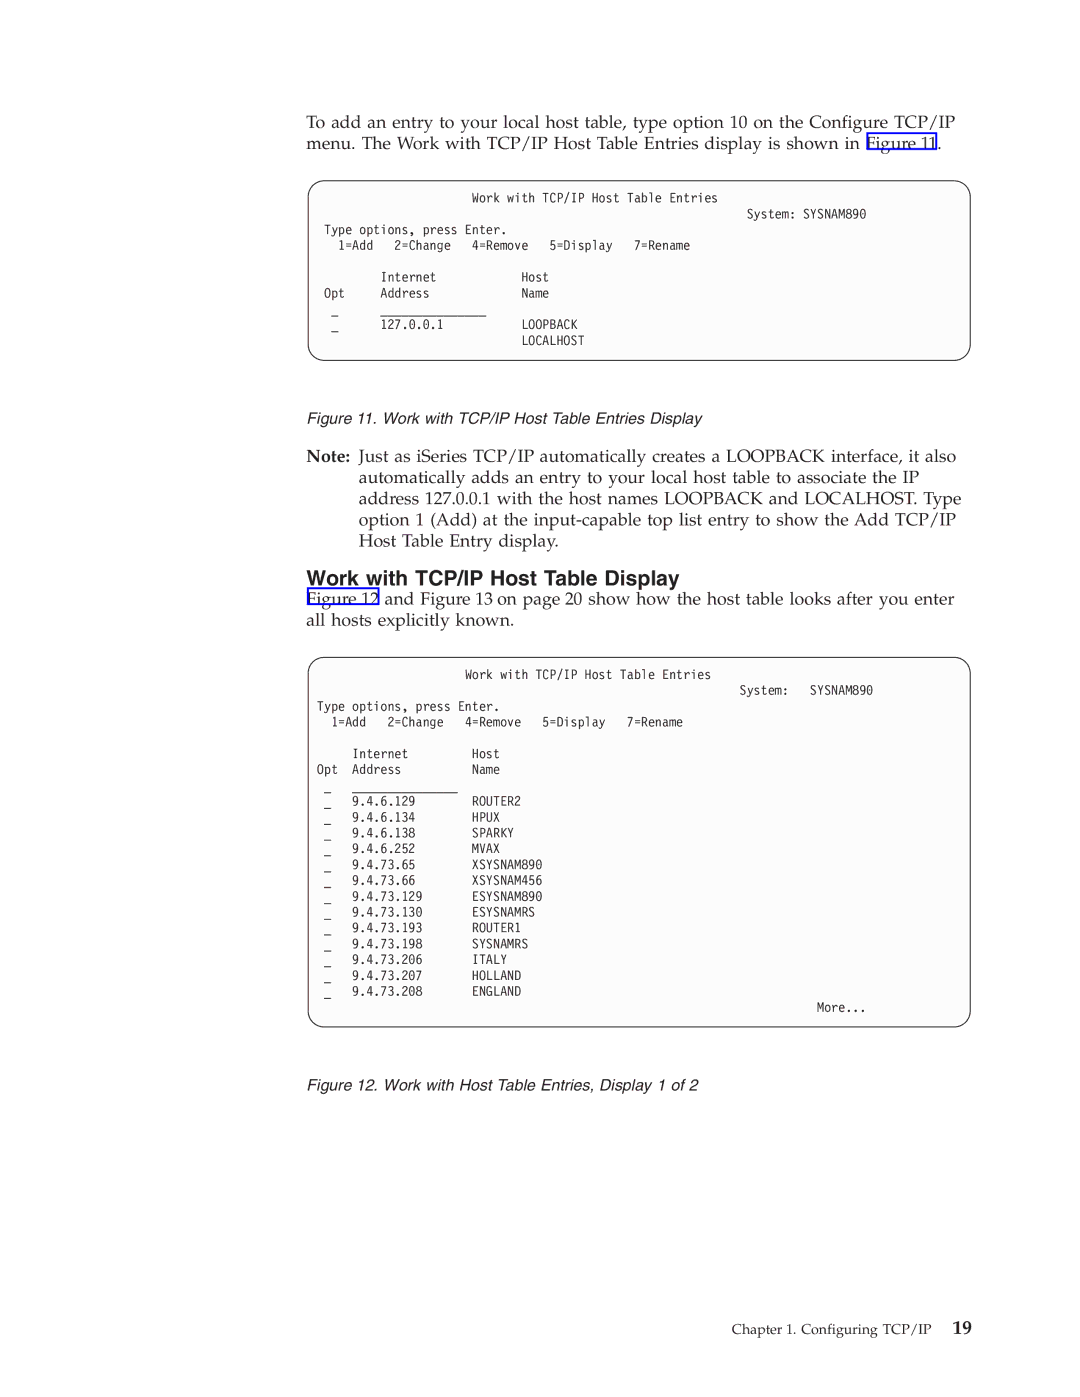
Configuring TCP/IP Host Table Entries
Work with TCP/IP Host Table Display
Bern
Macian
DNS
SYSNAM890
Loopback
Localhost
AnyNet/400 Appc over TCP/IP
Configuring the Local Domain and Host Name
Local
Domain Name System DNS Server
Dspmsg Qsysopr Dspmsg Qtcp
Starting TCP/IP and TCP/IP Servers
Job Name Description
TCP/IP Jobs
End TCP/IP Endtcp
Verifying the TCP/IP Connection
Successful Ping Messages
Verifying Additional TCP/IP Connections
Verify TCP/IP Connection Vfytcpcnn
Verify TCP/IP Connection
Verify TCP/IP Connection Ping
Verifying TCP/IP Connections with Host Name-Example
VERBOSE, *QUIET
COMP, *ESCAPE
Verifying TCP/IP Connections with Internet Address-Example
Saving Your TCP/IP Configuration
Configuring TCP/IP
32 OS/400 TCP/IP Configuration and Reference V5R1
Work with TCP/IP Network Status Menu
Network Status
Work with TCP/IP Network Status
Work with TCP/IP Interface Status
Work with TCP/IP Interface Status
Internet Network Line
Starting TCP/IP Interfaces
Opt Address Mask Service
Internet Subnet Type
Maxthrput
Ending TCP/IP Interfaces
Display TCP/IP Route Information
Display TCP/IP Route Information
Route Subnet Next Opt Destination Mask Hop Available
Work with TCP/IP Connection Status
Route Type Opt Destination Service
Type Source
Bottom
Work with TCP/IP Connection Status
Remote Local Opt Address Port Idle Time State
Remote Local Opt Address Port User Bytes Out
ALL
Ending TCP/IP Connections
Remote Local Opt Address Port Type
TCP
Confirm End of TCP/IP Connections
Working with Configuration Status
Display Multicast Groups
Displaying TCP/IP Network Status Information
Opt Description Status Job
Trnline Active Trnlinet Trnlitcp Qtcpip
Displaying TCP/IP Interfaces
Display Multicast Host Groups
Host Group Hardware Address
Display TCP/IP Interface Status
Displaying Associated Routes
Trlan
MSB
Displaying Route Details Option
Display Associated Routes
Route Subnet Next Opt Destination Mask Hop
Displaying TCP/IP Route Information
Display TCP/IP Route Details
Direct
Display TCP/IP Route Information, Display 1
Display TCP Connection Status
Displaying TCP/IP Connections
Display TCP/IP Connection Status, Display 2
Displaying Connection Totals
Display TCP/IP Connection Totals
TCP/IP Host Tables
Host File Formats
Managing TCP/IP Host Tables
Host Table Information with *AIX Files
Host Table Information with *NIC Files
Tips for Merging Host Tables
Merging TCP/IP Host Tables
Host Table Information with *AS400 Files
Managing the Host Table from a Central Site
Merge the File
Dead Gateway Processing
Negative Advice from TCP or the Data Link Layer
Multihoming Function
How IP Responds to Negative Advice
Multihoming Single Host, Single Network, Single Line
Per physical LAN only
Multihoming TCP/IP Network
Example The Multihoming function
Type of Service TOS
X25LINE
Loopback None
TOS Example
Multiple Routes
TCP/IP Port Restriction
Paolo
Configuring TCP/IP Port Restrictions
UDP, *TCP
Only
Gerry
Related Tables and the Host Table
Configure Related Tables Menu
Work with Service Table Entry Display
IBM
Using X.25 PVC instead of SVC
Multicast Restrictions
Chglintrn Lindtrnline FCNADRC00000040000
70 OS/400 TCP/IP Configuration and Reference V5R1
Base Pool Size
TCP/IP Jobs
TCP/IP Protocol Support Provided by IOP
Outbound batching of TCP and UDP datagrams
Running TCP/IP Only Performance Considerations
Merge Host Table Performance
74 OS/400 TCP/IP Configuration and Reference V5R1
Line type Configuration command
Source Service Access Point
Configuration Steps
Creating the Line Description
Line Description Name
Determining the Maximum Size of Datagrams
Setting the Maximum Transmission Unit
78 OS/400 TCP/IP Configuration and Reference V5R1
TCP/IP Exit Points and Exit Programs
Appendix B. TCP/IP Application Exit Points and Programs
TCP/IP Application Exit Points
OS/400 Registration Facility
Adding Your Exit Program to the Registration Facility
Creating Exit Programs
QAPP0100
Select your exit point
Add your exit program
Select the Add Exit Program option
Yourlib
Removing Exit Programs
TCP/IP Application Request Validation Exit Point Interface
Exit Point Interfaces for TCP/IP Application Exit Points
Required Parameter Group
Application identifier
User profile
Operation identifier
Remote IP address
Length of remote IP address
Usage Notes
Length of operation-specific information
Allow operation
QSYS.LIB file system pathnames are always in uppercase
Command string
Length of command string
Point
Character conversion option
Command processor identifier
Qshell interpreter not installed
92 OS/400 TCP/IP Configuration and Reference V5R1
Copyright IBM Corp
Trademarks
Programming Interface Information
DB2
96 OS/400 TCP/IP Configuration and Reference V5R1
Index Special Characters
Interface
Qtgtelnets
Qtsmtpsrvr
Page
SC41-5420-04

