5 Adding a Spooler
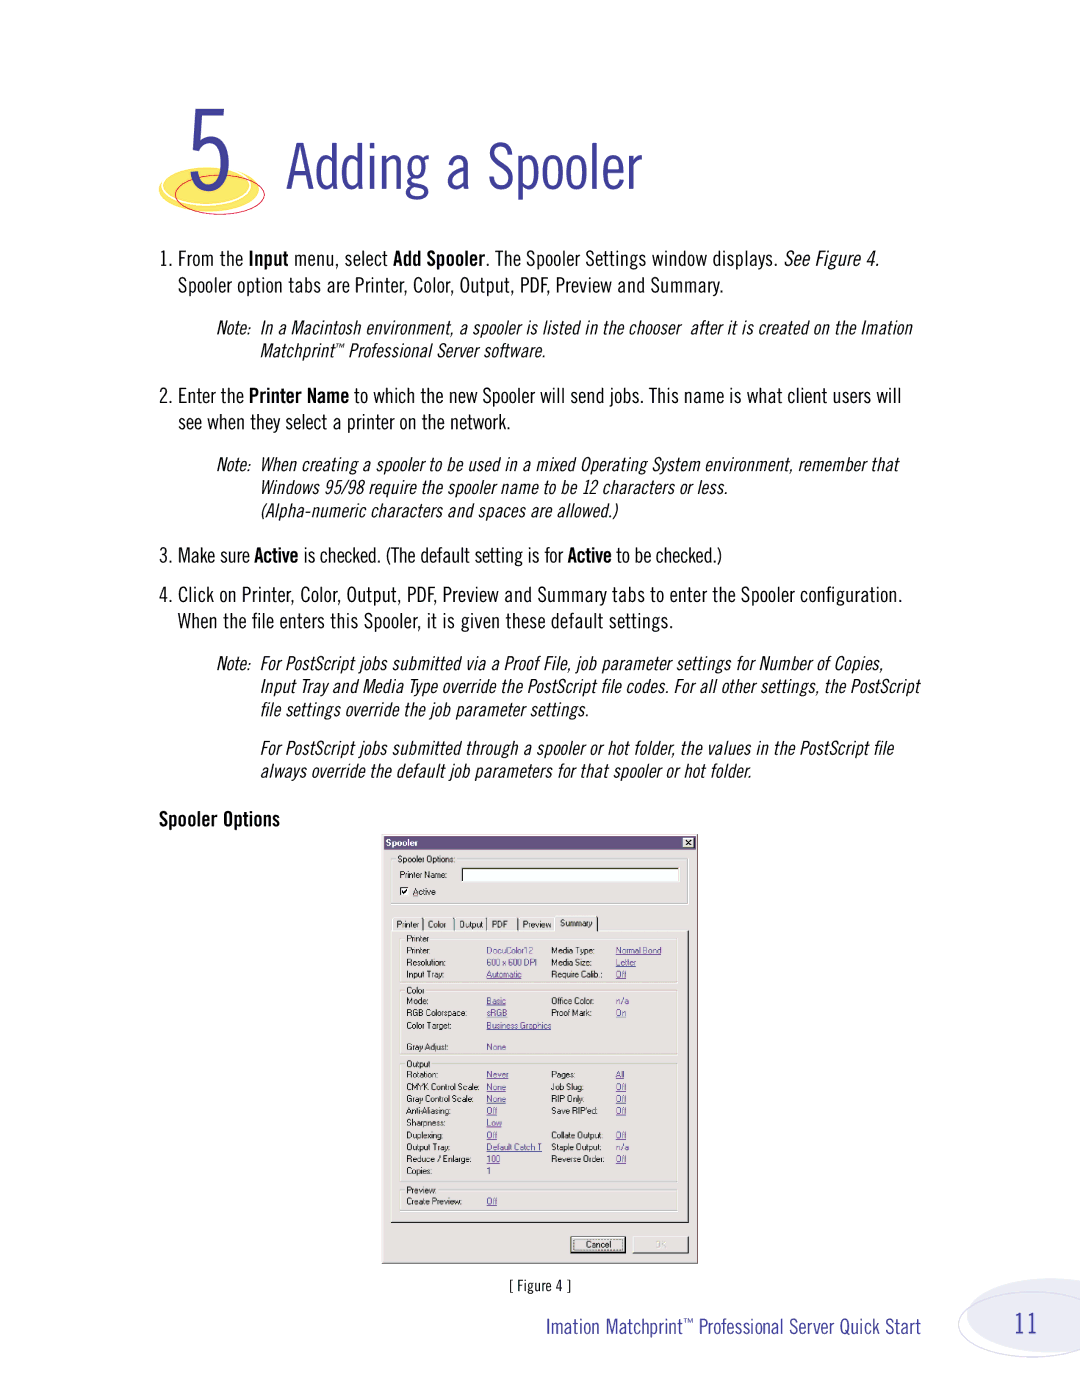
1.From the Input menu, select Add Spooler. The Spooler Settings window displays. See Figure 4. Spooler option tabs are Printer, Color, Output, PDF, Preview and Summary.
Note: In a Macintosh environment, a spooler is listed in the chooser after it is created on the Imation Matchprint™ Professional Server software.
2.Enter the Printer Name to which the new Spooler will send jobs. This name is what client users will see when they select a printer on the network.
Note: When creating a spooler to be used in a mixed Operating System environment, remember that Windows 95/98 require the spooler name to be 12 characters or less.
3.Make sure Active is checked. (The default setting is for Active to be checked.)
4.Click on Printer, Color, Output, PDF, Preview and Summary tabs to enter the Spooler configuration. When the file enters this Spooler, it is given these default settings.
Note: For PostScript jobs submitted via a Proof File, job parameter settings for Number of Copies, Input Tray and Media Type override the PostScript file codes. For all other settings, the PostScript file settings override the job parameter settings.
For PostScript jobs submitted through a spooler or hot folder, the values in the PostScript file always override the default job parameters for that spooler or hot folder.
Spooler Options
[ Figure 4 ]
Imation Matchprint™ Professional Server Quick Start | 11 |
