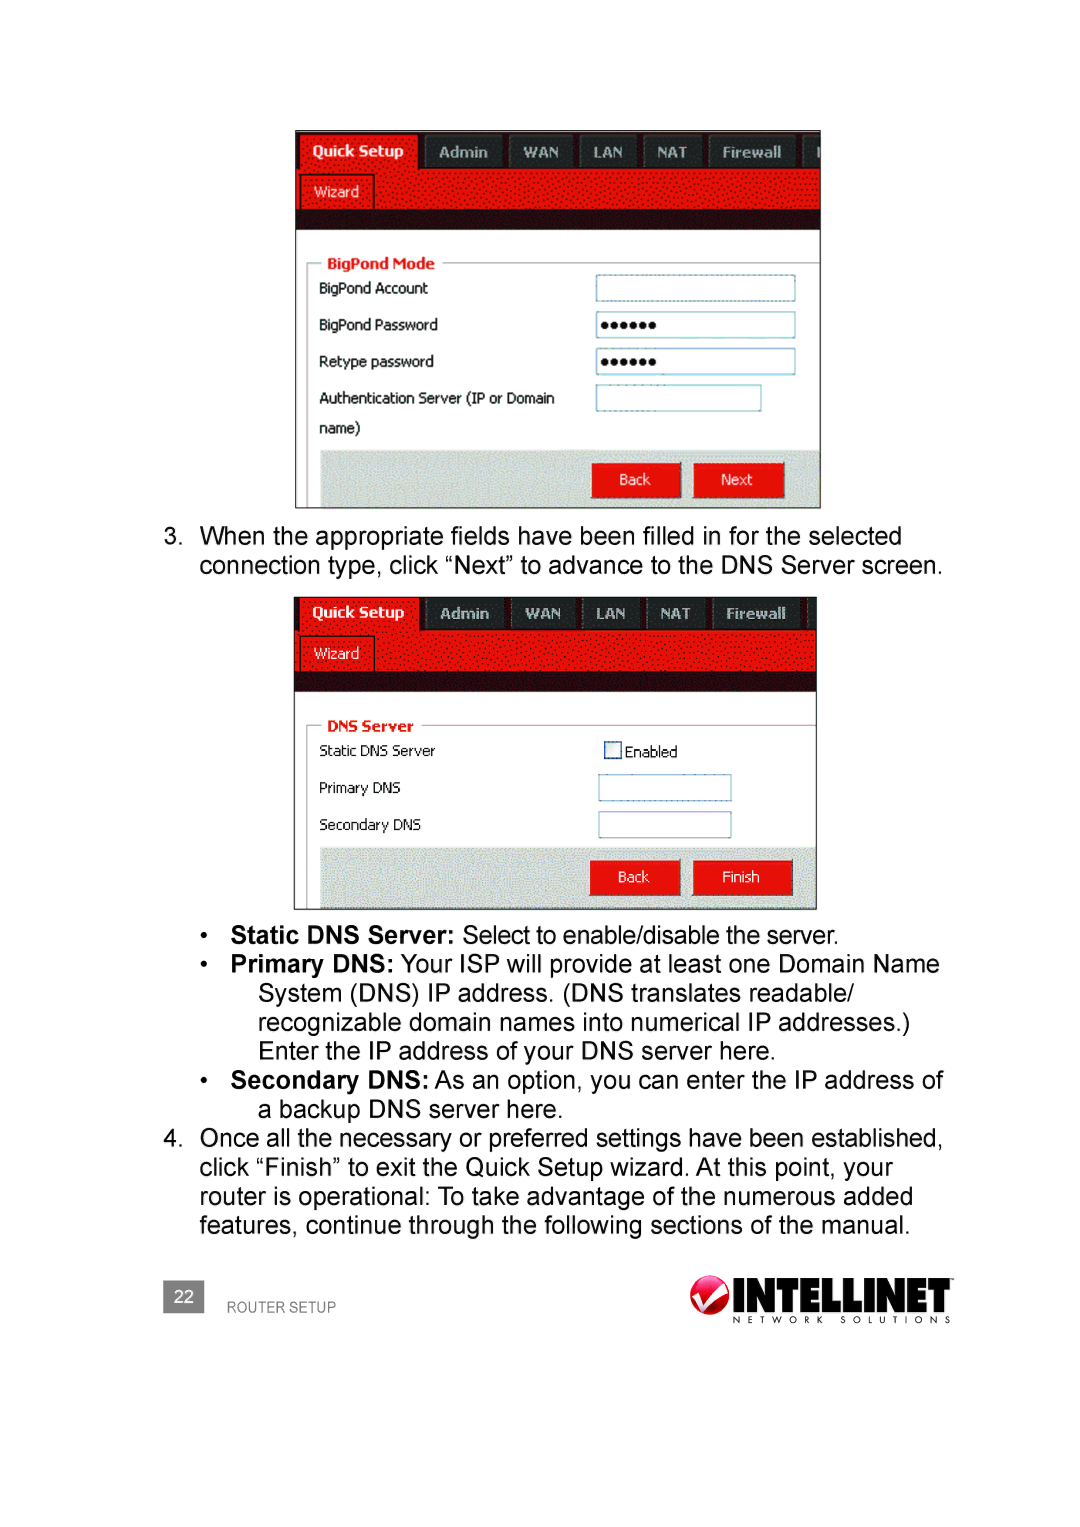
3.When the appropriate fields have been filled in for the selected connection type, click “Next” to advance to the DNS Server screen.
•Static DNS Server: Select to enable/disable the server.
•Primary DNS: Your ISP will provide at least one Domain Name System (DNS) IP address. (DNS translates readable/ recognizable domain names into numerical IP addresses.)
Enter the IP address of your DNS server here.
•Secondary DNS: As an option, you can enter the IP address of a backup DNS server here.
4.Once all the necessary or preferred settings have been established, click “Finish” to exit the Quick Setup wizard. At this point, your router is operational: To take advantage of the numerous added features, continue through the following sections of the manual.
