Invacare Li'l Execelerator manual A R, INSTALLING/ADJUSTING the Rear Wheel QUICK-RELEASE Axles

Models: Excelerator Excelerator XLT Li'l Execelerator Excelerator XLT 2000

1 36
Download 36 pages 54.53 Kb
Page 12
Image 12
Rear Wheel
Frame
Axle
FIGURE 2 - INSTALLING THE REAR WHEELS WITH THREADED AXLES - EXCELERATOR XLT/XLT 2000
TIRE/TUBE REPLACEMENT AND TUNING/REPLACEMENT OF SPOKES
NOTE: Invacare recommends that these procedures be performed by a qualified technician.
TIRE PRESSURE
WARNING
DO NOT use the Excelerator unless it has the propertirepressure(p.s.i.).DONOToverinflatethe tires.Failuretofollowthesesuggestionsmaycause the tire to explode and cause bodily harm. Tire p.s.i. is printed on the tire wall.
DETERMINING/ADJUSTING
TOE IN/TOE OUT (FIGURE 3)
Determining Toe In/Toe Out
1. Inflate all pneumatic tires to recommended tire pres- sures (listed on the sidewall of the tire).
REAR WHEELS
5. Reinstall rear wheel on the Excelerator.
6. Tilt Excelerator onto either rear wheel and spin raised wheel. It should spin freely with no excessive drag.
7. Repeat procedure for opposite rear wheel.
NOTE: If drag to either side occurs, repeat the proce- dure until the Excelerator rolls correctly.
INSTALLING THE REAR WHEELS WITH THREADED AXLES - EXCELERATOR XLT/XLT 2000 (FIGURE 2)
1. Apply a small amount of grease onto the axle.
2. Insert the axle into the axle mounting hole on the chair frame.
3. Securely tighten the axle to the frame.
1/4-inch Allen
Axle MountingWrench Hole

R E A R

W

H

E

E

L

S

PROCEDURE 4

This Procedure includes the following:

Installing/Adjusting the Rear Wheels and Quick- Release Axles

Installing the Rear Wheels with Threaded Axle Option - Excelerator XLT/XLT 2000

Tire/Tube Replacement and Tuning/Replacement of Spokes

Tire Pressure

Determining/Adjusting Toe In/Toe Out

Replacing Camber Inserts

WARNING

After ANY adjustments, repair or service and BE- FOREuse,makesureallattachinghardwareistight- ened securely - otherwise injury or damage may result.

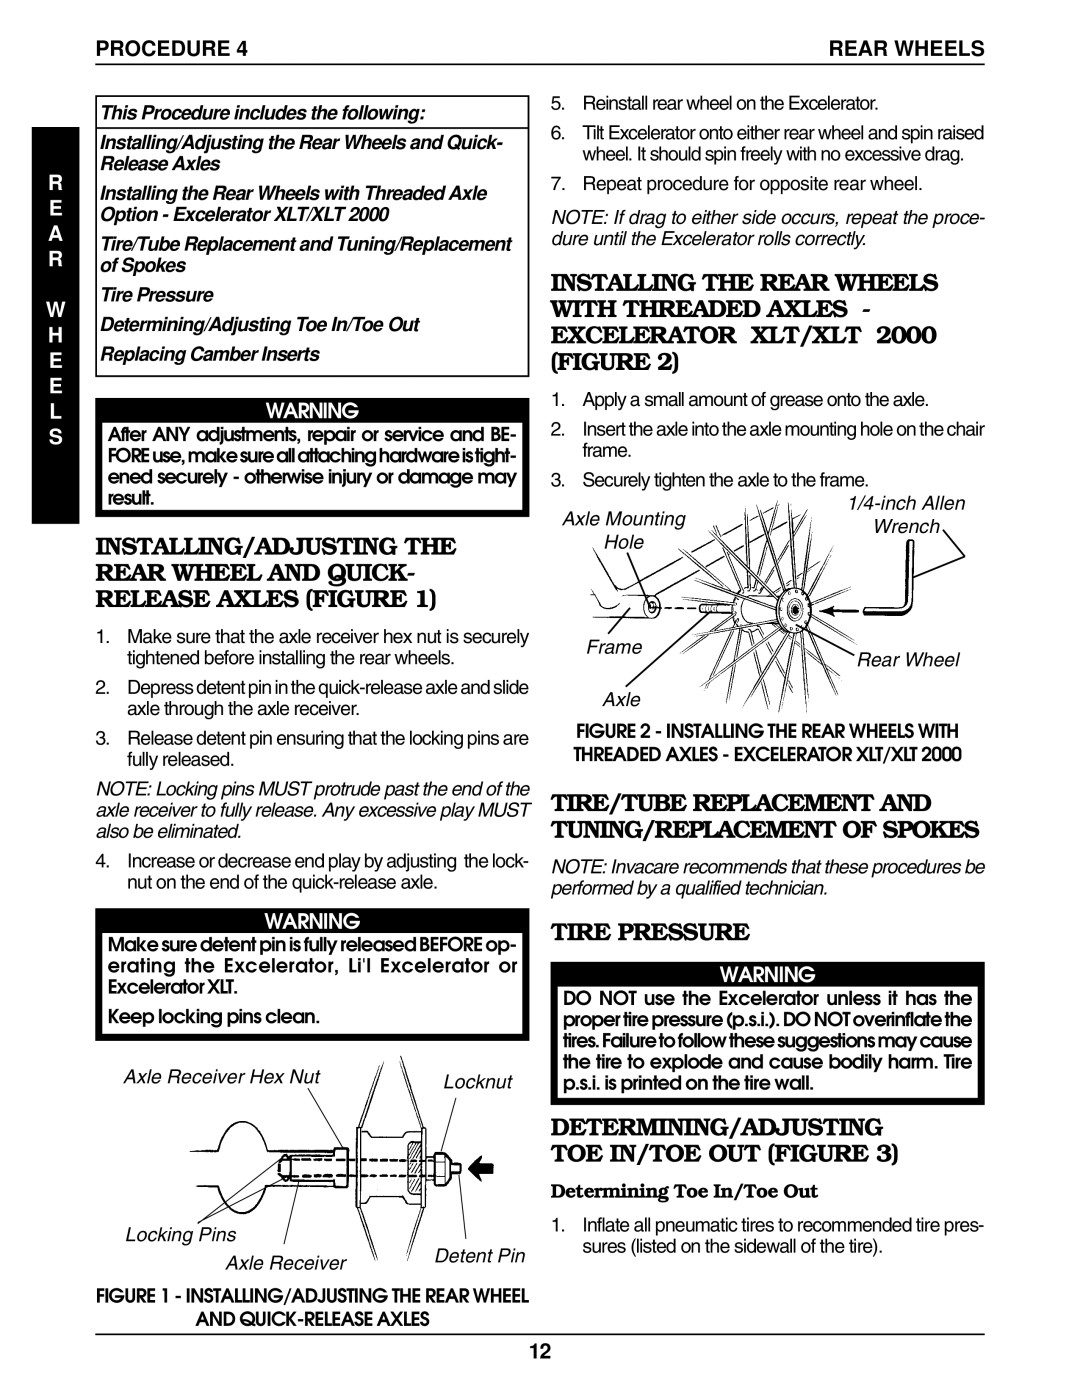
INSTALLING/ADJUSTING THE REAR WHEEL AND QUICK- RELEASE AXLES (FIGURE 1)

1.Make sure that the axle receiver hex nut is securely tightened before installing the rear wheels.

2.Depress detent pin in the quick-release axle and slide axle through the axle receiver.

3.Release detent pin ensuring that the locking pins are fully released.

NOTE: Locking pins MUST protrude past the end of the axle receiver to fully release. Any excessive play MUST also be eliminated.

4.Increase or decrease end play by adjusting the lock- nut on the end of the quick-release axle.

WARNING

Make sure detent pin is fully released BEFORE op- erating the Excelerator, Li'l Excelerator or Excelerator XLT.

Keep locking pins clean.

Axle Receiver Hex Nut

Locknut

Locking Pins

Detent Pin

Axle Receiver


FIGURE 1 - INSTALLING/ADJUSTING THE REAR WHEEL

AND QUICK-RELEASE AXLES

12

Page 12
Image 12
Invacare Li'l Execelerator, Excelerator XLT manual A R, INSTALLING/ADJUSTING the Rear Wheel QUICK-RELEASE Axles