5.Test calibration by moving the circle around the screen. Ensure you can reach all the corners.
6.Touch TRY AGAIN to run calibration again.
7.If CANCEL is touched, the Touchscreen Calibration will be canceled.
8.Touch SAVE. This will return you to the Clock screen.
Reset All Settings To Factory Defaults
1.From the Setup Menu, touch the button at the
2.Touch RESET or CANCEL.
3.If Reset is touched, the following sets will be lost: most used modes/foods, My Creations, Date/Time, and Language. The Welcome Guide will appear to help you reset these settings.
Service Information
For more information, see the “Assistance or Service” section.
1.From the Setup menu, touch the button at
2.Choose ON or OFF for Demo Mode. The default option is off when connected to 240V and on when connected to 120V.
3.If CANCEL is touched, the Service Information will go back to the default setting.
4.Touch SAVE. This will return you to the Clock screen.
OVEN USE
Odors and smoke are normal when the oven is used the first few times, or when it is heavily soiled.
During oven use, the heating elements will not remain on, but will cycle on and off throughout oven operation.
IMPORTANT: The health of some birds is extremely sensitive to the fumes given off. Exposure to the fumes may result in death to certain birds. Always move birds to another closed and well- ventilated room.
Aluminum Foil
IMPORTANT: To avoid permanent damage to the oven bottom finish, do not line the oven bottom with any type of foil or liner.
■For best cooking results, do not cover entire rack with foil because air must be able to move freely.
■To catch spills, place foil on rack below dish. Make sure foil is at least ½" (1.3 cm) larger than the dish and that it is turned up at the edges.
Positioning Racks and Bakeware
IMPORTANT: To avoid permanent damage to the porcelain finish, do not place food or bakeware directly on the oven door or bottom.
BAKEWARE
To cook food evenly, hot air must be able to circulate. Allow 2" (5.0 cm) of space around bakeware and oven walls.
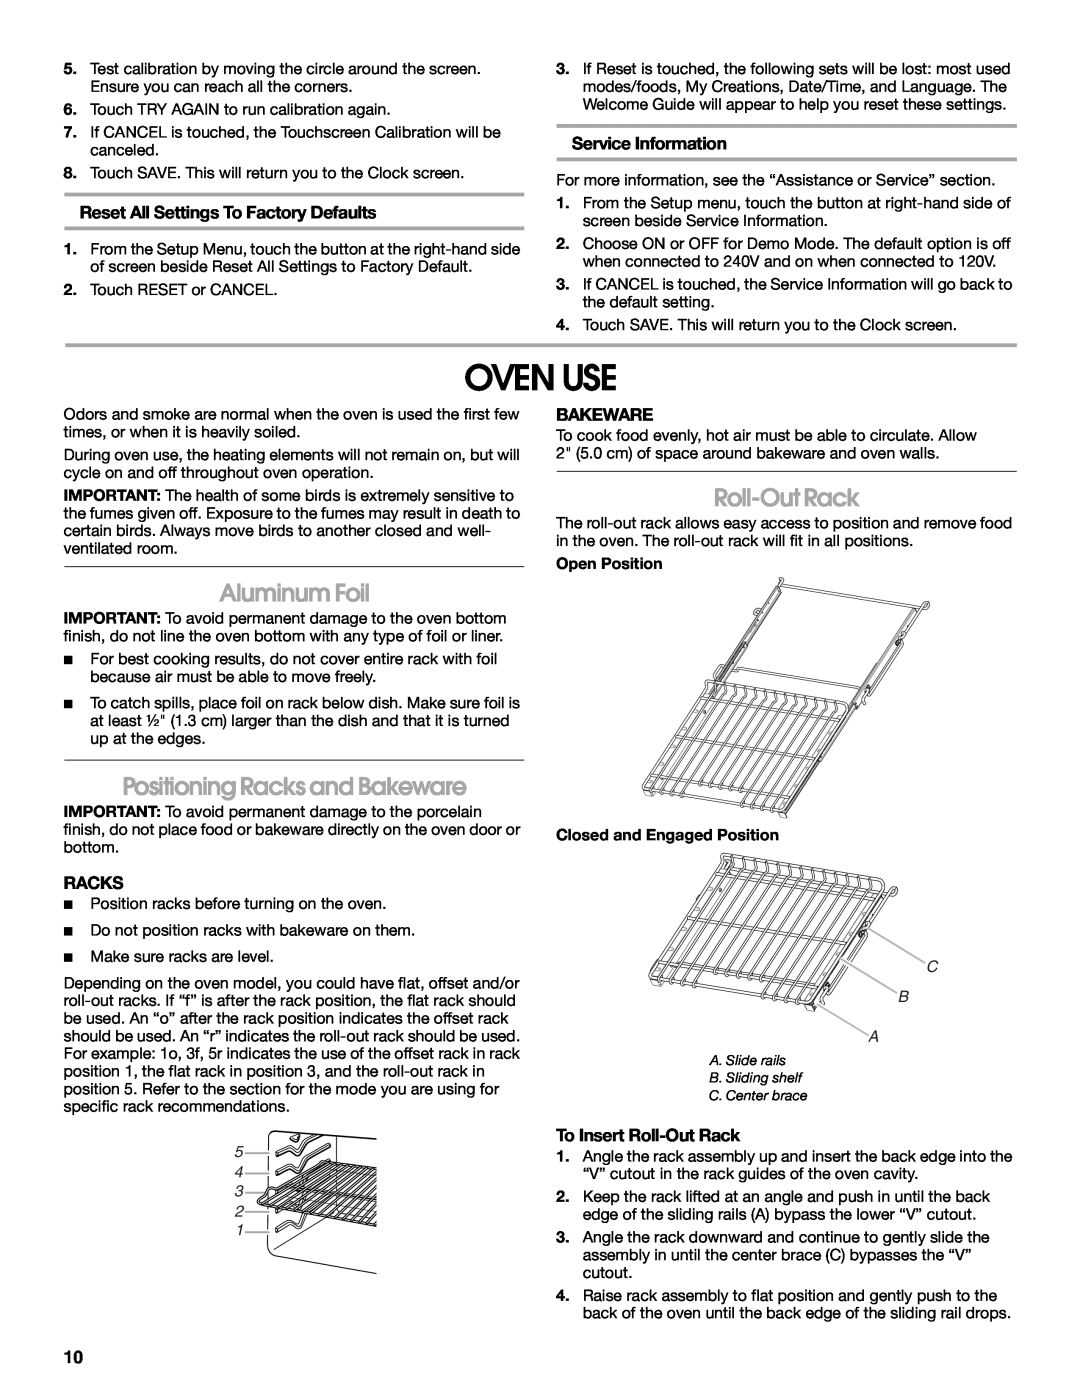
Roll-Out Rack
The
Open Position
Closed and Engaged Position
RACKS
■Position racks before turning on the oven.
■Do not position racks with bakeware on them.
■Make sure racks are level.
Depending on the oven model, you could have flat, offset and/or
5
4
3
2
1
C
B
![]() A
A
A. Slide rails
B. Sliding shelf
C. Center brace
To Insert Roll-Out Rack
1.Angle the rack assembly up and insert the back edge into the “V” cutout in the rack guides of the oven cavity.
2.Keep the rack lifted at an angle and push in until the back edge of the sliding rails (A) bypass the lower “V” cutout.
3.Angle the rack downward and continue to gently slide the assembly in until the center brace (C) bypasses the “V” cutout.
4.Raise rack assembly to flat position and gently push to the back of the oven until the back edge of the sliding rail drops.
10