ELECTRONIC OVEN CONTROL
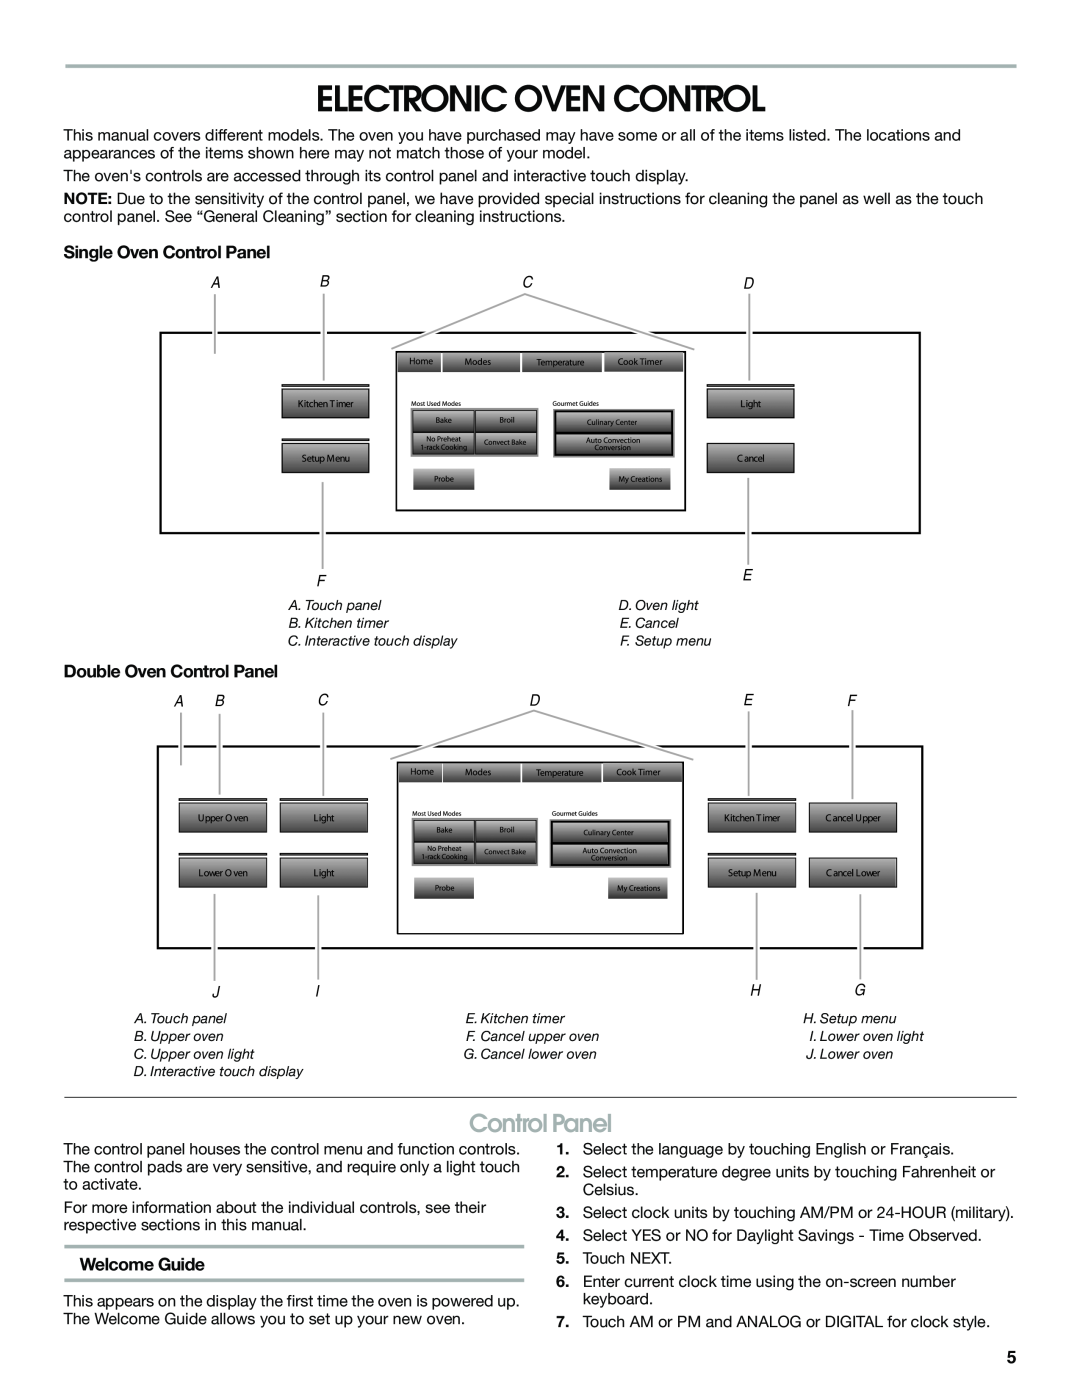
This manual covers different models. The oven you have purchased may have some or all of the items listed. The locations and appearances of the items shown here may not match those of your model.
The oven's controls are accessed through its control panel and interactive touch display.
NOTE: Due to the sensitivity of the control panel, we have provided special instructions for cleaning the panel as well as the touch control panel. See “General Cleaning” section for cleaning instructions.
Single Oven Control Panel
ABCD
F | E |
| |
A. Touch panel | D. Oven light |
B. Kitchen timer | E. Cancel |
C. Interactive touch display | F. Setup menu |
Double Oven Control Panel
A | B | C | D | E | F |
| J | I |
| H | G |
A. Touch panel | E. Kitchen timer | H. Setup menu |
B. Upper oven | F. Cancel upper oven | I. Lower oven light |
C. Upper oven light | G. Cancel lower oven | J. Lower oven |
D. Interactive touch display |
|
|
Control Panel
The control panel houses the control menu and function controls. The control pads are very sensitive, and require only a light touch to activate.
For more information about the individual controls, see their respective sections in this manual.
Welcome Guide
This appears on the display the first time the oven is powered up. The Welcome Guide allows you to set up your new oven.
1.Select the language by touching English or Français.
2.Select temperature degree units by touching Fahrenheit or Celsius.
3.Select clock units by touching AM/PM or
4.Select YES or NO for Daylight Savings - Time Observed.
5.Touch NEXT.
6.Enter current clock time using the
7.Touch AM or PM and ANALOG or DIGITAL for clock style.
5
