8.15Aligning blade guard and riving knife
Referring to Figure 17:
1.Remove blade guard and hold
2.Place an accurate straight edge (K) flush against saw blade (L) and riving knife (M). For proper alignment, blade and riving knife should be perfectly in line with the straight- edge.
If alignment is required:
3.Move
4.Rotate any of the four set screws as needed, to tilt the angle of the riving knife to achieve alignment.
5.Check alignment by repeating steps 1 and 2. If necessary, repeat steps 3 and 4 until proper alignment is achieved.
Figure 17
8.16Low profile riving knife
A low profile riving knife is included with your saw. It mounts and adjusts in the same manner as the standard riving knife. The low profile riving knife sits just below top of blade and is used for making
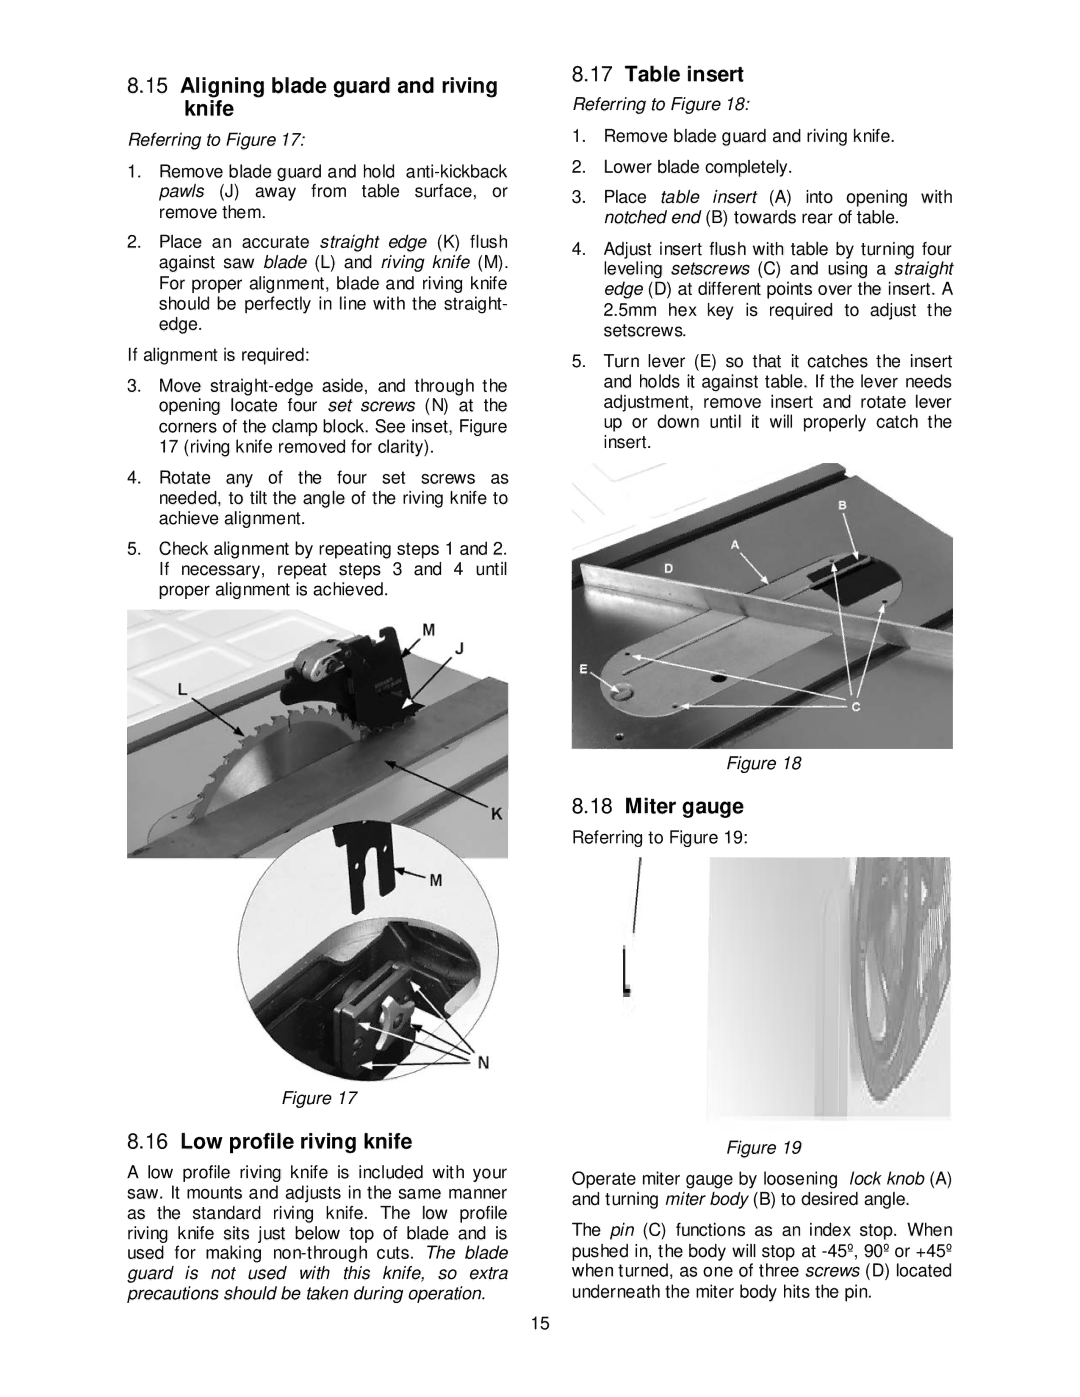
8.17Table insert
Referring to Figure 18:
1.Remove blade guard and riving knife.
2.Lower blade completely.
3.Place table insert (A) into opening with notched end (B) towards rear of table.
4.Adjust insert flush with table by turning four leveling setscrews (C) and using a straight edge (D) at different points over the insert. A 2.5mm hex key is required to adjust the setscrews.
5.Turn lever (E) so that it catches the insert and holds it against table. If the lever needs adjustment, remove insert and rotate lever up or down until it will properly catch the insert.
Figure 18
8.18Miter gauge
Referring to Figure 19:
Figure 19
Operate miter gauge by loosening lock knob (A) and turning miter body (B) to desired angle.
The pin (C) functions as an index stop. When pushed in, the body will stop at
15