Continued
Before You Start Recording
•Recording is only possible on MD deck B.
•It may be unlawful to record or play back copyrighted material without the consent of the copyright owner.
•When you record onto partially recorded MD, its contents are not erased or overwritten. The recording starts from the point following the last recorded track of the MD.
If you want to record on such an MD from the beginning, you have to erase its contents first (see “ALL ERASE Function” on page 43).
•The recording level is automatically set correctly, so it is not affected by the VOLUME control. Thus, during recording you can adjust the sound you are actually listening to without affecting the recording level.
•While recording, you can hear sound mode effect and/or the active bass extension effect through the speakers or headphones. However, the sound is recorded without these effects (see page 12).
About the track marks
When playing an MD, you can move among the tracks. You can do this because there is a mark recorded at the beginning of each track enabling you to locate the track. This mark is called a “ track mark” and the portion between two adjacent track marks is called a “ track.”
•When recording from the CD player or MD deck A built in this unit, a track mark is recorded automatically at the beginning of each track.
•When recording an analog or digital source using Standard Recording (see page 31) or AUX Recording (see page 31) and when recording an analog source using Long Recording (see page 37), no track mark is recorded on the MD. This means that, when playing this MD, the MD deck B will regard the entire recording as one track (track 1). You will not be able to select directly a song or navigate through songs.
However, if no sound comes in for about 3 seconds or more while recording, the MD deck B will consider it as a blank separating 2 tracks and consequently put a track mark.
To put a track mark manually while recording, press SET at the place where you want to put a track mark.
•To add a track mark after recording is over, you can use the DIVIDE function (see page 40).
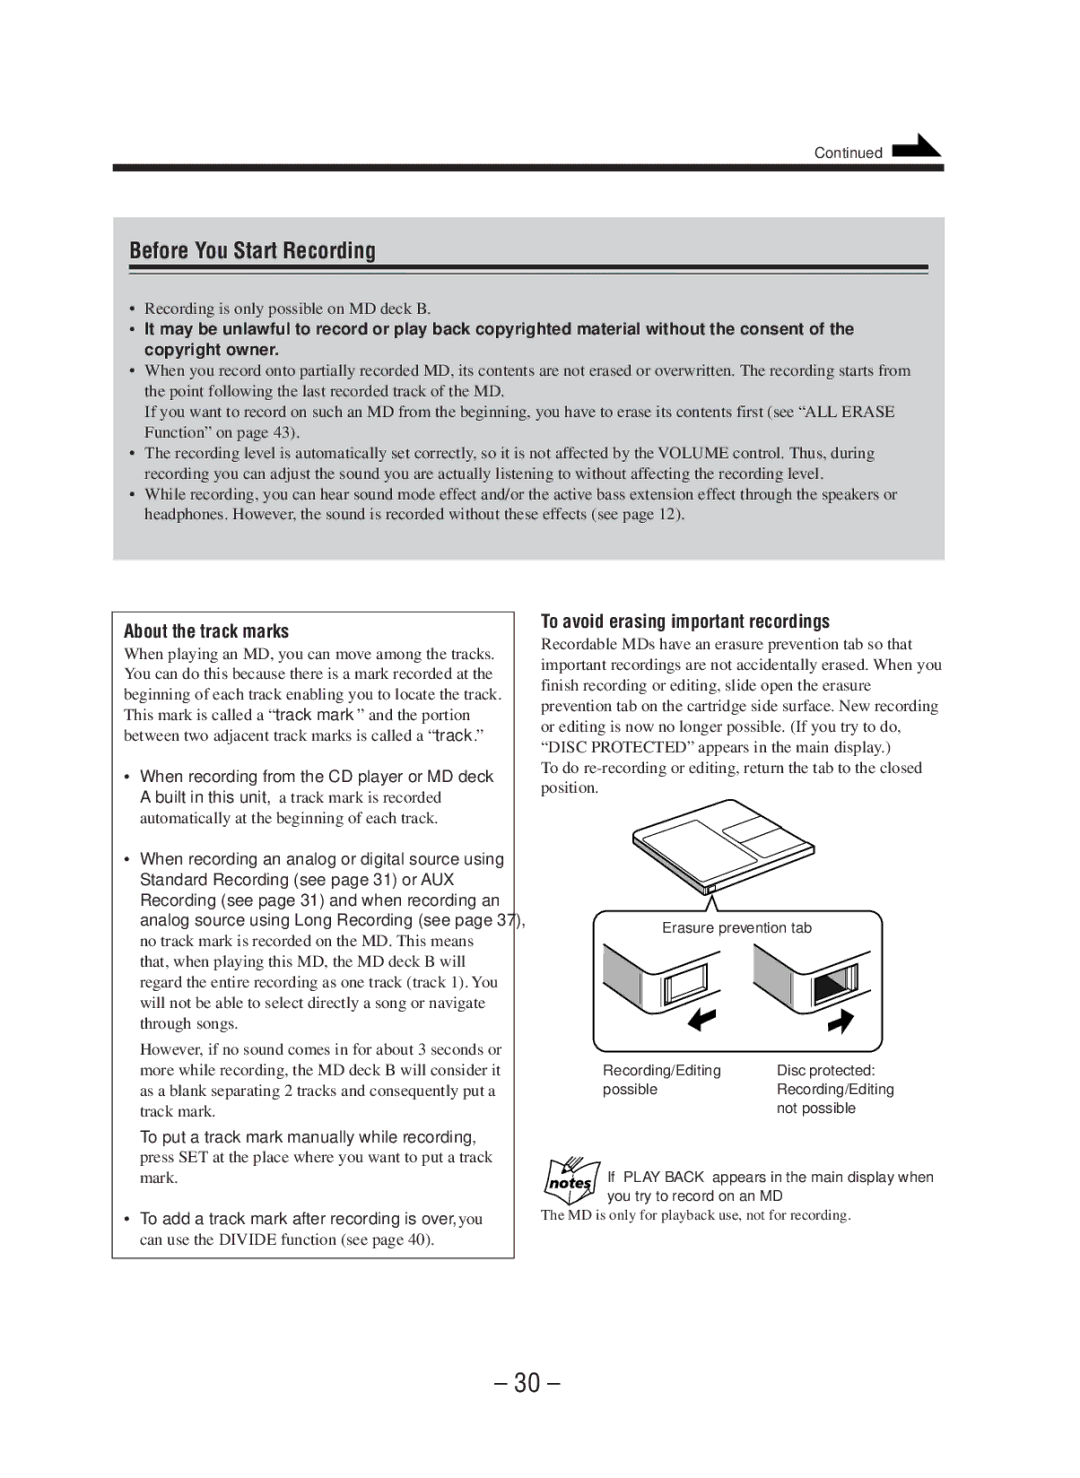
To avoid erasing important recordings
Recordable MDs have an erasure prevention tab so that important recordings are not accidentally erased. When you finish recording or editing, slide open the erasure prevention tab on the cartridge side surface. New recording or editing is now no longer possible. (If you try to do, “DISC PROTECTED” appears in the main display.)
To do
Erasure prevention tab
Recording/Editing | Disc protected: |
possible | Recording/Editing |
| not possible |
If “PLAY BACK” appears in the main display when you try to record on an MD
The MD is only for playback use, not for recording.
– 30 –