52 EN NAVIGATION ON HDD/DVD DECK


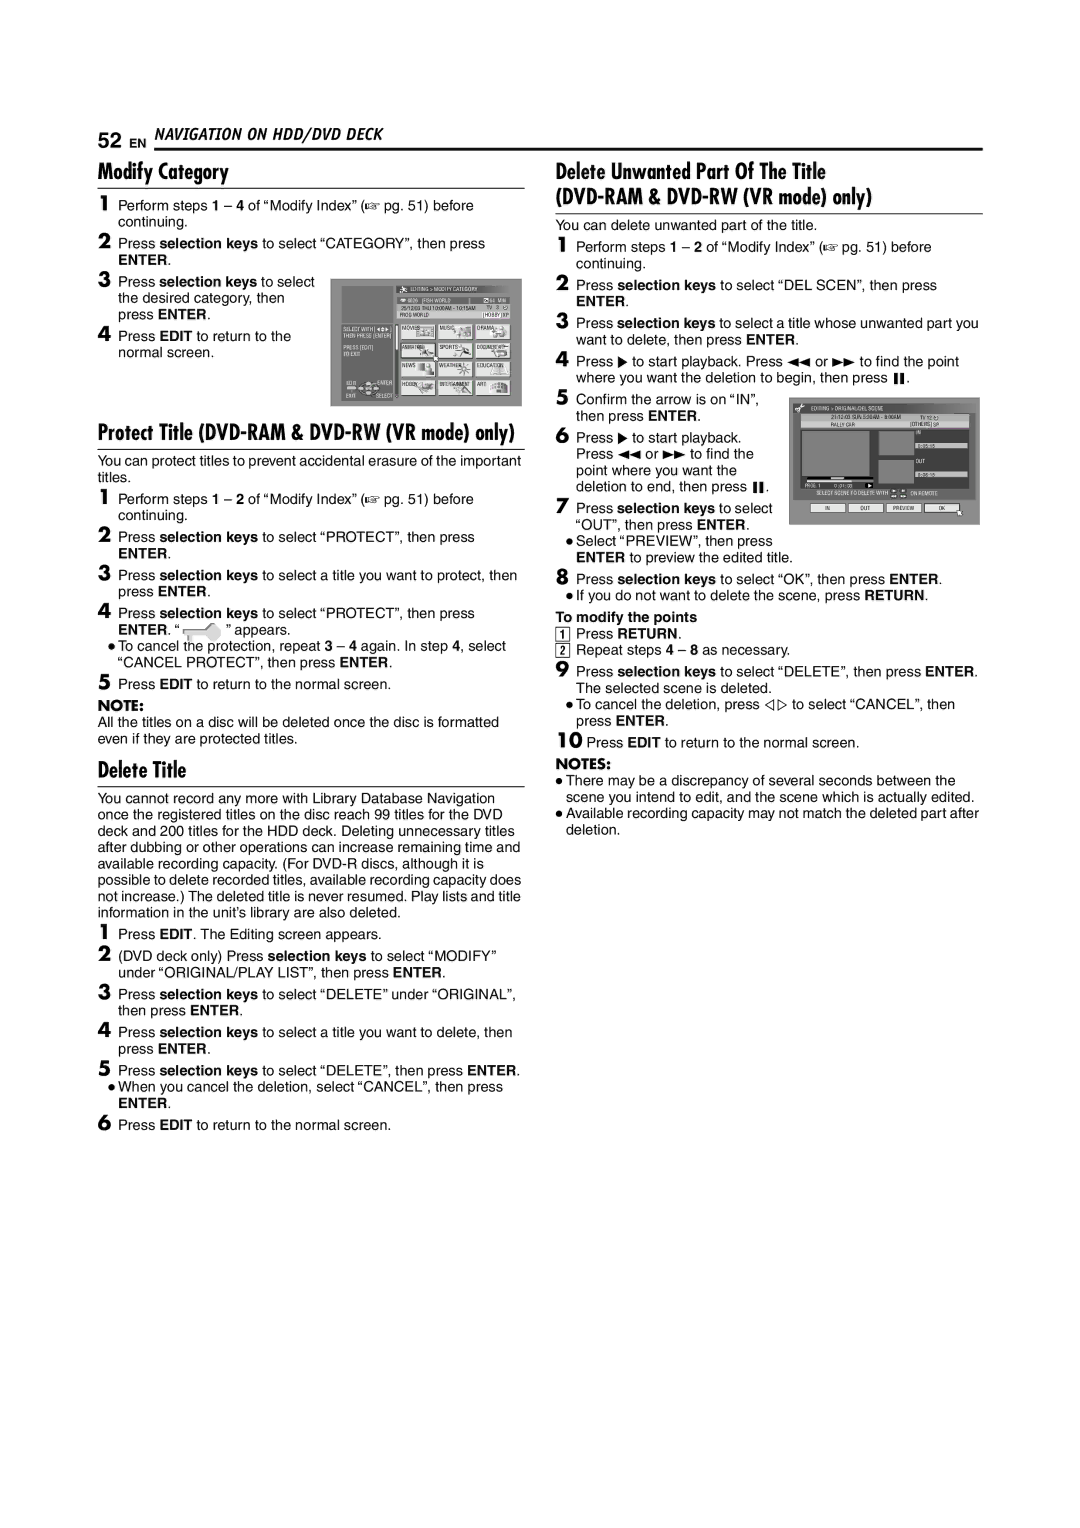
Modify Category


Delete Unwanted Part Of The Title


1 Perform steps 1 4 of AModify IndexB (A pg. 51) before


(DVD-RAM & DVD-RW (VR mode) only)


continuing.


You can delete unwanted part of the title.


2 Press selection keys to select ACATEGORYB, then press

1 Perform steps 1 2 of AModify IndexB (A pg. 51) before


ENTER.


continuing.


3 Press selection keys to select


EDITING > MODIFY CATEGORY

2 Press selection keys to select ADEL SCENB, then press


the desired category, then


25/12/03 THU 10:00AM - 10:15AM

TV 3

ENTER.


press ENTER.


0026 [FISH WORLD

]

64 MIN


FROG WORLD


[HOBBY] XP

3 Press selection keys to select a title whose unwanted part you

4 Press EDIT to return to the

SELECT WITH @

MOVIES

MUSIC


DRAMA

THEN PRESS [ENTER]


want to delete, then press ENTER.


normal screen.


PRESS [EDIT]


ANIMATION

SPORTS


DOCUMENTARY

4 Press I to start playback. Press O or N to find the point


TO EXIT


NEWS

WEATHER


EDUCATION


EDIT

ENTER

HOBBY

ENTERTAINMENT

ART

where you want the deletion to begin, then press W.


EXIT

SELECT


5 Confirm the arrow is on AINB,


EDITING > ORIGINAL/DEL SCENE


Protect Title (DVD-RAM & DVD-RW (VR mode) only)

then press ENTER.


21/12/03 SUN 5:30AM - 8:00AM

TV 12


6 Press I to start playback.


RALLY CAR


[OTHERS] SP


0 : 05 :15


IN


You can protect titles to prevent accidental erasure of the important

Press O or N to find the


OUT


titles.


point where you want the


0 : 06 :15


deletion to end, then press W.

SELECT SCENE TO DELETE WITH


ON REMOTE


1 Perform steps 1 2 of AModify IndexB (A pg. 51) before


PROG. 1

0 : 01 : 03


7 Press selection keys to select

IN

OUT

PREVIEW

OK

continuing.


AOUTB, then press ENTER.


2 Press selection keys to select APROTECTB, then press


Select APREVIEWB, then press


ENTER.


ENTER to preview the edited title.


3 Press selection keys to select a title you want to protect, then

8 Press selection keys to select AOKB, then press ENTER.

press ENTER.


If you do not want to delete the scene, press RETURN.


4 Press selection keys to select APROTECTB, then press


To modify the points


ENTER. A

B appears.


A Press RETURN.


To cancel the protection, repeat 3 4 again. In step 4, select

B Repeat steps 4 8 as necessary.


ACANCEL PROTECTB, then press ENTER.


9 Press selection keys to select ADELETEB, then press ENTER.

5 Press EDIT to return to the normal screen.


The selected scene is deleted.


NOTE:


To cancel the deletion, press DE to select ACANCELB, then

All the titles on a disc will be deleted once the disc is formatted

press ENTER.


even if they are protected titles.


10 Press EDIT to return to the normal screen.


Delete Title


NOTES:


There may be a discrepancy of several seconds between the


You cannot record any more with Library Database Navigation

scene you intend to edit, and the scene which is actually edited.

once the registered titles on the disc reach 99 titles for the DVD

Available recording capacity may not match the deleted part after

deck and 200 titles for the HDD deck. Deleting unnecessary titles

deletion.


after dubbing or other operations can increase remaining time and


available recording capacity. (For DVD-Rdiscs, although it is


possible to delete recorded titles, available recording capacity does


not increase.) The deleted title is never resumed. Play lists and title


information in the unit’s library are also deleted.


1Press EDIT. The Editing screen appears.

2(DVD deck only) Press selection keys to select AMODIFYB under AORIGINAL/PLAY LISTB, then press ENTER.

3Press selection keys to select ADELETEB under AORIGINALB, then press ENTER.

4Press selection keys to select a title you want to delete, then press ENTER.

5Press selection keys to select ADELETEB, then press ENTER.

When you cancel the deletion, select ACANCELB, then press

ENTER.

6Press EDIT to return to the normal screen.

Page 52
Image 52
JVC DR-DX5SU manual Modify Category, Delete Title, To modify the points, ENTER. a

DR-DX5SU specifications

The JVC DR-DX5SU is a versatile and compact DVD recorder that has gained recognition for its impressive features and user-friendly design. This device serves as a perfect solution for individuals looking to digitize their favorite media while enjoying high-quality playback and recording capabilities.

One of the standout features of the DR-DX5SU is its ability to record in various formats, including DVD-R, DVD-RW, and DVD+RW. This flexibility allows users to choose the type of media that best suits their needs, whether they require a one-time recording or rewritable discs. The recorder supports a range of video resolutions, ensuring that users can capture their content in exceptional quality. With its progressive scan output, the device provides sharp and detailed images, enhancing the overall viewing experience.

The JVC DR-DX5SU is also equipped with a built-in hard drive that offers ample storage space for recorded content. This feature makes it easy for users to store their favorite shows and movies without worrying about running out of disk space. The hard drive can be used for time-shifting, allowing users to pause and resume live TV, making it a practical choice for busy households.

In terms of connectivity, the DR-DX5SU comes with a variety of ports, including HDMI, composite video, and S-Video outputs. This wide range of connectivity options ensures compatibility with various devices, allowing seamless integration with existing home entertainment systems. Moreover, the HDMI output is particularly beneficial as it supports the transfer of high-definition video and audio through a single cable, reducing clutter and improving convenience.

Another noteworthy aspect of the JVC DR-DX5SU is its intuitive interface, which simplifies navigation and programming. Users can easily set up recordings using the on-screen menu, and the device's scheduling functions enable hassle-free recording of multiple shows over an extended period.

The JVC DR-DX5SU's range of features positions it as a top choice for consumers looking for a reliable DVD recorder that balances performance and usability. Its recording versatility, ample storage, and multiple connectivity options make it an excellent addition to any home entertainment system, while the user-friendly design ensures that everyone from tech-savvy users to novices can take full advantage of its capabilities. Overall, the DR-DX5SU stands out as a powerful and practical solution for those looking to preserve their favorite media.