70 EN

USING THE REMOTE CONTROL UNIT (cont.)

Program 1

I N


OUT MODE

1 – – – – : – –

~

2~

3~

4~

5~

6~

7~

8~


T I ME CODE

– : – –


TOTAL

0 0

: 00


SYNCHRO

O . 1


Random Assemble Editing Menu

For More Accurate Editing

Some VCRs make the transition from Record-Pause to Record mode faster than others. Even if you begin editing for the camcorder and the VCR at exactly the same time, you may lose scenes you wanted, or find that you have recorded scenes you did not want. For a cleanly edited tape, confirm and adjust the timing of the camcorder against your VCR.

DIAGNOSING VCR/CAMCORDER TIMING

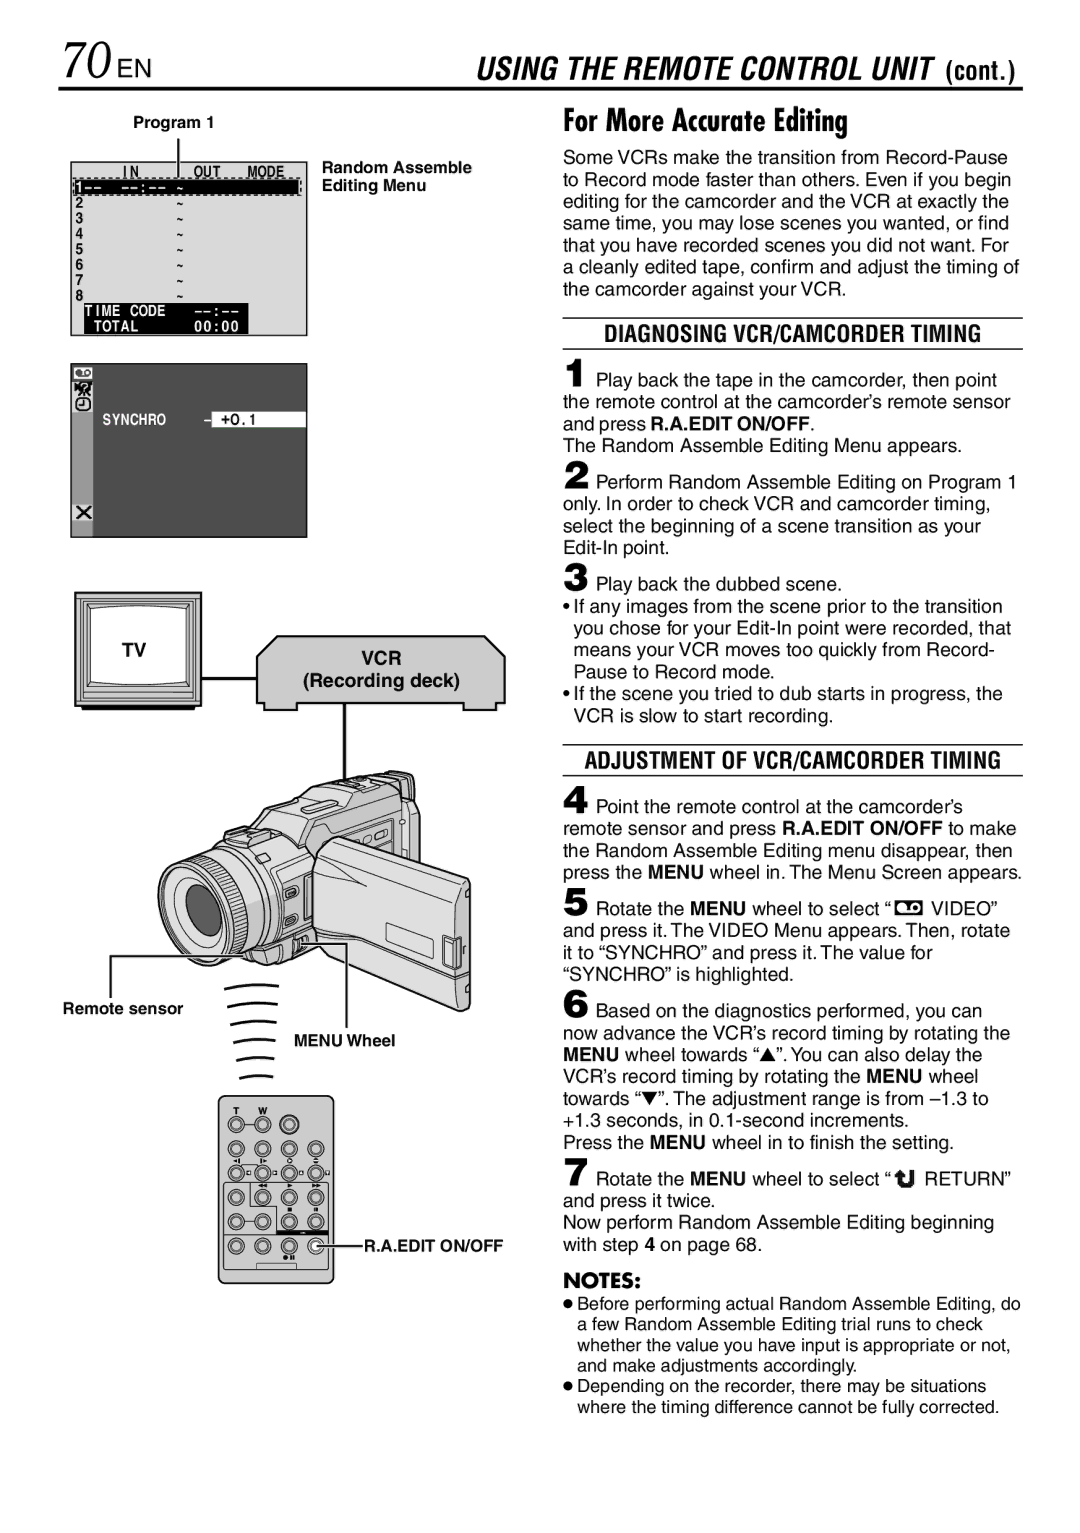
1 Play back the tape in the camcorder, then point the remote control at the camcorder’s remote sensor and press R.A.EDIT ON/OFF.

The Random Assemble Editing Menu appears.

2 Perform Random Assemble Editing on Program 1 only. In order to check VCR and camcorder timing, select the beginning of a scene transition as your Edit-In point.

3 Play back the dubbed scene.

TVVCR (Recording deck)

Remote sensor

MENU Wheel

R.A.EDIT ON/OFF

If any images from the scene prior to the transition you chose for your Edit-In point were recorded, that means your VCR moves too quickly from Record- Pause to Record mode.

If the scene you tried to dub starts in progress, the VCR is slow to start recording.

ADJUSTMENT OF VCR/CAMCORDER TIMING

4 Point the remote control at the camcorder’s remote sensor and press R.A.EDIT ON/OFF to make the Random Assemble Editing menu disappear, then press the MENU wheel in. The Menu Screen appears.

5 Rotate the MENU wheel to select “ VIDEO” and press it. The VIDEO Menu appears. Then, rotate it to “SYNCHRO” and press it. The value for “SYNCHRO” is highlighted.

6 Based on the diagnostics performed, you can now advance the VCR’s record timing by rotating the MENU wheel towards “”. You can also delay the VCR’s record timing by rotating the MENU wheel towards “”. The adjustment range is from –1.3 to +1.3 seconds, in 0.1-second increments.

Press the MENU wheel in to finish the setting.

7 Rotate the MENU wheel to select “ RETURN” and press it twice.

Now perform Random Assemble Editing beginning with step 4 on page 68.

NOTES:

Before performing actual Random Assemble Editing, do a few Random Assemble Editing trial runs to check whether the value you have input is appropriate or not, and make adjustments accordingly.

Depending on the recorder, there may be situations where the timing difference cannot be fully corrected.

Page 70
Image 70
JVC GR-DV3000 70 EN, For More Accurate Editing, Diagnosing VCR/CAMCORDER Timing, Adjustment of VCR/CAMCORDER Timing

GR-DV3000 specifications

The JVC GR-DV3000 is a compact digital camcorder that impresses with its advanced features and user-friendly design. Intended for enthusiasts and professionals alike, this model caters to those who are looking for high-quality video capture in a portable format.

One of the standout features of the GR-DV3000 is its MegaPixel CCD image sensor. This technology provides enhanced image clarity and detail, allowing users to capture stunning 640 x 480 resolution still images along with high-quality video. The camcorder supports a variety of recording formats, including Mini DV, ensuring that users can easily transfer their footage to digital platforms for editing or sharing.

A highlight of the GR-DV3000 is its powerful 10x optical zoom lens, which allows for detailed close-up shots without compromising image quality. Coupled with a 700x digital zoom, users can explore further distances while retaining the ability to capture vivid detail. The lens features a fast aperture, making it easier to shoot in low-light conditions—a significant advantage for those shooting in diverse environments.

The camcorder also boasts a 2.5-inch LCD screen that provides clear playback and easy framing of shots. This screen is not only vital for composing your videos but also plays a crucial role during playback, allowing for an immersive viewing experience. Additionally, the GR-DV3000 is equipped with a night vision mode, making it possible to capture video even in near darkness, an essential feature for outdoor and low-light enthusiasts.

Audio quality is another strength of the GR-DV3000, thanks to its built-in stereo microphone and the ability to input external audio sources. This feature is crucial for capturing high-quality sound, whether in interviews or in a bustling outdoor setting.

The camcorder is designed with ease of use in mind, featuring a simple interface that allows for quick access to various settings and options. Its lightweight build makes it portable, perfect for on-the-go shooting, while the durable design ensures longevity—even with regular use.

Overall, the JVC GR-DV3000 combines a range of advanced technologies and user-friendly features, making it an excellent choice for anyone looking to create high-quality video content. Whether you're a budding filmmaker or a seasoned professional, this camcorder offers an impressive suite of tools to help you tell your story with clarity and impact.