28

 EN
EN 


 RECOR
RECOR DING
DING

Advanced Features (Cont.)![]()
VIEWFINDER | VIEWFINDER |
T
W
WIDE MODE | O FF |
ZOOM | 2 0X |
D I S | OFF |
GA I N UP | AGC |
TO | FADER / W IPE | MENU | |
TO | P . AE / EFFECT | MENU | |
TO DAT E / TIME MENU | |||
TO SYSTEM MENU |
| ||
END | I TEM ZOOM SW . | ||
SET SET | BUTTON | ||
ON SCREEN | OFF | |
D I SPLAY | OFF | |
DATE / TIME | 25. 12. 97 | |
|
| 17 : 30 |
END | I TEM ZOOM SW . | |
SET | SET BUTTON | |
RECORDING MENU | DATE/TIME MENU | |
MENU BUTTON | ZOOM LEVER |
|
| SET BUTTON |
|
|
| MANUAL |
| AUTO | |
|
| FOCUS |
|
| EXP. |
POWER DIAL | SET | WB |
| ||
PRO
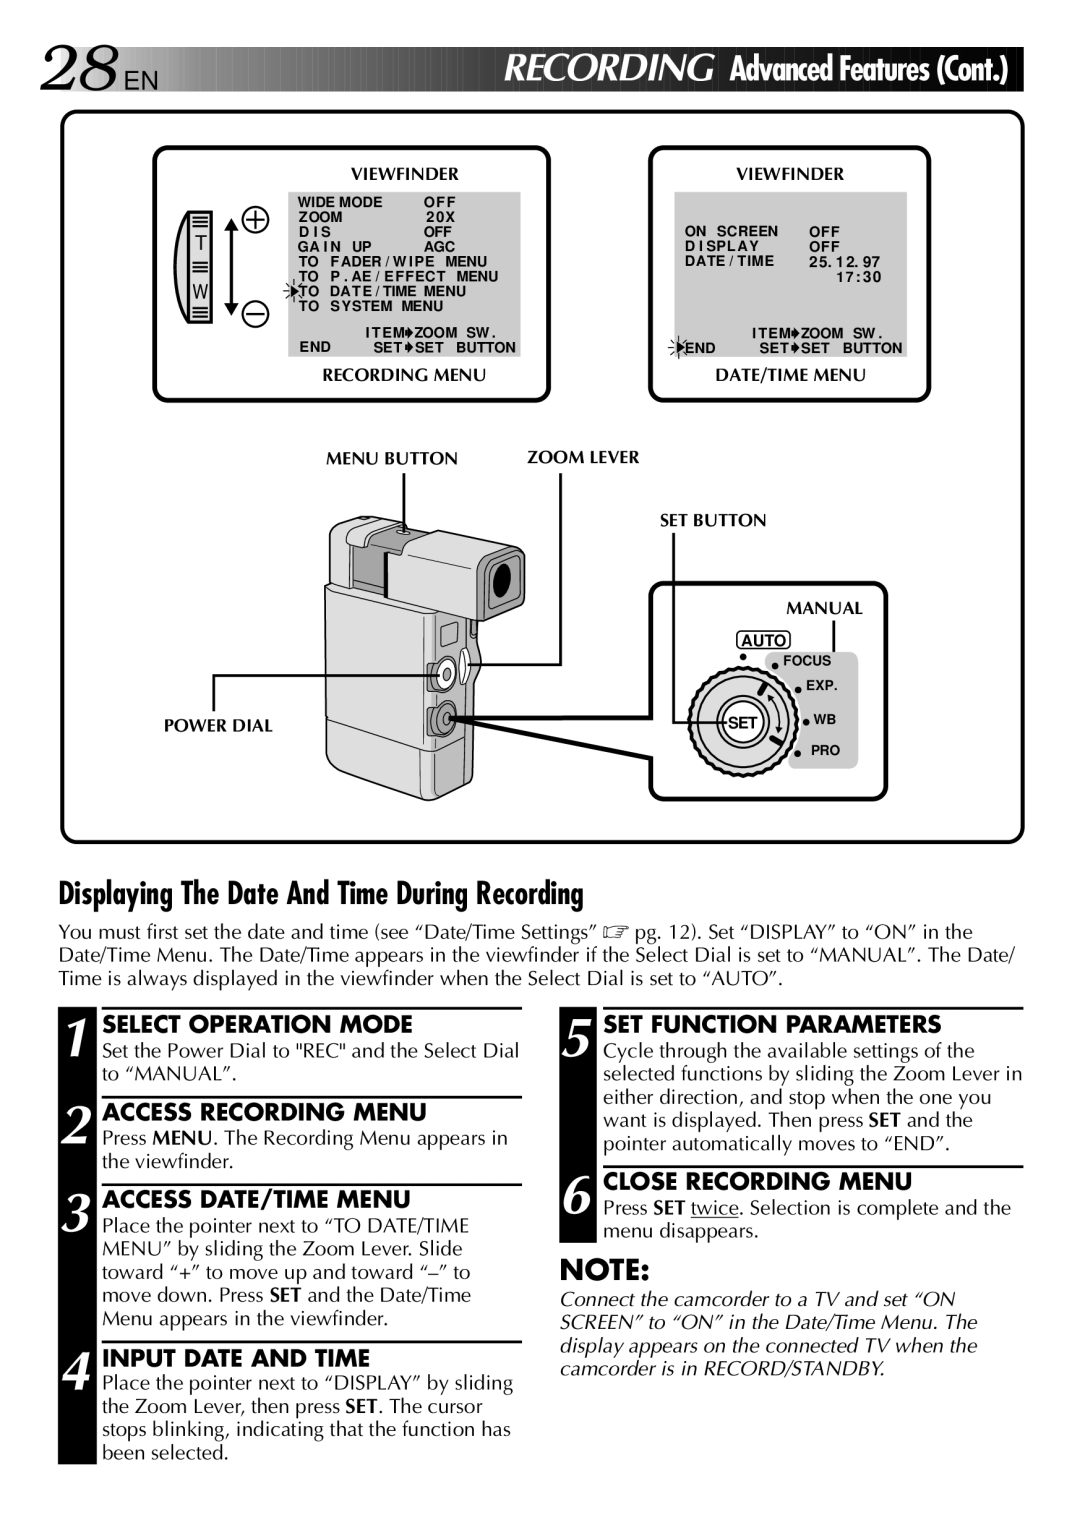
Displaying The Date And Time During Recording
You must first set the date and time (see “Date/Time Settings” ☞ pg. 12). Set “DISPLAY” to “ON” in the Date/Time Menu. The Date/Time appears in the viewfinder if the Select Dial is set to “MANUAL”. The Date/ Time is always displayed in the viewfinder when the Select Dial is set to “AUTO”.
1 SELECT OPERATION MODE
Set the Power Dial to "REC" and the Select Dial to “MANUAL”.
2 ACCESS RECORDING MENU
Press MENU. The Recording Menu appears in the viewfinder.
3 ACCESS DATE/TIME MENU Place the pointer next to “TO DATE/TIME MENU” by sliding the Zoom Lever. Slide toward “+” to move up and toward
4 INPUT DATE AND TIME
Place the pointer next to “DISPLAY” by sliding the Zoom Lever, then press SET. The cursor stops blinking, indicating that the function has been selected.
5 SET FUNCTION PARAMETERS Cycle through the available settings of the selected functions by sliding the Zoom Lever in either direction, and stop when the one you want is displayed. Then press SET and the pointer automatically moves to “END”.
6 CLOSE RECORDING MENU
Press SET twice. Selection is complete and the menu disappears.
NOTE:
Connect the camcorder to a TV and set “ON SCREEN” to “ON” in the Date/Time Menu. The display appears on the connected TV when the camcorder is in RECORD/STANDBY.