44![]()
![]()
![]() EN
EN ![]()
![]()
![]()
![]()
![]()
![]()
![]()
![]()
![]()
![]()
![]()
![]()
![]()
![]()
![]()
![]()
![]()
![]()
![]()
![]()
![]()
![]()
![]()
![]()
![]()
![]()
![]()
![]()
![]()
![]()
![]()
![]()
![]()
![]()
![]()
![]()
![]()
![]() P
P![]() LA
LA![]() YBACK
YBACK![]()
![]() Basic Connections (Cont.)
Basic Connections (Cont.)![]()
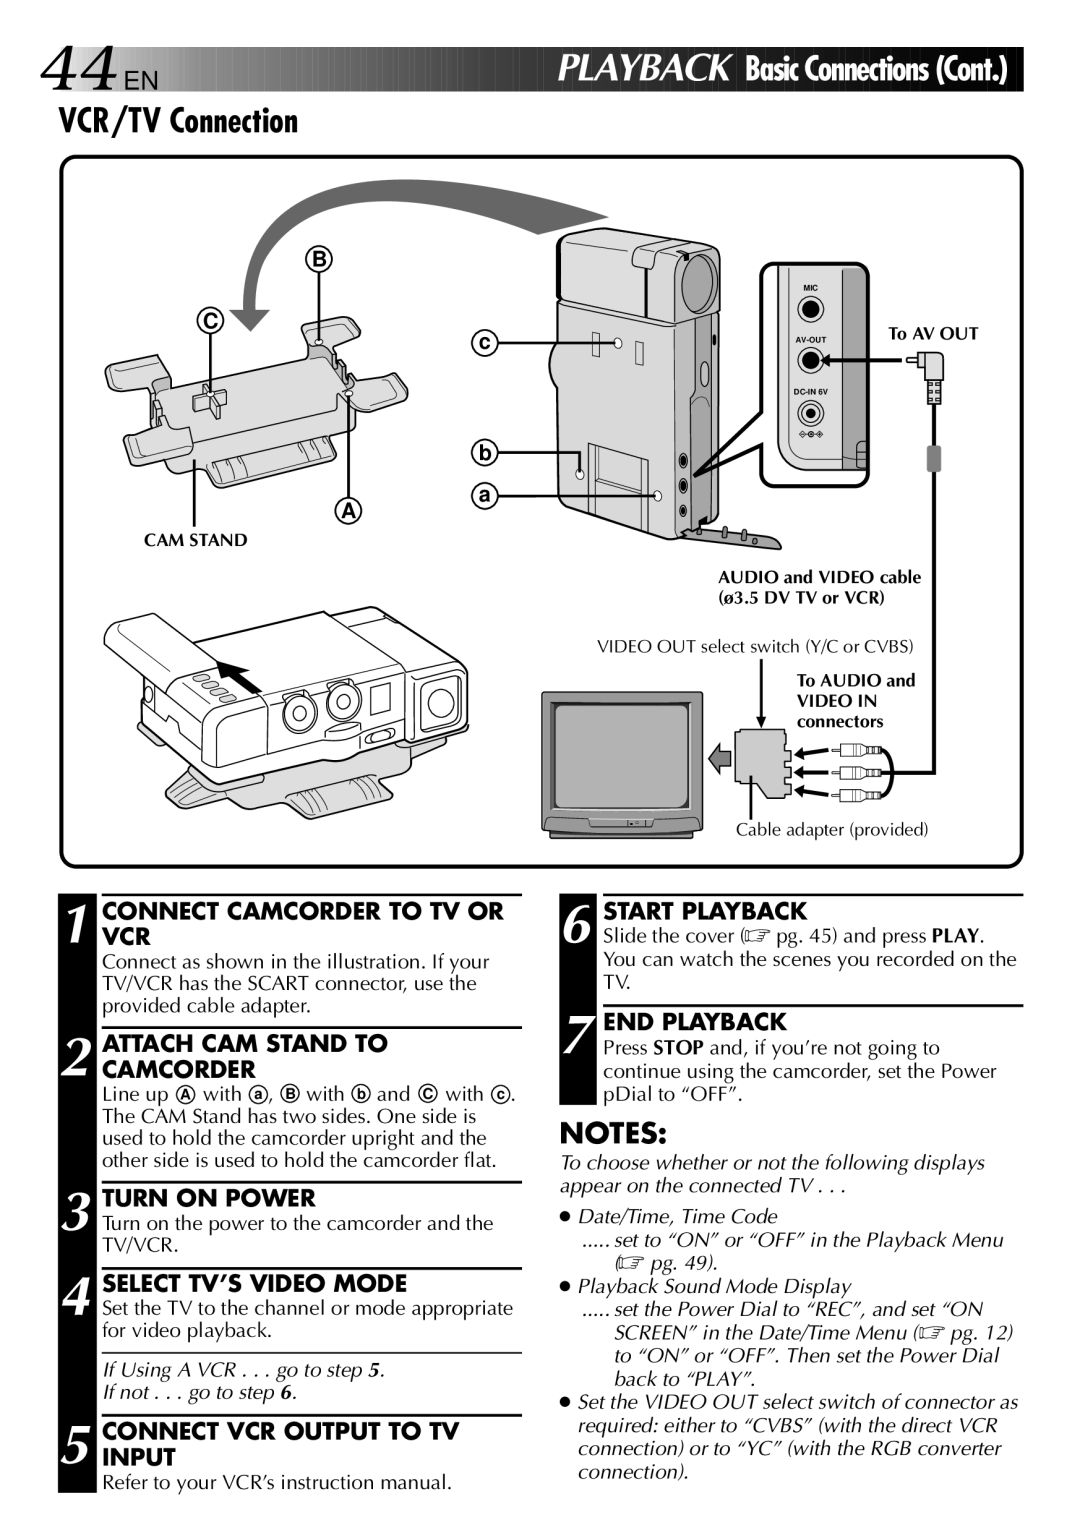
VCR/TV Connection
B
C
CAM STAND
c
b
a ![]()
A
MIC
To AV OUT
AUDIO and VIDEO cable (ø3.5 DV TV or VCR)
VIDEO OUT select switch (Y/C or CVBS)
To AUDIO and
VIDEO IN connectors
Cable adapter (provided)
1 CONNECTVCR CAMCORDER TO TV OR
Connect as shown in the illustration. If your TV/VCR has the SCART connector, use the provided cable adapter.
2 ATTACH CAM STAND TO CAMCORDER
Line up A with a , B with b and C with c . The CAM Stand has two sides. One side is used to hold the camcorder upright and the other side is used to hold the camcorder flat.
3 TURN ON POWER
Turn on the power to the camcorder and the TV/VCR.
4 SELECT TV’S VIDEO MODE
Set the TV to the channel or mode appropriate for video playback.
If Using A VCR . . . go to step 5.
If not . . . go to step 6.
5 CONNECTINPUT VCR OUTPUT TO TV
Refer to your VCR’s instruction manual.
6 START PLAYBACK
Slide the cover (☞ pg. 45) and press PLAY. You can watch the scenes you recorded on the TV.
7 END PLAYBACK
Press STOP and, if you’re not going to continue using the camcorder, set the Power pDial to “OFF”.
NOTES:
To choose whether or not the following displays appear on the connected TV . . .
●Date/Time, Time Code
..... set to “ON” or “OFF” in the Playback Menu
(☞ pg. 49).
●Playback Sound Mode Display
..... set the Power Dial to “REC”, and set “ON
SCREEN” in the Date/Time Menu (☞ pg. 12) to “ON” or “OFF”. Then set the Power Dial back to “PLAY”.
●Set the VIDEO OUT select switch of connector as required: either to “CVBS” (with the direct VCR connection) or to “YC” (with the RGB converter connection).
