![]()
![]() EN 43
EN 43
TV Playback
* Please refer to your VCR and/or TV instruction manual(s) when connecting.
NOTE:
During playback, if the camcorder is left on its side for an extended period, its surface will become very warm. It is recommended that you use the Docking Station (☞ pg. 42) or the CAM Stand (☞ pg. 10) during playback.
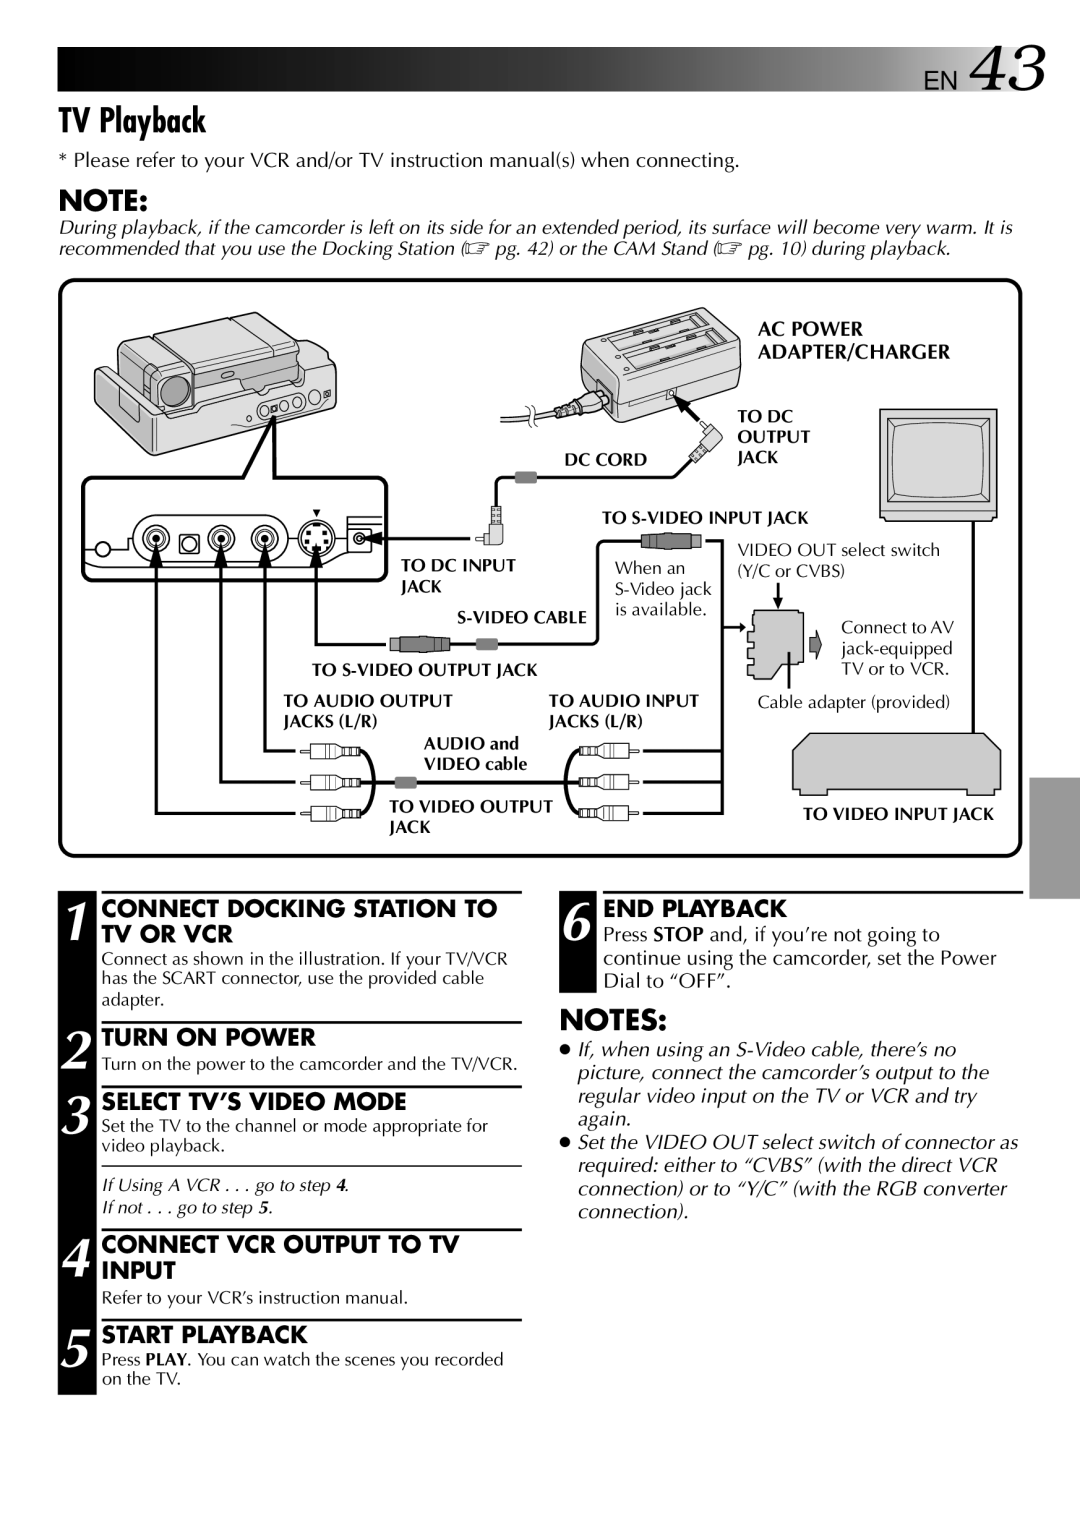
AC POWER
ADAPTER/CHARGER
| TO DC |
| OUTPUT |
DC CORD | JACK |
TO
|
|
|
|
|
|
|
|
| TO DC INPUT |
|
|
|
|
| When an | |||||
|
|
|
|
|
|
|
|
|
|
|
|
| ||||||||
|
|
|
|
|
|
|
|
| JACK |
|
|
|
|
| ||||||
|
|
|
|
|
|
|
|
|
|
|
|
| is available. | |||||||
|
|
|
|
|
|
|
|
|
|
|
|
|
|
| ||||||
|
|
|
|
|
|
|
|
|
|
|
|
|
|
|
| |||||
|
| TO |
|
|
|
|
|
|
| |||||||||||
| TO AUDIO OUTPUT | TO AUDIO INPUT | ||||||||||||||||||
| JACKS (L/R) | JACKS (L/R) | ||||||||||||||||||
|
|
|
|
|
|
|
|
| AUDIO and |
|
|
|
|
|
|
| ||||
|
|
|
|
|
|
|
|
| VIDEO cable |
|
|
|
|
|
|
| ||||
TO VIDEO OUTPUT
JACK
VIDEO OUT select switch (Y/C or CVBS)
Connect to AV
Cable adapter (provided)
TO VIDEO INPUT JACK
1 CONNECT DOCKING STATION TO TV OR VCR
Connect as shown in the illustration. If your TV/VCR has the SCART connector, use the provided cable adapter.
2 TURN ON POWER
Turn on the power to the camcorder and the TV/VCR.
3 SELECT TV’S VIDEO MODE
Set the TV to the channel or mode appropriate for video playback.
If Using A VCR . . . go to step 4.
If not . . . go to step 5.
4 CONNECTINPUT VCR OUTPUT TO TV
Refer to your VCR’s instruction manual.
5 START PLAYBACK
Press PLAY. You can watch the scenes you recorded on the TV.
6 END PLAYBACK
Press STOP and, if you’re not going to continue using the camcorder, set the Power Dial to “OFF”.
NOTES:
●If, when using an
●Set the VIDEO OUT select switch of connector as required: either to “CVBS” (with the direct VCR connection) or to “Y/C” (with the RGB converter connection).