50![]()
![]()
![]() EN
EN ![]()
![]()
![]()
![]()
![]()
![]()
![]()
![]()
![]()
![]()
![]()
![]()
![]()
![]()
![]()
![]()
![]()
![]()
![]()
![]()
![]()
![]()
![]()
![]()
![]()
![]()
![]()
![]()
![]()
![]()
![]()
![]()
![]()
![]()
![]()
![]()
![]()
![]()
![]()
![]()
![]()
![]()
![]()
![]()
![]()
![]()
![]()
![]()
![]()
![]()
![]()
![]()
![]()


 EDITING
Docking Station (optional avilable accessory kit CU-V70KIT E)
Refer to “Docking Station Attachment” on pages 42 and 43 for attachment procedures. Make sure the camcorder is attached to the Docking Station before beginning editing.
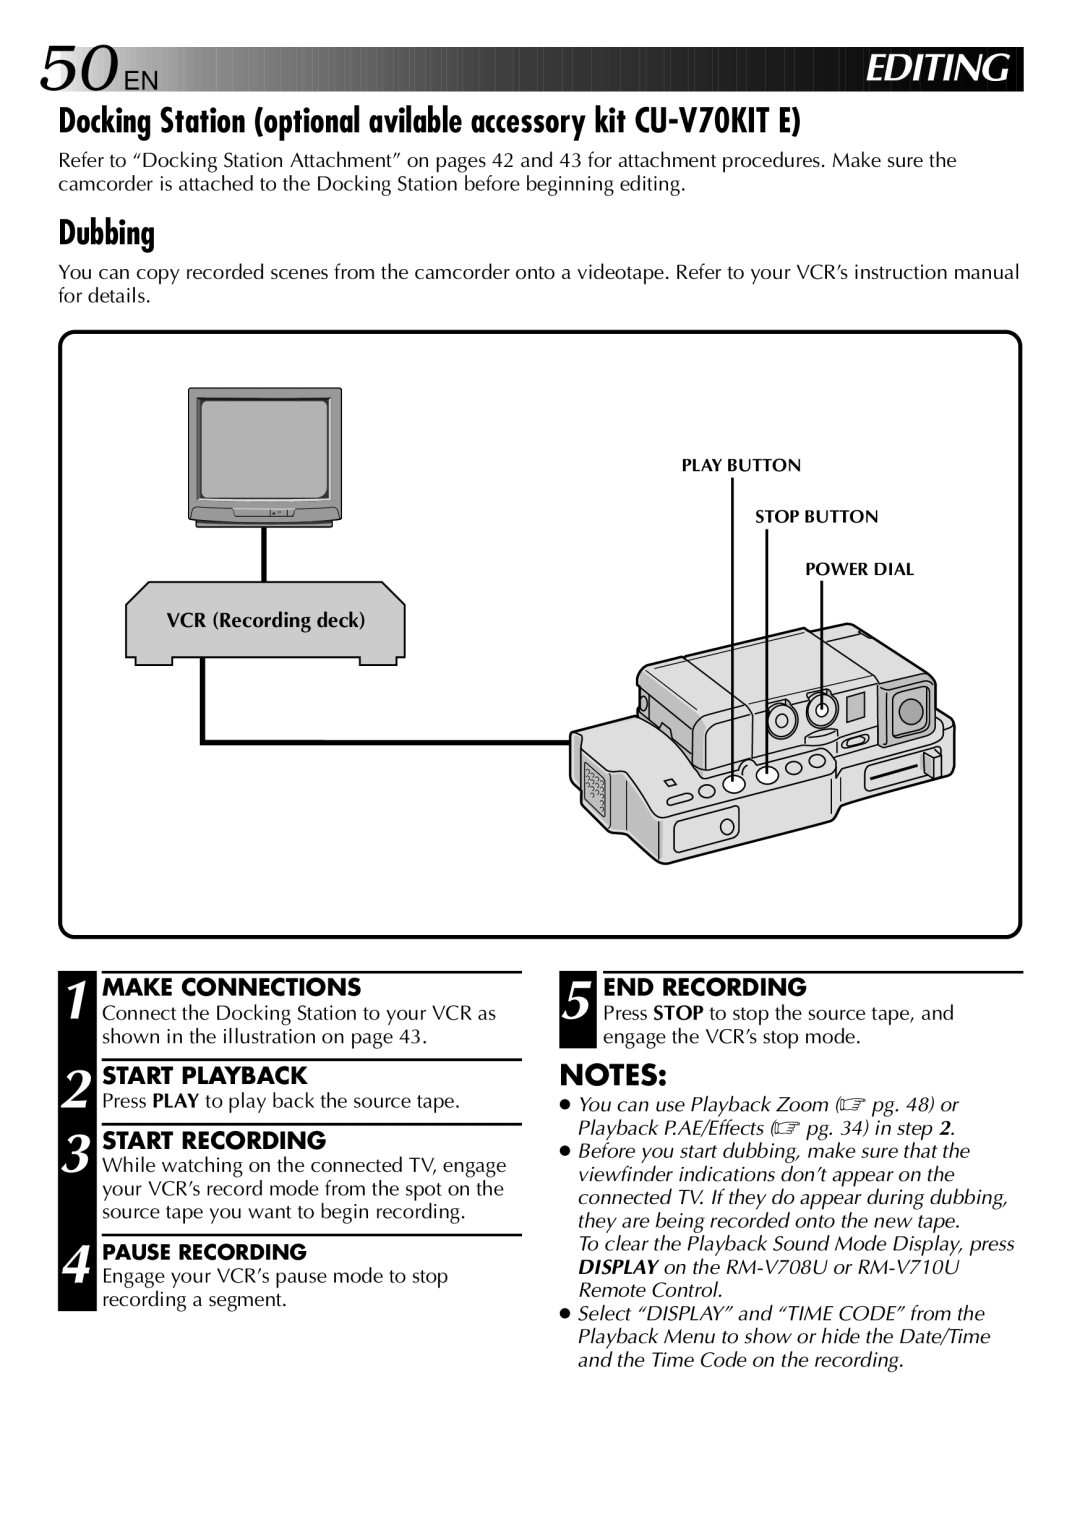
Dubbing
You can copy recorded scenes from the camcorder onto a videotape. Refer to your VCR’s instruction manual for details.
VCR (Recording deck)
1 MAKE CONNECTIONS
Connect the Docking Station to your VCR as shown in the illustration on page 43.
2 START PLAYBACK
Press PLAY to play back the source tape.
3 START RECORDING
While watching on the connected TV, engage your VCR’s record mode from the spot on the source tape you want to begin recording.
4 PAUSE RECORDING
Engage your VCR’s pause mode to stop recording a segment.
PLAY BUTTON
STOP BUTTON
POWER DIAL
5 END RECORDING
Press STOP to stop the source tape, and engage the VCR’s stop mode.
NOTES:
●You can use Playback Zoom (☞ pg. 48) or Playback P.AE/Effects (☞ pg. 34) in step 2.
●Before you start dubbing, make sure that the viewfinder indications don’t appear on the connected TV. If they do appear during dubbing, they are being recorded onto the new tape.
To clear the Playback Sound Mode Display, press DISPLAY on the
●Select “DISPLAY” and “TIME CODE” from the Playback Menu to show or hide the Date/Time and the Time Code on the recording.