26 EN | MEMORY CARD RECORDING |
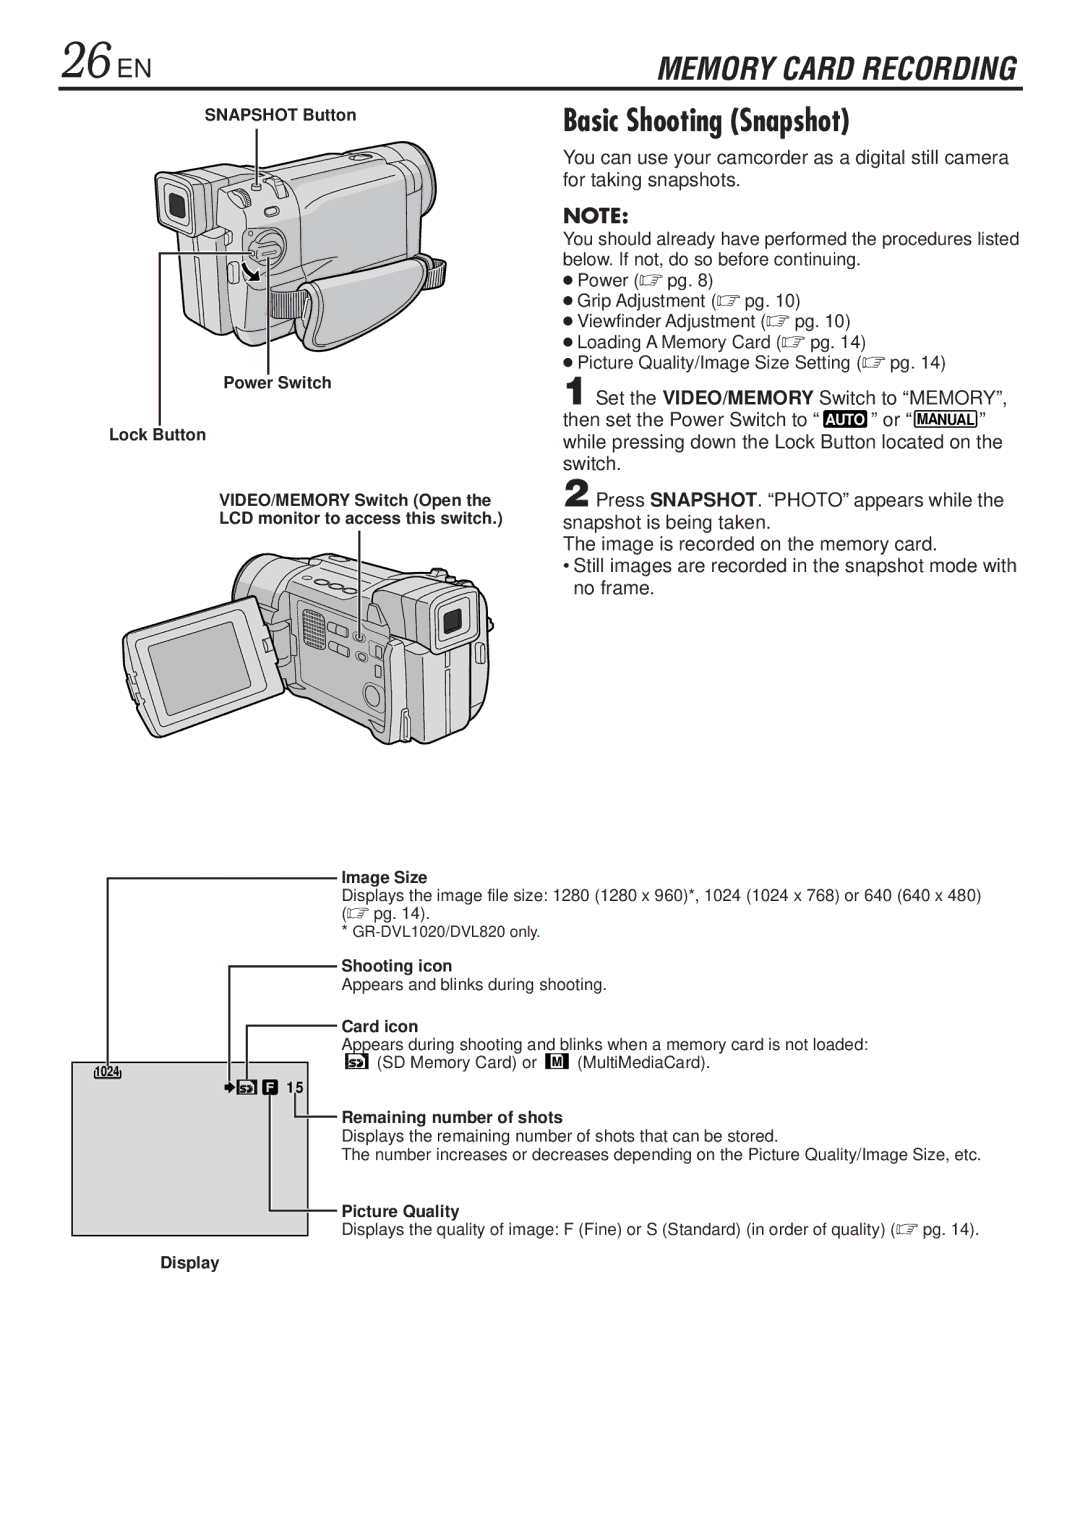
SNAPSHOT Button
Basic Shooting (Snapshot)
Power Switch
Lock Button
VIDEO/MEMORY Switch (Open the
LCD monitor to access this switch.)
You can use your camcorder as a digital still camera for taking snapshots.
NOTE:
You should already have performed the procedures listed below. If not, do so before continuing.
●Power (☞ pg. 8)
●Grip Adjustment (☞ pg. 10)
●Viewfinder Adjustment (☞ pg. 10)
●Loading A Memory Card (☞ pg. 14)
●Picture Quality/Image Size Setting (☞ pg. 14)
1 Set the VIDEO/MEMORY Switch to “MEMORY”, then set the Power Switch to “ AUTO ” or “ MANUAL ” while pressing down the Lock Button located on the switch.
2 Press SNAPSHOT. “PHOTO” appears while the snapshot is being taken.
The image is recorded on the memory card.
•Still images are recorded in the snapshot mode with no frame.
1024
Image Size
Displays the image file size: 1280 (1280 x 960)*, 1024 (1024 x 768) or 640 (640 x 480) (☞ pg. 14).
*
Shooting icon
Appears and blinks during shooting.
Card icon
Appears during shooting and blinks when a memory card is not loaded:
(SD Memory Card) or ![]() (MultiMediaCard).
(MultiMediaCard).
1 5
Remaining number of shots
Displays the remaining number of shots that can be stored.
The number increases or decreases depending on the Picture Quality/Image Size, etc.
![]() Picture Quality
Picture Quality
Displays the quality of image: F (Fine) or S (Standard) (in order of quality) (☞ pg. 14).
Display