28 EN
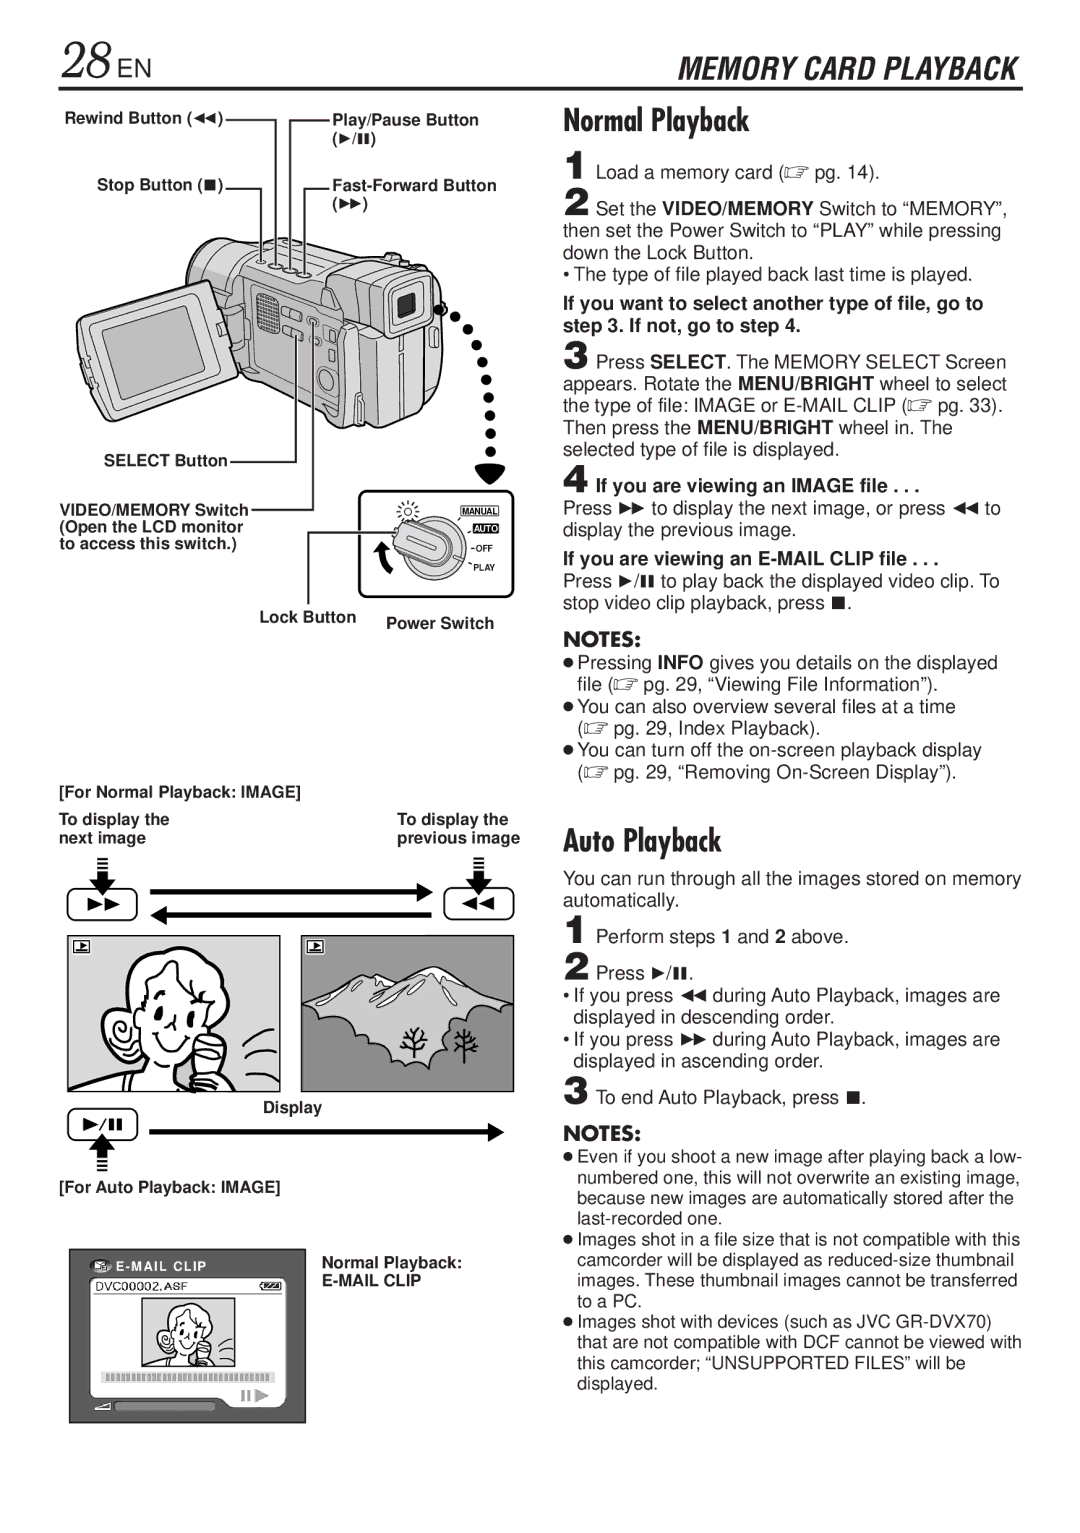
Rewind Button (2) ![]()
![]() Play/Pause Button (4/6)
Play/Pause Button (4/6)
Stop Button (5) |
|
|
| |
|
|
| (3) | |
|
|
|
|
|
|
|
|
|
|
SELECT Button |
|
|
VIDEO/MEMORY Switch |
| MANUAL |
(Open the LCD monitor |
| AUTO |
to access this switch.) |
| OFF |
|
| PLAY |
| Lock Button | Power Switch |
|
|
[For Normal Playback: IMAGE] |
|
|
| ||
To display the | To display the | ||||
next image | previous image | ||||
|
|
|
|
|
|
|
|
|
|
|
|
Display
[For Auto Playback: IMAGE]
E - MAIL CLIP | Normal Playback: |
|
MEMORY CARD PLAYBACK
Normal Playback
1 Load a memory card (☞ pg. 14).
2 Set the VIDEO/MEMORY Switch to “MEMORY”, then set the Power Switch to “PLAY” while pressing down the Lock Button.
• The type of file played back last time is played.
If you want to select another type of file, go to step 3. If not, go to step 4.
3 Press SELECT. The MEMORY SELECT Screen appears. Rotate the MENU/BRIGHT wheel to select the type of file: IMAGE or
4 If you are viewing an IMAGE file . . .
Press 3 to display the next image, or press 2to display the previous image.
If you are viewing an E-MAIL CLIP file . . .
Press 4/6 to play back the displayed video clip. To stop video clip playback, press 5.
NOTES:
●Pressing INFO gives you details on the displayed file (☞ pg. 29, “Viewing File Information”).
●You can also overview several files at a time (☞ pg. 29, Index Playback).
●You can turn off the
Auto Playback
You can run through all the images stored on memory automatically.
1 Perform steps 1 and 2 above.
2 Press 4/6.
•If you press 2during Auto Playback, images are displayed in descending order.
•If you press 3during Auto Playback, images are displayed in ascending order.
3 To end Auto Playback, press 5.
NOTES:
●Even if you shoot a new image after playing back a low- numbered one, this will not overwrite an existing image, because new images are automatically stored after the
●Images shot in a file size that is not compatible with this camcorder will be displayed as
●Images shot with devices (such as JVC
