EN 55
| 1 | 0 |
|
2 |
|
| ! |
4 | 3 | @ | # |
6 | 5 | $ | % |
7 | ^ | & | |
8 | 9 | * | ( |
)
Buttons
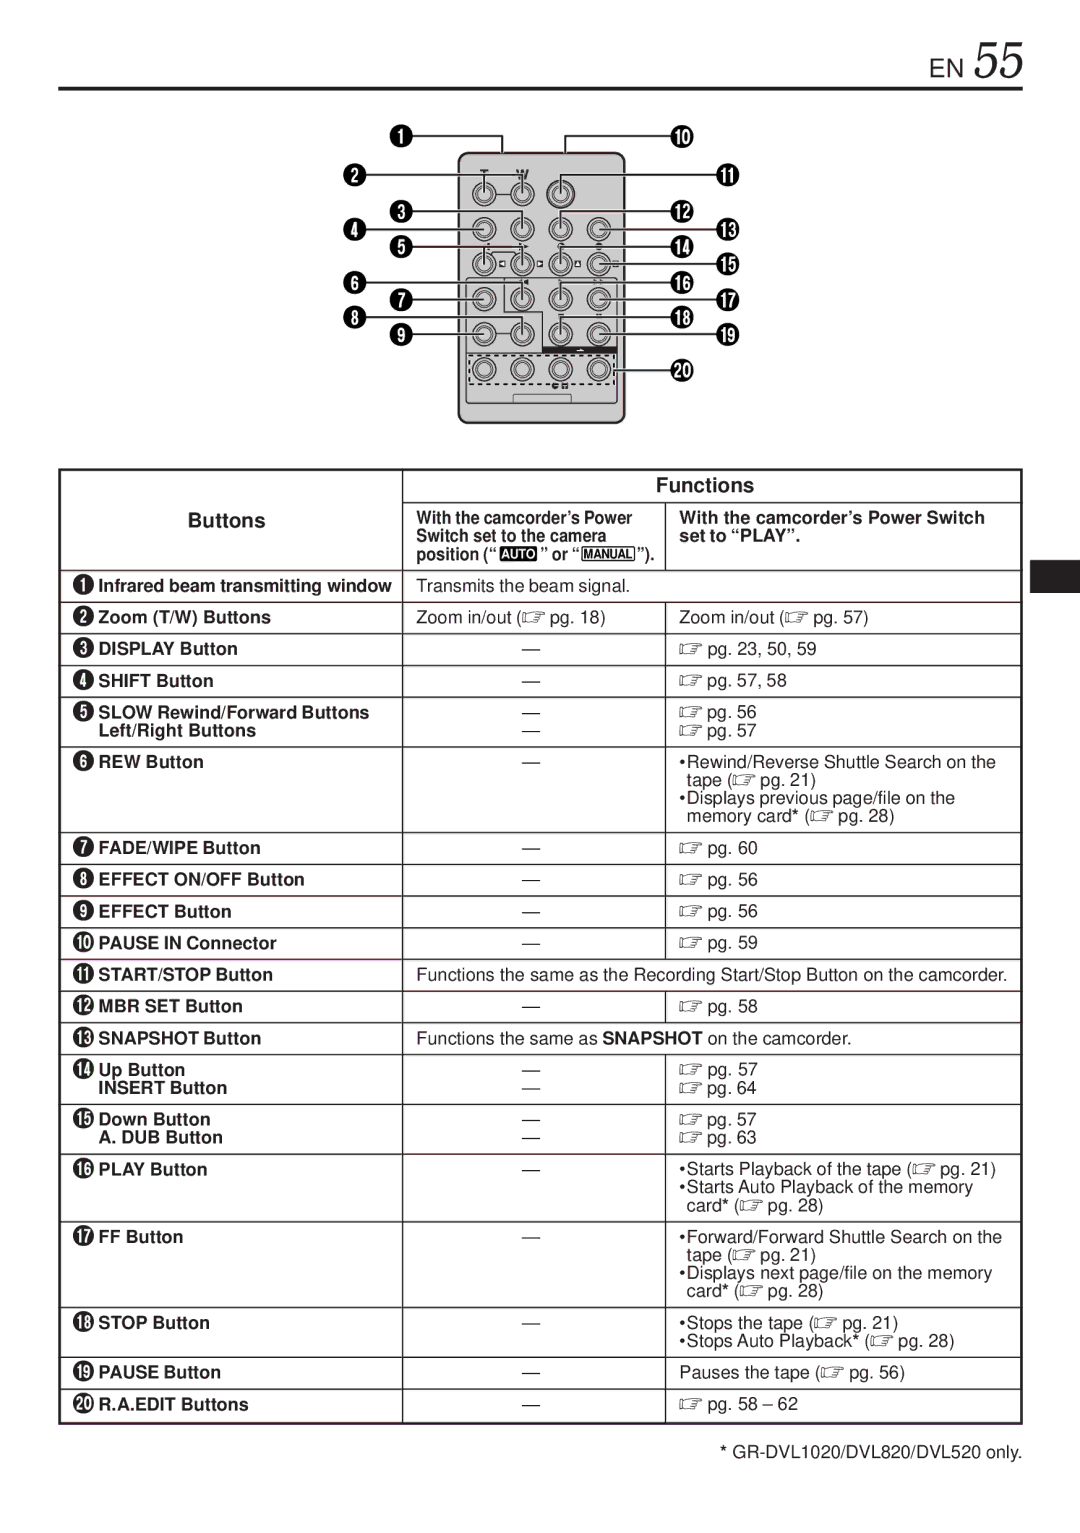
1Infrared beam transmitting window
2Zoom (T/W) Buttons
3DISPLAY Button
4SHIFT Button
5SLOW Rewind/Forward Buttons Left/Right Buttons
6REW Button
7FADE/WIPE Button
8EFFECT ON/OFF Button
9EFFECT Button
0PAUSE IN Connector
!START/STOP Button
@MBR SET Button
#SNAPSHOT Button
$Up Button INSERT Button
%Down Button A. DUB Button
^PLAY Button
&FF Button
*STOP Button
(PAUSE Button
)R.A.EDIT Buttons
|
|
|
| Functions | |
With the camcorder’s Power |
| With the camcorder’s Power Switch | |||
Switch set to the camera | ”). | set to “PLAY”. | |||
position (“ | AUTO | ” or “ | MANUAL |
| |
|
|
| |||
Transmits the beam signal. |
|
| |||
|
|
| |||
Zoom in/out (☞ pg. 18) |
| Zoom in/out (☞ pg. 57) | |||
—☞ pg. 23, 50, 59
—☞ pg. 57, 58
—☞ pg. 56
—☞ pg. 57
—•Rewind/Reverse Shuttle Search on the
tape (☞ pg. 21)
•Displays previous page/file on the memory card* (☞ pg. 28)
—☞ pg. 60
—☞ pg. 56
—☞ pg. 56
—☞ pg. 59
Functions the same as the Recording Start/Stop Button on the camcorder.
—☞ pg. 58
Functions the same as SNAPSHOT on the camcorder.
—☞ pg. 57
—☞ pg. 64
—☞ pg. 57
—☞ pg. 63
—•Starts Playback of the tape (☞ pg. 21) •Starts Auto Playback of the memory card* (☞ pg. 28)
—•Forward/Forward Shuttle Search on the tape (☞ pg. 21)
•Displays next page/file on the memory card* (☞ pg. 28)
—•Stops the tape (☞ pg. 21) •Stops Auto Playback* (☞ pg. 28)
—Pauses the tape (☞ pg. 56)
—☞ pg. 58 – 62
*
