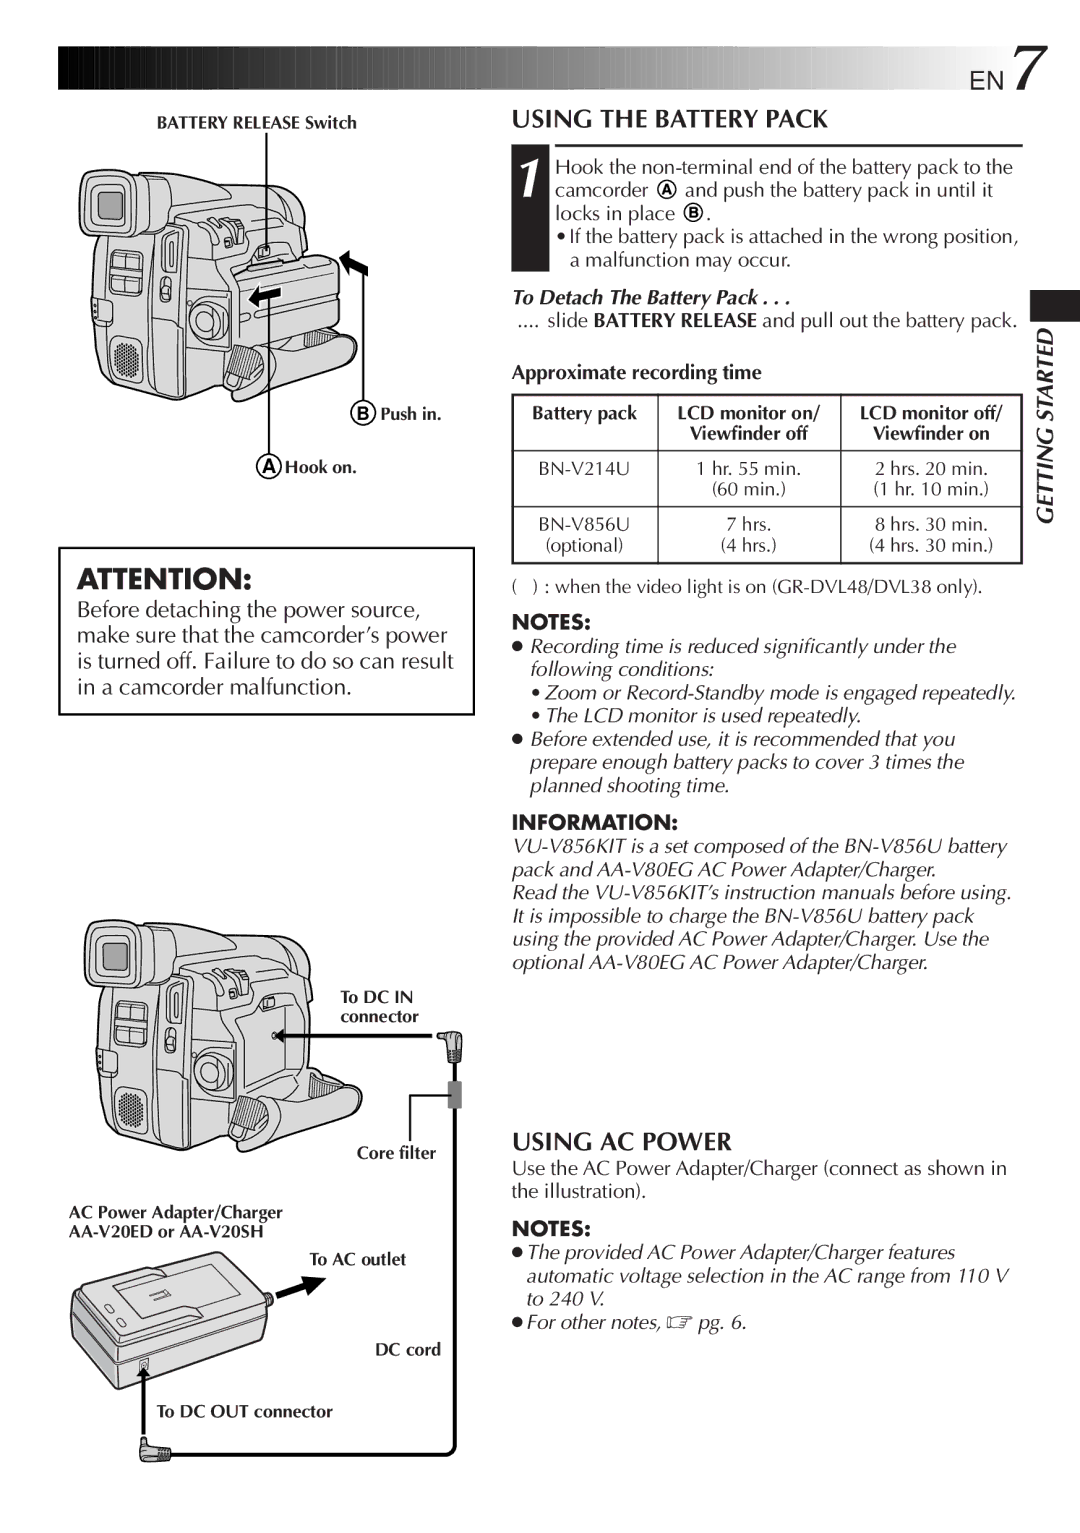
BATTERY RELEASE Switch
B Push in.
A Hook on.
ATTENTION:
Before detaching the power source, make sure that the camcorder’s power is turned off. Failure to do so can result in a camcorder malfunction.
To DC IN connector
Core filter
AC Power Adapter/Charger
To AC outlet
DC cord


 EN7
EN7
USING THE BATTERY PACK
1 Hook the ![]() and push the battery pack in until it locks in place
and push the battery pack in until it locks in place ![]() .
.
•If the battery pack is attached in the wrong position, a malfunction may occur.
To Detach The Battery Pack . . .
.... slide BATTERY RELEASE and pull out the battery pack.
Battery pack | LCD monitor on/ | LCD monitor off/ | STARTED | |
Approximate recording time |
|
| ||
| Viewfinder off | Viewfinder on | GETTING | |
|
|
| ||
1 hr. 55 min. | 2 hrs. 20 min. | |||
| ||||
| (60 min.) | (1 hr. 10 min.) |
| |
|
|
|
| |
7 hrs. | 8 hrs. 30 min. |
| ||
(optional) | (4 hrs.) | (4 hrs. 30 min.) |
| |
|
|
|
| |
( ) : when the video light is on
NOTES:
●Recording time is reduced significantly under the following conditions:
•Zoom or
•The LCD monitor is used repeatedly.
●Before extended use, it is recommended that you prepare enough battery packs to cover 3 times the planned shooting time.
INFORMATION:
Read the
USING AC POWER
Use the AC Power Adapter/Charger (connect as shown in the illustration).
NOTES:
●The provided AC Power Adapter/Charger features automatic voltage selection in the AC range from 110 V to 240 V.
●For other notes, ☞ pg. 6.
To DC OUT connector