8
 EN
EN


 GETTING
 STARTED

 (cont.)

Date/Time Settings
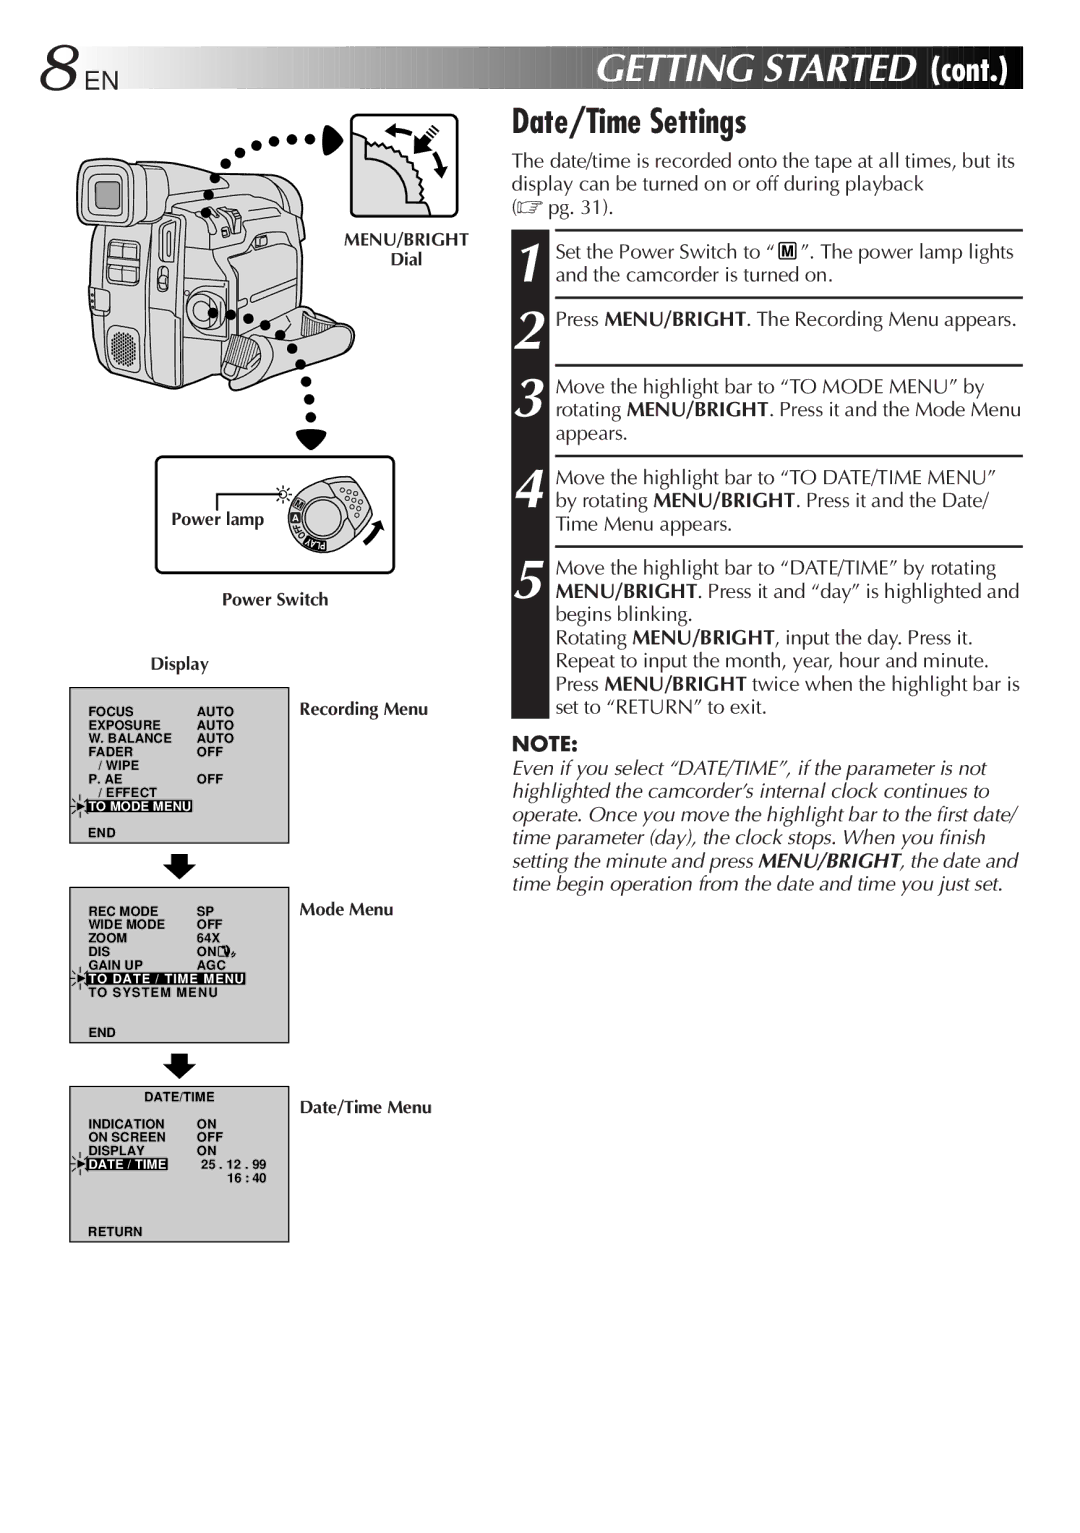
MENU/BRIGHT
Dial
The date/time is recorded onto the tape at all times, but its display can be turned on or off during playback
(☞ pg. 31).
1
2 Press MENU/BRIGHT. The Recording Menu appears.
3 Move the highlight bar to “TO MODE MENU” by rotating MENU/BRIGHT. Press it and the Mode Menu appears.
Power lamp | M |
F | |
| A |
| F |
| O |
YALP
Power Switch
4 Move the highlight bar to “TO DATE/TIME MENU” by rotating MENU/BRIGHT. Press it and the Date/ Time Menu appears.
5 Move the highlight bar to “DATE/TIME” by rotating MENU/BRIGHT. Press it and “day” is highlighted and begins blinking.
Display
| FOCUS | AUTO |
| EXPOSURE | AUTO |
| W. BALANCE | AUTO |
| FADER | OFF |
| / WIPE |
|
| P. AE | OFF |
| / EFFECT | 0 |
4 | TO MODE MENU | |
| END |
|
Recording Menu
Rotating MENU/BRIGHT, input the day. Press it. Repeat to input the month, year, hour and minute. Press MENU/BRIGHT twice when the highlight bar is set to “RETURN” to exit.
NOTE:
Even if you select “DATE/TIME”, if the parameter is not highlighted the camcorder’s internal clock continues to operate. Once you move the highlight bar to the first date/ time parameter (day), the clock stops. When you finish setting the minute and press MENU/BRIGHT, the date and time begin operation from the date and time you just set.
REC MODE | SP | Mode Menu | |
WIDE MODE | OFF |
| |
ZOOM |
| 64X |
|
DIS |
| ON |
|
GAIN UP |
| AGC |
|
4TO DATE / TIME MENU |
| ||
TO SYSTEM MENU |
| ||
END | – – – – |
| |
DATE/TIME
| INDICATION | ON |
| ON SCREEN | OFF |
| DISPLAY | ON |
4 | DATE / TIME | 25 . 12 . 99 |
|
| 16 : 40 |
Date/Time Menu
RETURN