Press the MENU Wheel in. The Menu Screen appears.

White Balance Adjustment

A term that refers to the correctness of color reproduction under various lighting. If the white balance is correct, all other colors will be accurately reproduced.

The white balance is usually adjusted automatically. However, more advanced camcorder operators control this function manually to achieve a more professional color/tint reproduction.

1 Set the Power Switch to “ ” while pressing down the Lock Button located on the switch. Open the LCD monitor fully or pull out the viewfinder fully.

2

3 Rotate the MENU Wheel to select “ W.BALANCE”, then press it. The W.BALANCE Menu appears.

4 Rotate the MENU Wheel to select the desired mode.

“AUTO” – White balance is adjusted automatically (factory preset).

MWB” – White balance is set manually.

FINE” – Outdoors on a sunny day.

CLOUD” – Outdoors on a cloudy day.

HALOGEN” – A video light or similar type of lighting is used.

5 Press the MENU Wheel in. Selection is complete. Press the MENU Wheel in again. The Menu Screen closes and the selected mode indicator except “AUTO” appears.

To Return To Automatic White Balance . . .

... select “AUTO” in step 4. Or, set the Power Switch to “ ”.

NOTE:

White balance cannot be used when Sepia or Monotone ( pg. 47) is activated.

EN53

Manual White Balance Operation

Perform Manual White Balance when shooting under various types of lighting.

1 Follow steps 1 through 4 of the white balance adjustment, and select “ MWB”.

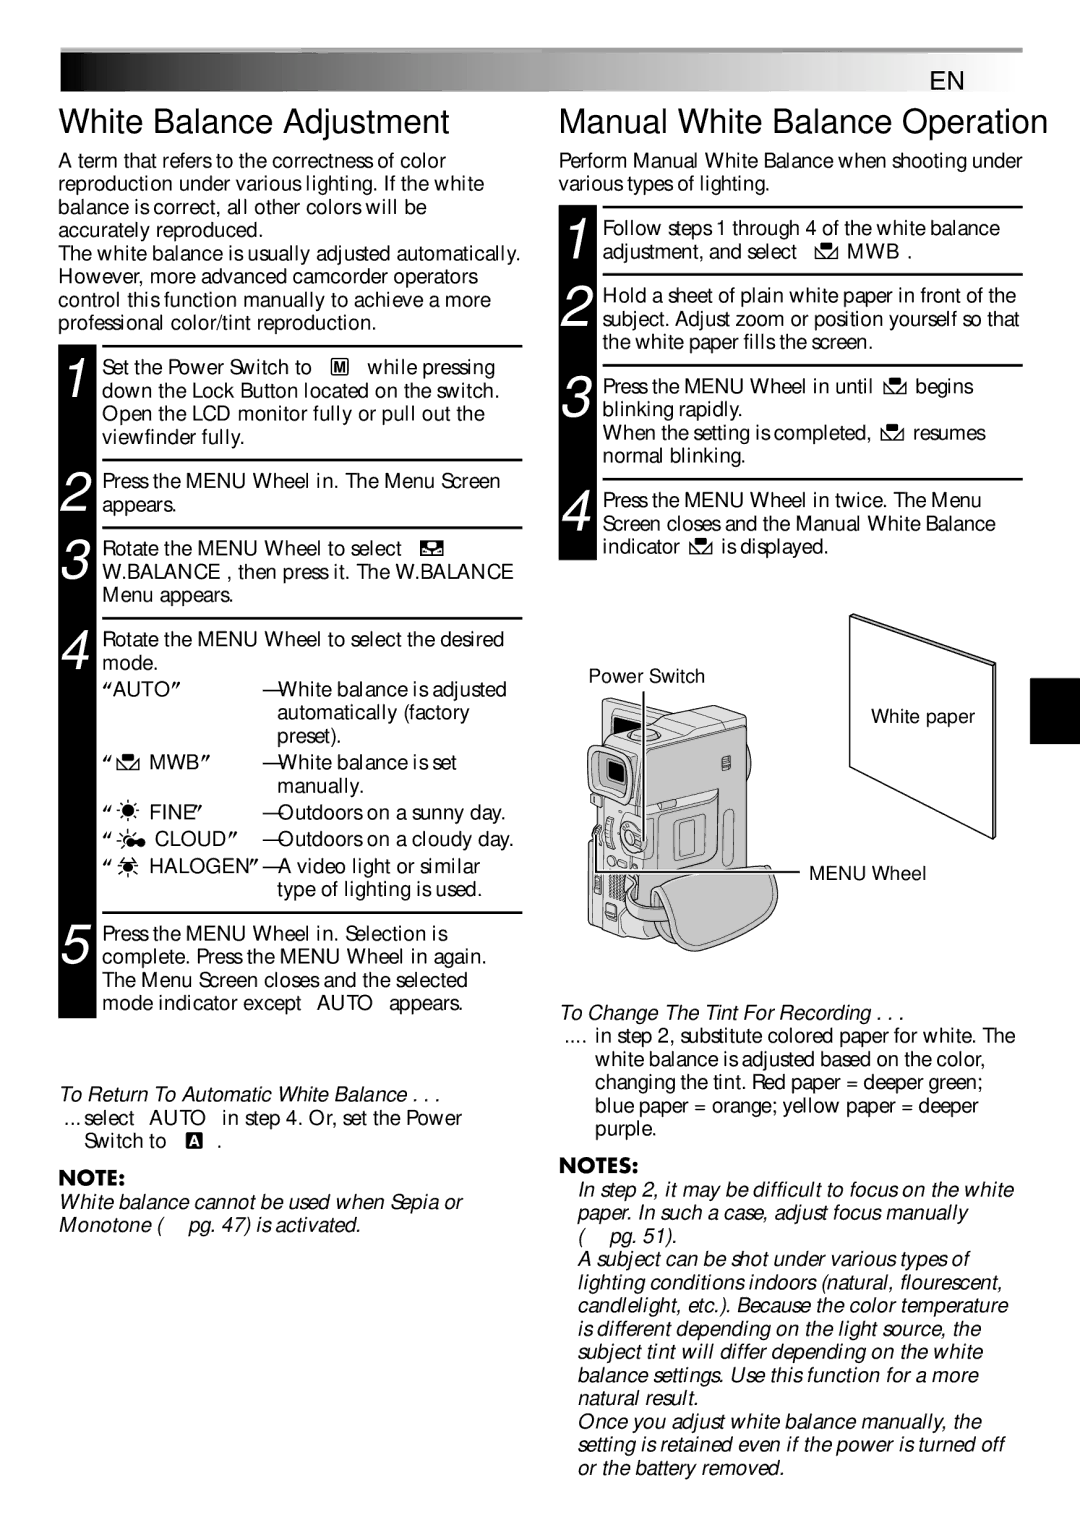
2 Hold a sheet of plain white paper in front of the subject. Adjust zoom or position yourself so that the white paper fills the screen.

Press the MENU Wheel in until

begins

3 blinking rapidly.


When the setting is completed,

resumes

normal blinking.


4 Press the MENU Wheel in twice. The Menu Screen closes and the Manual White Balance

indicator is displayed.

Power Switch

White paper

MENU Wheel

To Change The Tint For Recording . . .

.... in step 2, substitute colored paper for white. The

white balance is adjusted based on the color, changing the tint. Red paper = deeper green; blue paper = orange; yellow paper = deeper purple.

NOTES:

In step 2, it may be difficult to focus on the white paper. In such a case, adjust focus manually

( pg. 51).

A subject can be shot under various types of lighting conditions indoors (natural, flourescent, candlelight, etc.). Because the color temperature is different depending on the light source, the subject tint will differ depending on the white balance settings. Use this function for a more natural result.

Once you adjust white balance manually, the setting is retained even if the power is turned off or the battery removed.

Page 53
Image 53
JVC GR-DVM75 White Balance Adjustment, Manual White Balance Operation, EN53, To Return To Automatic White Balance

GR-DVM75 specifications

The JVC GR-DVM75 is a digital camcorder that represents a significant leap forward in home video technology at its launch. Designed for both amateur videographers and enthusiasts, this model integrates a variety of features and technologies that enhance the shooting experience while ensuring high-quality video output.

One of the standout aspects of the GR-DVM75 is its 690,000 pixel CCD sensor, which delivers impressive image clarity and detail. This camcorder offers a 16:9 aspect ratio for widescreen shooting, allowing users to capture cinematic-style footage that is well suited for modern viewing formats. The camcorder's 10x optical zoom lens lets users get close to their subjects without sacrificing image quality, while a digital zoom feature extends this range up to 800x, providing flexibility in different shooting environments.

The GR-DVM75 is equipped with JVC's proprietary Digital Image Stabilization technology, which minimizes the effects of camera shake, resulting in smoother video playback. This feature is particularly useful in handheld shooting scenarios or when capturing moving subjects. Additionally, the camcorder supports various recording formats, including MiniDV, ensuring compatibility with a wide range of playback devices.

The model also boasts a swivel LCD screen, allowing for easy framing of shots from various angles. This 2.5-inch screen is bright and clear, providing a reliable visual reference for users. Moreover, the camcorder incorporates a viewfinder for traditional shooting styles, catering to diverse preferences among users.

Connectivity is another crucial aspect of the GR-DVM75. The camcorder features Firewire (IEEE 1394) and USB ports that facilitate fast data transfer for easy editing and sharing of videos. This functionality is vital in today's digital age, where content creation and sharing on various platforms have become commonplace.

In terms of audio capabilities, the JVC GR-DVM75 is equipped with a built-in stereo microphone that captures clear sound, supplemented by audio input options for external microphones. This feature is especially beneficial for users looking to enhance their sound quality, whether for interviews or ambient sound capture.

Overall, the JVC GR-DVM75 combines cutting-edge technology with user-friendly features, making it an excellent choice for anyone looking to capture high-quality home videos. Its blend of image stabilization, versatility in recording, and robust connectivity options set it apart as a reliable tool for creative expression. Whether someone is documenting family events, creating travel vlogs, or exploring artistic videography, the GR-DVM75 provides a solid foundation for captivating storytelling.