Synchro Editing
(S-VHS/VHS Mode Only)
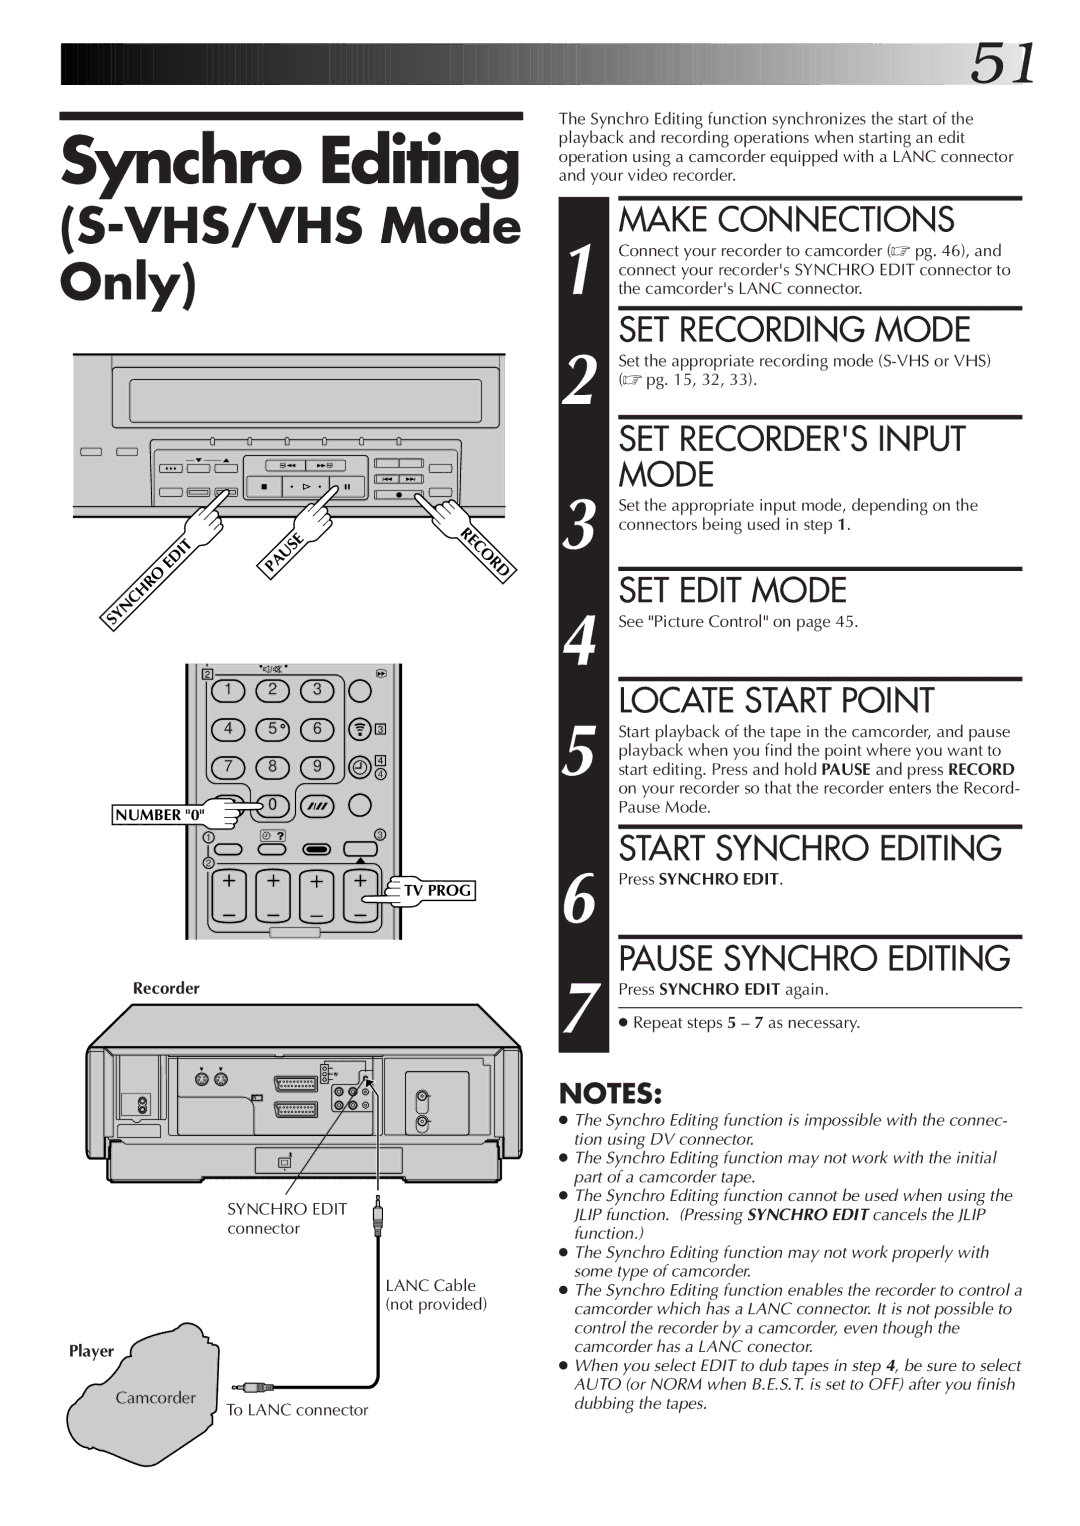
SYNCHRO | EDIT | PAUSE |
|
|
|
| |
| 2 |
|
|
| 1 | 2 | 3 |
| 4 | 5 | 6 |
7 8 9
RECORD
3
4
4
NUMBER "0"
0
1
2
Recorder
3
![]() TV PROG
TV PROG
6
7 Press SYNCHRO EDIT again.
●Repeat steps 5 – 7 as necessary.
NOTES:
Player
Camcorder
SYNCHRO EDIT connector
LANC Cable (not provided)
To LANC connector
●The Synchro Editing function is impossible with the connec- tion using DV connector.
●The Synchro Editing function may not work with the initial part of a camcorder tape.
●The Synchro Editing function cannot be used when using the JLIP function. (Pressing SYNCHRO EDIT cancels the JLIP function.)
●The Synchro Editing function may not work properly with some type of camcorder.
●The Synchro Editing function enables the recorder to control a camcorder which has a LANC connector. It is not possible to control the recorder by a camcorder, even though the camcorder has a LANC conector.
●When you select EDIT to dub tapes in step 4, be sure to select AUTO (or NORM when B.E.S.T. is set to OFF) after you finish dubbing the tapes.