English
To reduce the beat during recording
AM station
When recording an AM broadcast, beats may be produces which are not heard when listening to the broadcast. In this case, press the REPEAT button on the CD Player to eliminate the beats.
Unit |
| Steps | Explanation/Remarks |
| On the Unit | 1. Pressing the REPEAT button repeatedly will cancel off | |
REPEAT | 1. | Set to AM station and start recording. | |
| 2. | Press the REPEAT button repeatedly | the unwanted beats. The display changes as below : |
|
| until the beats are eliminated. | = CUT 1 = CUT 2 = CUT 3 = (back to the |
|
|
| beginning) |
|
|
| If the proper setting is selected, the beats will be elimi- |
|
|
| nated. |
|
|
|
|
CD Direct Recording
The order of recording of the tracks goes according to the original order of the CD or to the order you have programmed.
The CD player starts playing automatically and recording begins. When the CD player finishes playing, recording will stop automatically.
| Unit | Steps |
| Explanation/Remarks |
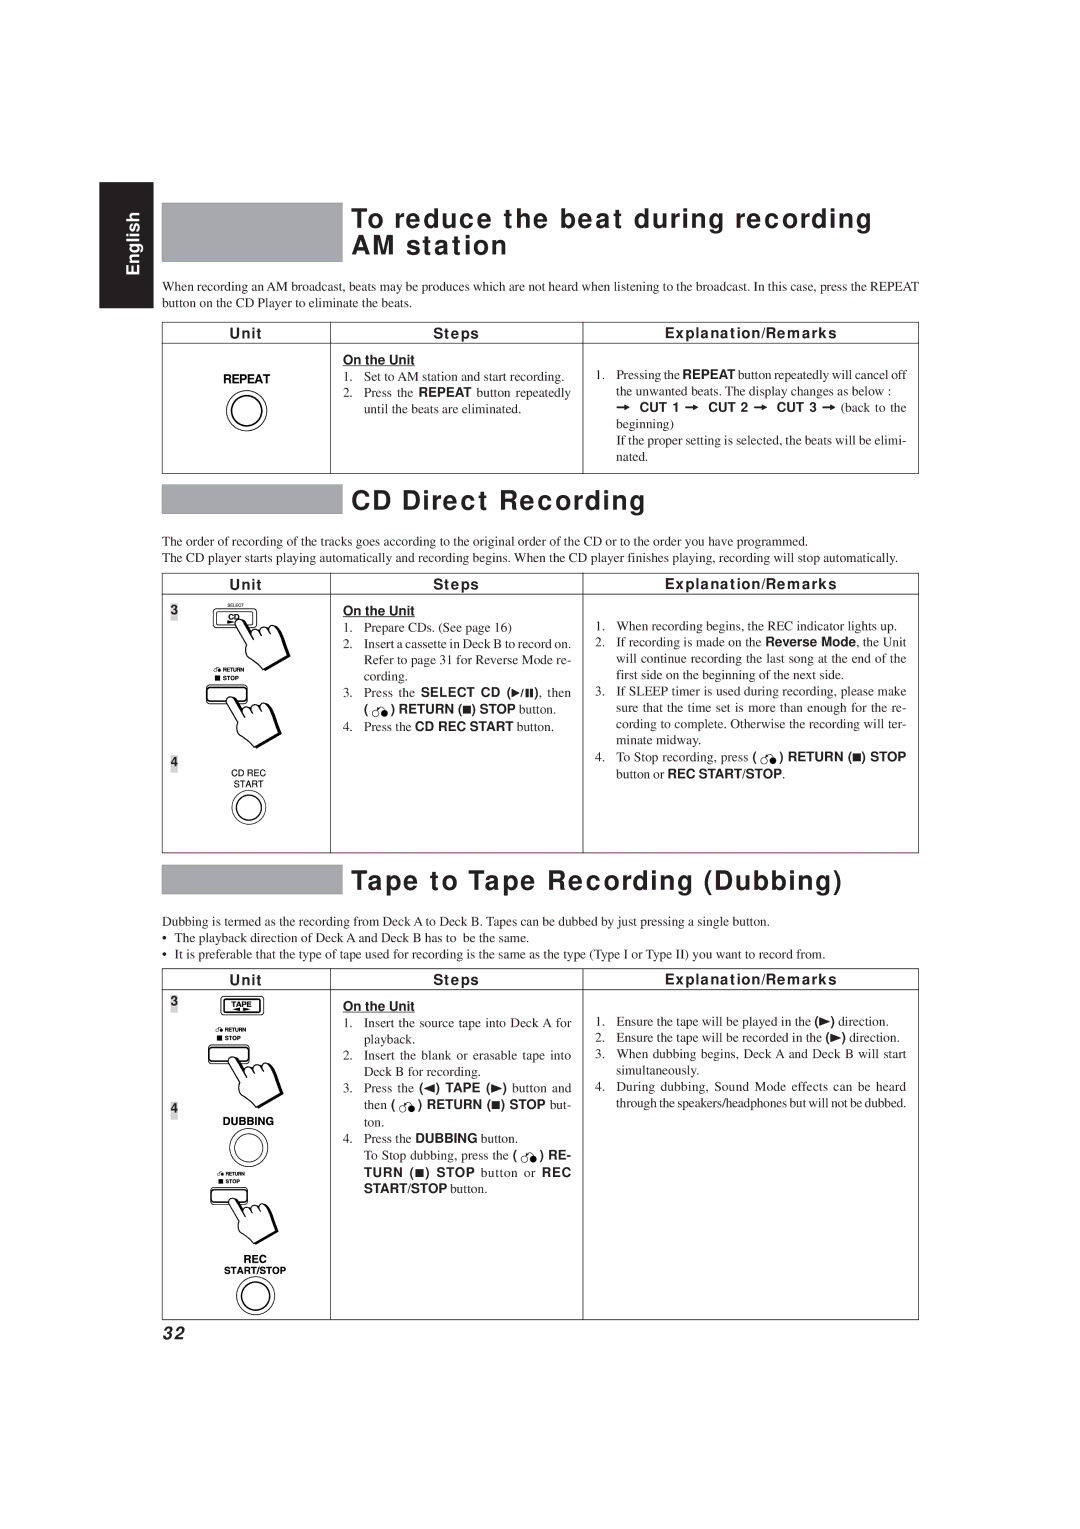
3 | On the Unit |
|
| |
| 1. | Prepare CDs. (See page 16) | 1. | When recording begins, the REC indicator lights up. |
| 2. | Insert a cassette in Deck B to record on. | 2. | If recording is made on the Reverse Mode, the Unit |
|
| Refer to page 31 for Reverse Mode re- |
| will continue recording the last song at the end of the |
|
| cording. |
| first side on the beginning of the next side. |
| 3. | Press the SELECT CD (6), then | 3. | If SLEEP timer is used during recording, please make |
|
| ( ) RETURN (7) STOP button. |
| sure that the time set is more than enough for the re- |
| 4. | Press the CD REC START button. |
| cording to complete. Otherwise the recording will ter- |
|
|
|
| minate midway. |
4 |
|
| 4. | To Stop recording, press ( ) RETURN (7) STOP |
|
|
|
| button or REC START/STOP. |
Tape to Tape Recording (Dubbing)
Dubbing is termed as the recording from Deck A to Deck B. Tapes can be dubbed by just pressing a single button.
•The playback direction of Deck A and Deck B has to be the same.
•It is preferable that the type of tape used for recording is the same as the type (Type I or Type II) you want to record from.
3
4
Unit | Steps |
| Explanation/Remarks | |
| On the Unit |
| Ensure the tape will be played in the (3) direction. | |
1. | Insert the source tape into Deck A for | 1. | ||
|
| playback. | 2. | Ensure the tape will be recorded in the (3) direction. |
2. | Insert the blank or erasable tape into | 3. | When dubbing begins, Deck A and Deck B will start | |
|
| Deck B for recording. |
| simultaneously. |
3. | Press the (2) TAPE (3) button and | 4. | During dubbing, Sound Mode effects can be heard | |
|
| then ( ) RETURN (7) STOP but- |
| through the speakers/headphones but will not be dubbed. |
|
| ton. |
|
|
|
|
|
| |
|
|
|
| |
4.Press the DUBBING button.
To Stop dubbing, press the ( ![]()
![]() ) RE-
) RE-
TURN (7) STOP button or REC
START/STOP button.
32