6 PREPARATION
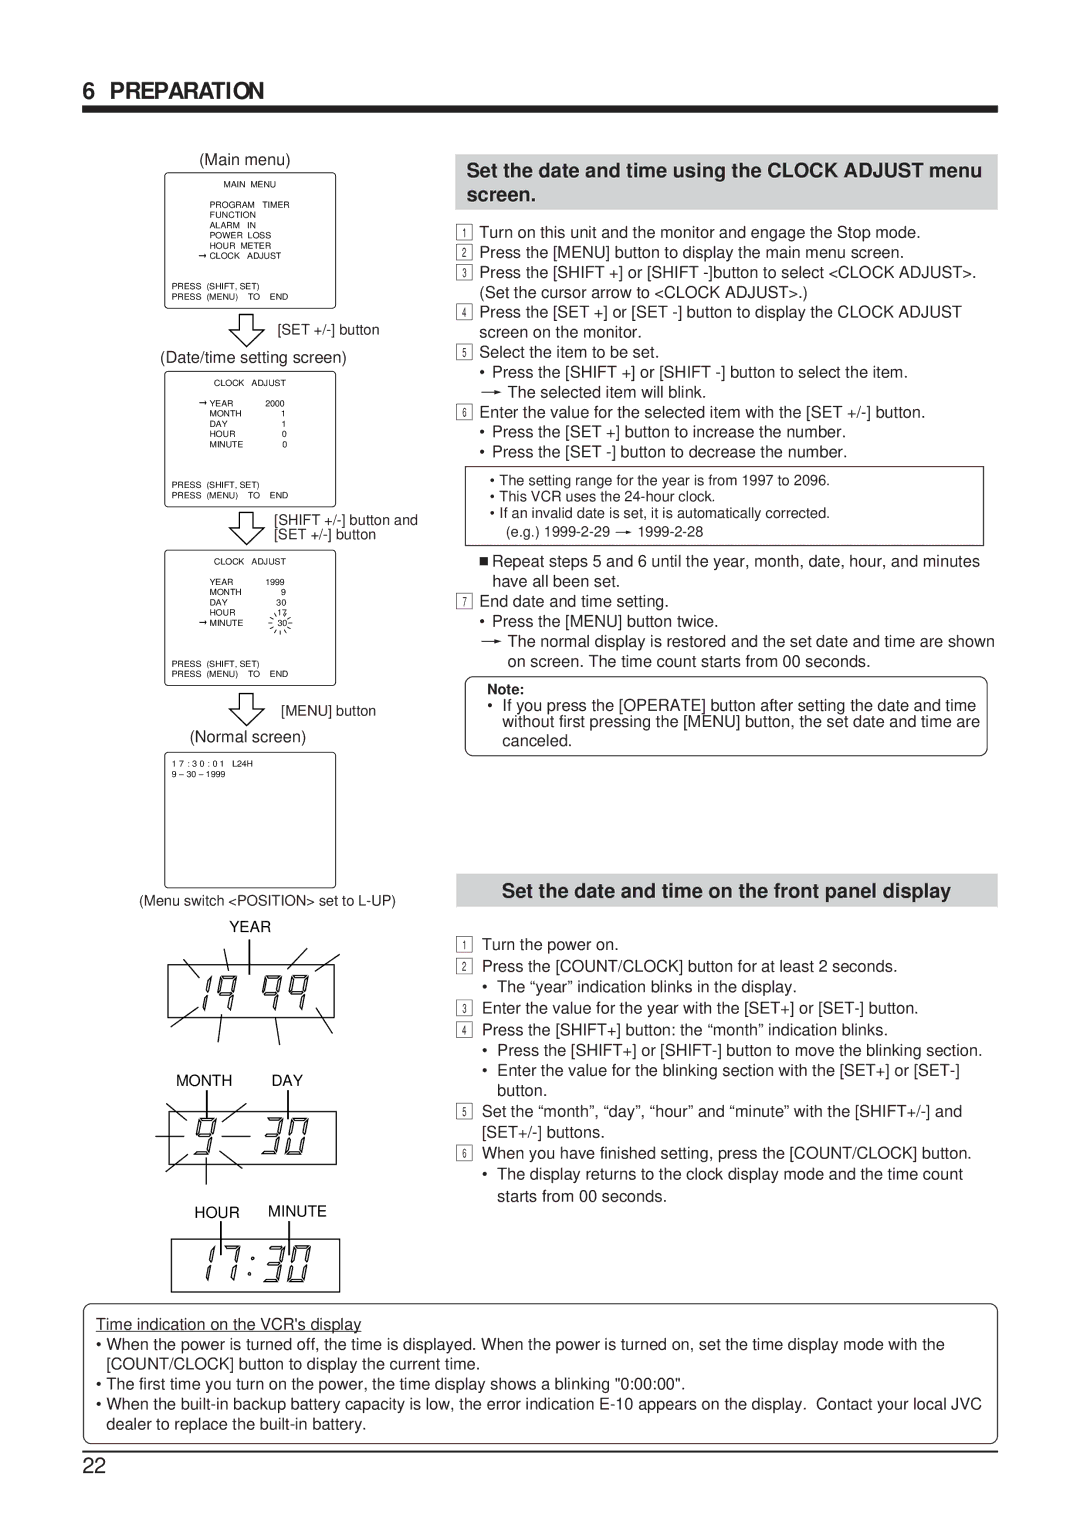
(Main menu)
MAIN MENU
PROGRAM TIMER
FUNCTION
ALARM IN
POWER LOSS
HOUR METER
![]() CLOCK ADJUST
CLOCK ADJUST
PRESS (SHIFT, SET)
PRESS (MENU) TO END
[SET
(Date/time setting screen)
CLOCK | ADJUST |
YEAR | 2000 |
MONTH | 1 |
DAY | 1 |
HOUR | 0 |
MINUTE | 0 |
PRESS (SHIFT, SET)
PRESS (MENU) TO END
| [SHIFT |
| [SET |
CLOCK | ADJUST |
YEAR | 1999 |
MONTH | 9 |
DAY | 30 |
HOUR | 17 |
MINUTE | 30 |
PRESS (SHIFT, SET)
PRESS (MENU) TO END
Set the date and time using the CLOCK ADJUST menu screen.
1Turn on this unit and the monitor and engage the Stop mode.
2 Press the [MENU] button to display the main menu screen.
3 Press the [SHIFT +] or [SHIFT
4 Press the [SET +] or [SET
5 Select the item to be set.
•Press the [SHIFT +] or [SHIFT
6Enter the value for the selected item with the [SET
•Press the [SET +] button to increase the number.
•Press the [SET
•The setting range for the year is from 1997 to 2096.
•This VCR uses the
•If an invalid date is set, it is automatically corrected.
(e.g.)
■Repeat steps 5 and 6 until the year, month, date, hour, and minutes
have all been set.
7End date and time setting.
• Press the [MENU] button twice.
[The normal display is restored and the set date and time are shown on screen. The time count starts from 00 seconds.
[MENU] button
(Normal screen)
1 7 : 3 0 : 0 1 L24H
9 – 30 – 1999
(Menu switch <POSITION> set to
YEAR
MONTH DAY
HOUR MINUTE
Note:
•If you press the [OPERATE] button after setting the date and time without first pressing the [MENU] button, the set date and time are canceled.
Set the date and time on the front panel display
1Turn the power on.
2Press the [COUNT/CLOCK] button for at least 2 seconds.
• The “year” indication blinks in the display.
3Enter the value for the year with the [SET+] or
4 Press the [SHIFT+] button: the “month” indication blinks.
•Press the [SHIFT+] or
•Enter the value for the blinking section with the [SET+] or
5Set the “month”, “day”, “hour” and “minute” with the
6When you have finished setting, press the [COUNT/CLOCK] button.
•The display returns to the clock display mode and the time count starts from 00 seconds.
Time indication on the VCR's display
•When the power is turned off, the time is displayed. When the power is turned on, set the time display mode with the [COUNT/CLOCK] button to display the current time.
•The first time you turn on the power, the time display shows a blinking "0:00:00".
•When the
22