7 RECORDING
7-2 Recording
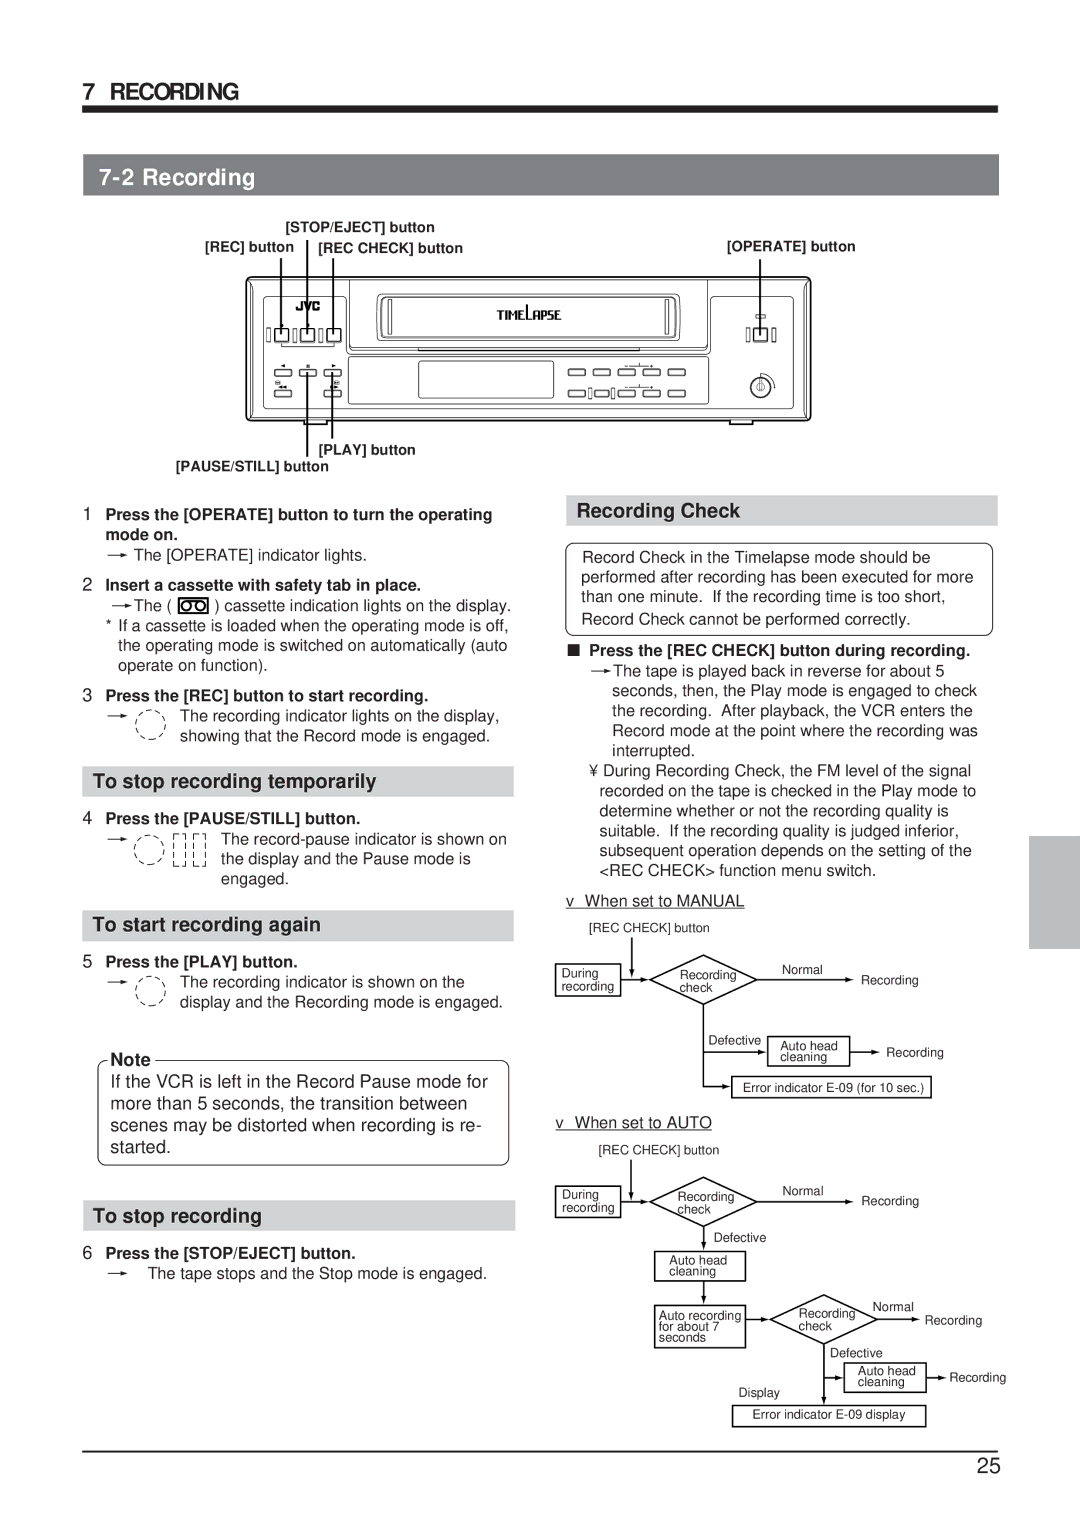
[STOP/EJECT] button
[REC] button
[REC CHECK] button | [OPERATE] button |
[PLAY] button
[PAUSE/STILL] button
1Press the [OPERATE] button to turn the operating mode on.
[The [OPERATE] indicator lights.
2Insert a cassette with safety tab in place.
[The ( ![]() ) cassette indication lights on the display.
) cassette indication lights on the display.
*If a cassette is loaded when the operating mode is off, the operating mode is switched on automatically (auto operate on function).
3Press the [REC] button to start recording.
[ The recording indicator lights on the display, showing that the Record mode is engaged.
To stop recording temporarily
4Press the [PAUSE/STILL] button.
[The
To start recording again
5Press the [PLAY] button.
[ The recording indicator is shown on the display and the Recording mode is engaged.
Note
If the VCR is left in the Record Pause mode for more than 5 seconds, the transition between scenes may be distorted when recording is re- started.
To stop recording
6Press the [STOP/EJECT] button.
[ The tape stops and the Stop mode is engaged.
Recording Check
Record Check in the Timelapse mode should be performed after recording has been executed for more than one minute. If the recording time is too short, Record Check cannot be performed correctly.
5Press the [REC CHECK] button during recording.
[The tape is played back in reverse for about 5 seconds, then, the Play mode is engaged to check the recording. After playback, the VCR enters the Record mode at the point where the recording was interrupted.
•During Recording Check, the FM level of the signal recorded on the tape is checked in the Play mode to determine whether or not the recording quality is suitable. If the recording quality is judged inferior, subsequent operation depends on the setting of the <REC CHECK> function menu switch.
⬤When set to MANUAL
[REC CHECK] button
During |
| Recording |
|
|
| Normal |
| Recording | |||
|
|
|
|
| |||||||
recording |
| check |
|
|
|
|
| ||||
|
|
|
|
|
|
|
| ||||
|
|
| Defective | Auto head |
|
| Recording | ||||
|
|
|
|
| |||||||
|
|
|
|
|
|
|
|
|
| ||
|
|
|
|
|
|
|
| cleaning |
|
| |
|
|
|
|
|
|
|
|
|
|
| |
|
|
|
|
| Error indicator | ||||||
|
|
|
|
| |||||||
⬤When set to AUTO
[REC CHECK] button
During |
|
| Recording |
| Normal |
| Recording |
|
| ||||||
|
|
| |||||||||||||
recording |
|
| check |
|
|
|
|
|
| ||||||
|
|
|
|
|
|
|
|
|
|
| |||||
|
|
|
| Defective |
|
|
|
|
|
|
|
|
| ||
|
|
|
|
|
|
|
|
|
|
|
|
| |||
|
|
| Auto head |
|
|
|
|
|
|
|
|
| |||
|
|
| cleaning |
|
|
|
|
|
|
|
|
| |||
|
|
|
|
|
|
| Recording | Normal |
|
| |||||
|
|
|
|
|
|
|
|
| |||||||
|
|
| Auto recording |
|
| Recording | |||||||||
|
|
|
|
|
|
| |||||||||
|
|
| for about 7 |
|
| check |
|
|
| ||||||
|
|
|
|
|
|
|
|
| |||||||
|
|
| seconds |
|
|
|
|
|
|
|
|
|
| ||
|
|
|
|
|
|
|
| Defective |
|
| |||||
|
|
|
|
|
|
|
|
|
|
| Auto head |
| Recording | ||
|
|
|
| Display |
|
|
|
| cleaning |
| |||||
|
|
|
|
|
|
|
|
|
| ||||||
|
|
|
|
|
|
|
|
|
|
|
|
| |||
|
|
|
|
| Error indicator |
|
| ||||||||
25