6 PLAYBACK
Basic Procedure
41
OPERATE |
| AUDIO OUT | |
SELECT |
| SELECT | |
|
| ||
| BALANCE | REC LEVEL | |
EJECT |
|
|
|
L | R | 0 | 10 |
REV
JOG
SHUTTLE
| OPERATE | HD | SD | IN — R.A.E. — OUT |
|
|
| ||
|
|
|
|
|
|
|
| HD INPUT | R.A.EDIT |
629 | INDEX |
|
|
| INDEX SEARCH | INPUT |
|
| |
TBC | MARK | ERASE |
| REW | FF |
| SELECT | PREROLL EDIT | IN/OUT |
|
|
|
| INSERT A.DUB |
|
| |||
|
|
|
|
|
|
| START |
| |
COUNTER | COUNTER | ZERO |
|
|
|
|
|
| |
| STOP | PLAY | PAUSE/STIL |
|
| START | |||
/REMAIN | RESET | SEARCH |
| SP/EP |
| ||||
|
|
|
|
|
| REC |
| PAUSE |
|
FWD
3 2
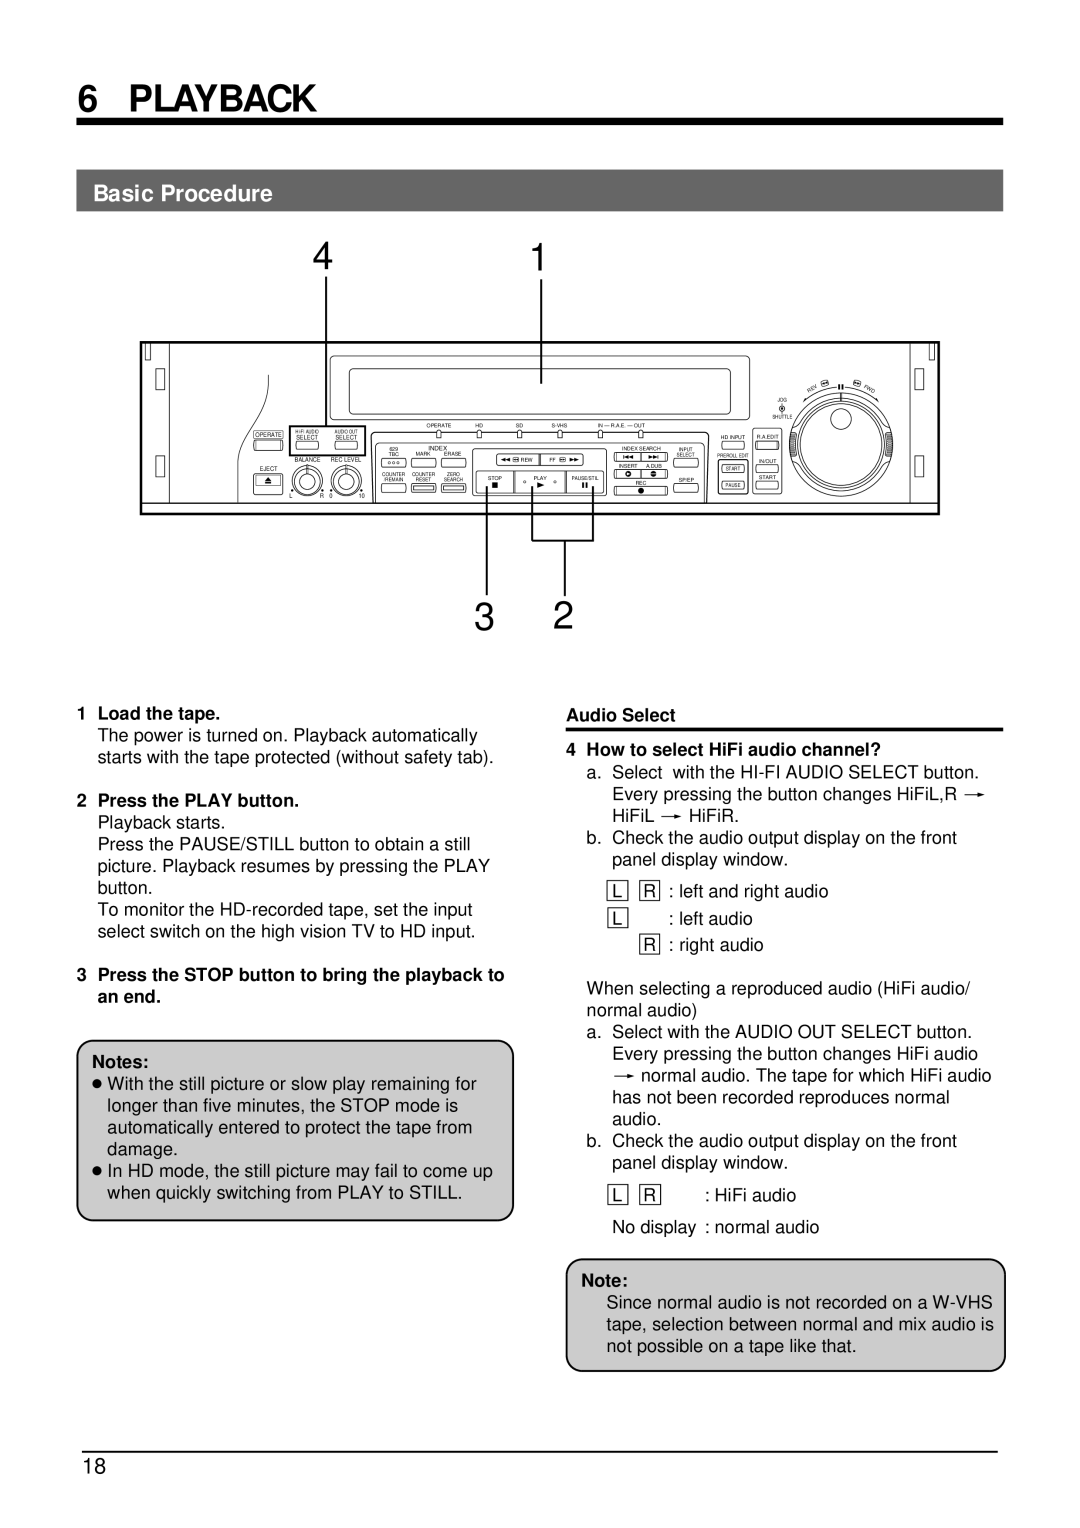
1Load the tape.
The power is turned on. Playback automatically starts with the tape protected (without safety tab).
2Press the PLAY button. Playback starts.
Press the PAUSE/STILL button to obtain a still picture. Playback resumes by pressing the PLAY button.
To monitor the
3Press the STOP button to bring the playback to an end.
Notes:
●With the still picture or slow play remaining for longer than five minutes, the STOP mode is automatically entered to protect the tape from damage.
●In HD mode, the still picture may fail to come up when quickly switching from PLAY to STILL.
Audio Select
4How to select HiFi audio channel?
a.Select with the
b.Check the audio output display on the front panel display window.
L ![]()
![]() R : left and right audio
R : left and right audio
L: left audio R : right audio
When selecting a reproduced audio (HiFi audio/ normal audio)
a.Select with the AUDIO OUT SELECT button. Every pressing the button changes HiFi audio [normal audio. The tape for which HiFi audio has not been recorded reproduces normal audio.
b.Check the audio output display on the front panel display window.
L R | : HiFi audio |
No display : normal audio
Note:
Since normal audio is not recorded on a
18
