2 CONTROLS AND CONNECTORS
Front Panel
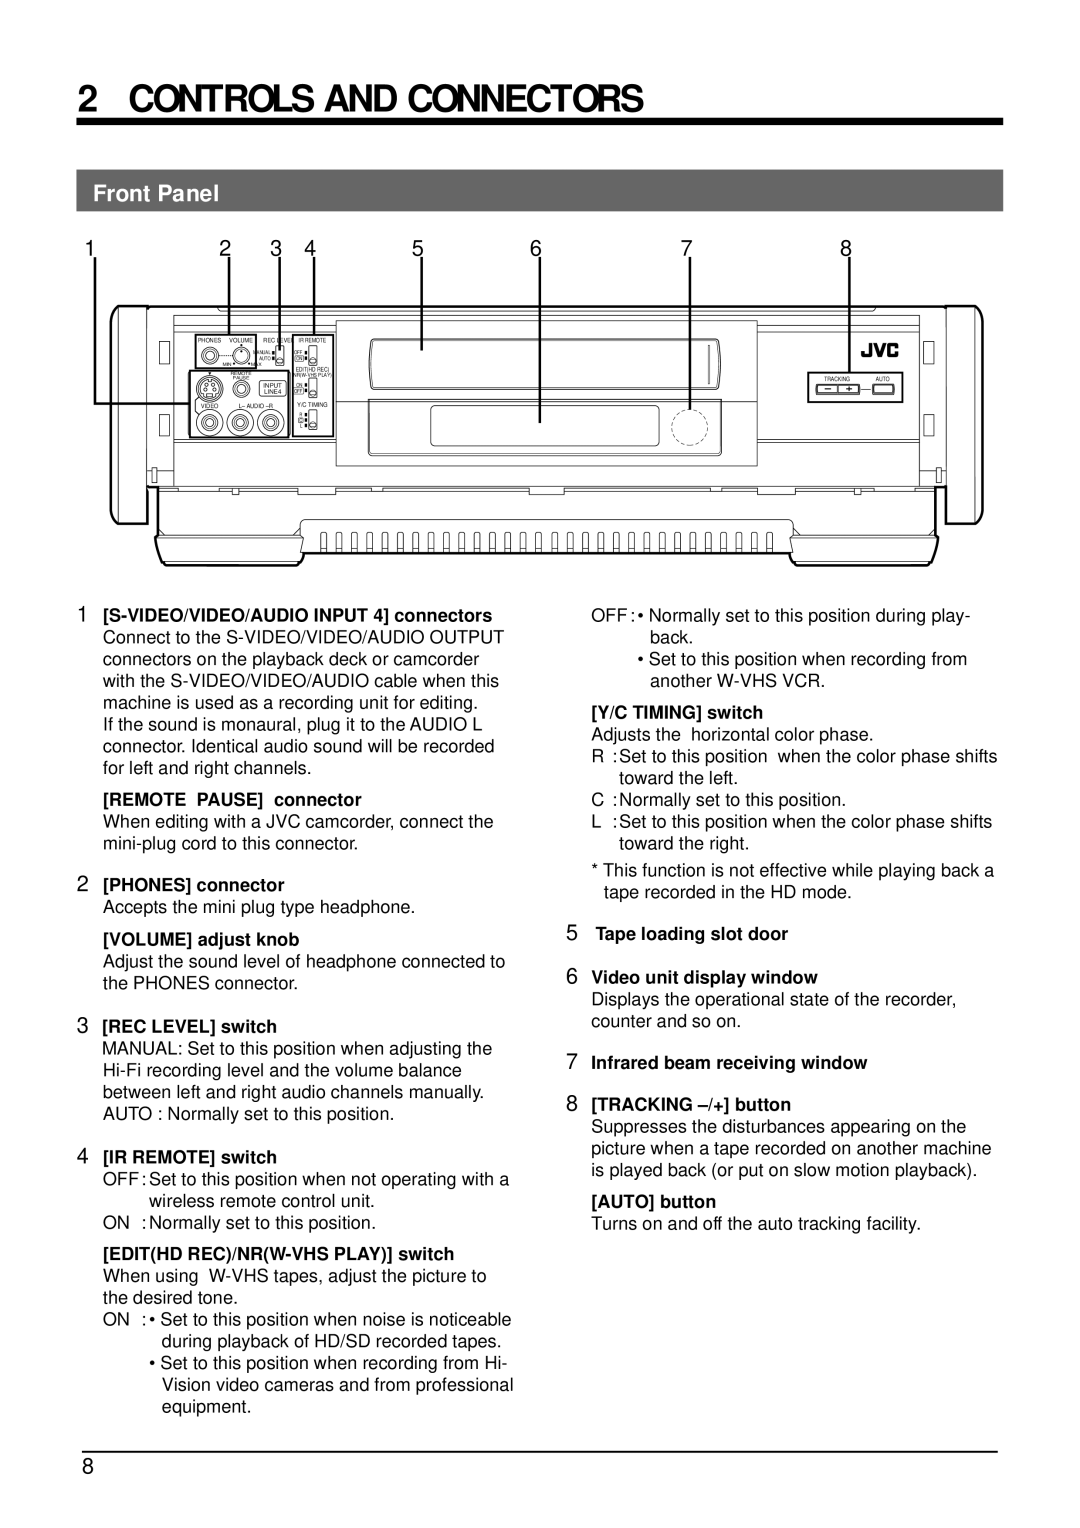
1 | 2 | 3 4 | 5 | 6 | 7 | 8 |
PHONES | VOLUME | REC LEVEL | IR REMOTE |
| |
|
|
| MANUAL | OFF |
|
|
|
| AUTO | ON |
|
| MIN | MAX | EDIT(HD REC) |
| |
| REMOTE |
|
| ||
|
| ||||
|
| PAUSE |
| TRACKING | AUTO |
|
|
| INPUT | ON |
|
|
|
| LINE4 | OFF |
|
VIDEO |
| L– AUDIO | Y/C TIMING |
| |
|
|
|
| R |
|
|
|
|
| C |
|
|
|
|
| L |
|
1
If the sound is monaural, plug it to the AUDIO L connector. Identical audio sound will be recorded for left and right channels.
[REMOTE PAUSE] connector
When editing with a JVC camcorder, connect the
2[PHONES] connector
Accepts the mini plug type headphone.
[VOLUME] adjust knob
Adjust the sound level of headphone connected to the PHONES connector.
3[REC LEVEL] switch
MANUAL: Set to this position when adjusting the
4[IR REMOTE] switch
OFF: Set to this position when not operating with a wireless remote control unit.
ON : Normally set to this position.
[EDIT(HD
ON : • Set to this position when noise is noticeable during playback of HD/SD recorded tapes.
•Set to this position when recording from Hi- Vision video cameras and from professional equipment.
OFF : • Normally set to this position during play- back.
•Set to this position when recording from another
[Y/C TIMING] switch
Adjusts the horizontal color phase.
R: Set to this position when the color phase shifts toward the left.
C : Normally set to this position.
L: Set to this position when the color phase shifts toward the right.
8