
VN-C10 specifications
The JVC VN-C10 is a notable entry in the world of network cameras, designed for both professional and consumer use, emphasizing a blend of advanced technology and user-friendly features. It is well-regarded for its reliability and performance, making it a popular choice for security and surveillance applications.One of the main features of the VN-C10 is its high-resolution imaging capability. With a resolution of up to 640 x 480 pixels, the camera delivers clear and detailed images, which are crucial for accurately monitoring environments. This camera is equipped with a 1/4-inch CCD sensor, known for its excellent light sensitivity. This enables the VN-C10 to produce high-quality video even in low-light conditions, making it versatile for various monitoring needs.
The VN-C10 employs advanced compression technologies to optimize streaming performance while conserving bandwidth. With support for both MPEG-4 and MJPEG compression methods, it allows users to choose the best setting for their specific requirements, balancing image quality with bandwidth usage. This flexibility is particularly important for installations with limited network capacity.
Another significant characteristic of the JVC VN-C10 is its PTZ capabilities, which stands for Pan-Tilt-Zoom. This functionality allows users to control the camera remotely, adjusting its viewing angles and zooming in on specific areas of interest. The ability to cover wide areas while focusing on details enhances the usability of the camera for surveillance tasks.
Integration is a key feature of the VN-C10, as it supports various network protocols including TCP/IP and HTTP. This ensures compatibility with a wide range of devices and software, making it easier to incorporate into existing security systems. Additionally, the camera is equipped with a built-in web server, allowing for straightforward access and configuration through standard web browsers.
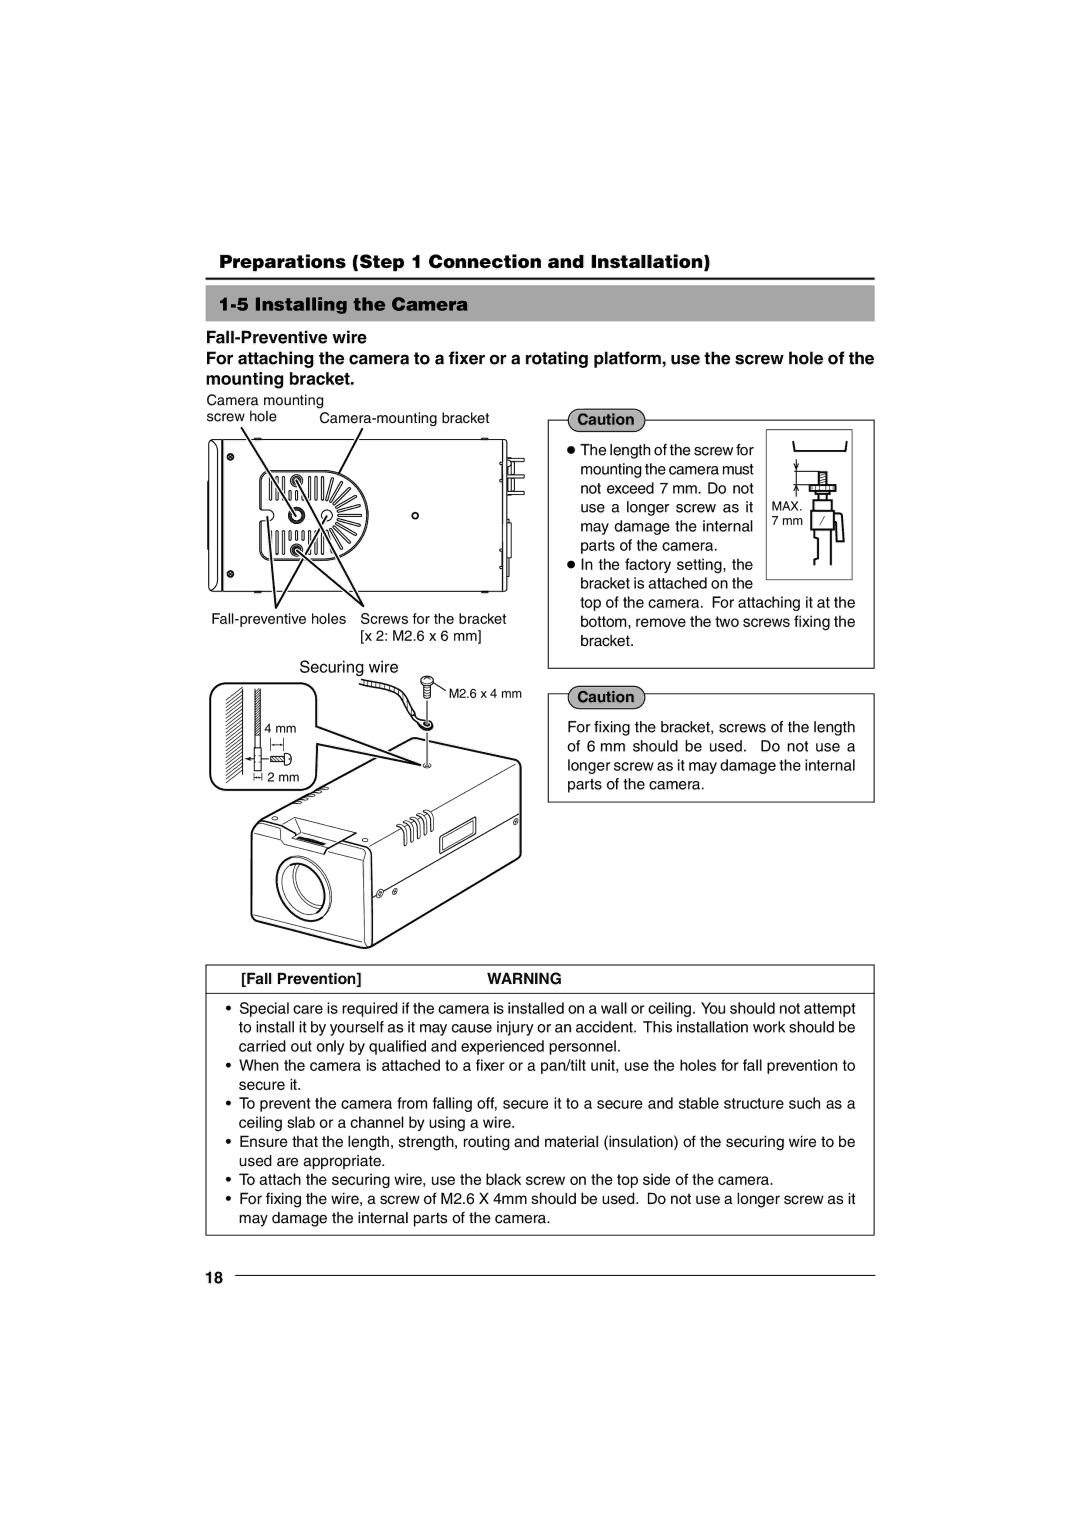
In terms of physical characteristics, the JVC VN-C10 has a compact and durable design, which facilitates easy installation in diverse environments. Its robust build quality ensures longevity, while the camera's aesthetic design allows for discreet placement.
Overall, the JVC VN-C10 stands out for its combination of high-performance imaging, flexible streaming options, and user-friendly remote controls. It is an excellent choice for anyone looking to enhance their surveillance capabilities with a reliable and advanced network camera.