QUICK USE
If you have a handy transceiver, the steps given here will allow you to try SSTV with your friend right away.
Note: To correctly receive or transmit images, you and your friend have to select the same SSTV mode. If you prefer using a mode other than Robot (color) 36 which is the factory default, see “SELECTING A SSTV MODE” {page 7} and “RECEIVING IMAGES” {page 10}.
|
|
|
|
| ON |
|
|
|
| NIC | ATI |
|
|
|
| MU |
|
|
|
|
| OM |
|
|
| VE VIS | UA | L C |
|
|
|
|
|
| |
INTE | RA | CTI |
|
|
|
|
|
|
|
|
|
|
|
| TX | /R | X |
|
|
| IVE | OR |
|
|
| ACT | ICAT |
|
| ||
| MUN |
|
|
| ||
TER | COM |
|
|
| ||
IN | UAL |
|
|
|
|
|
VIS | 1 |
|
|
|
|
|
|
|
|
|
| ||
S
P T T
O | LD |
H |
|
|
| FM | M | R | |
| ST |
|
| ||
FA | R | X |
|
| |
|
|
| |||
ON
T | X |
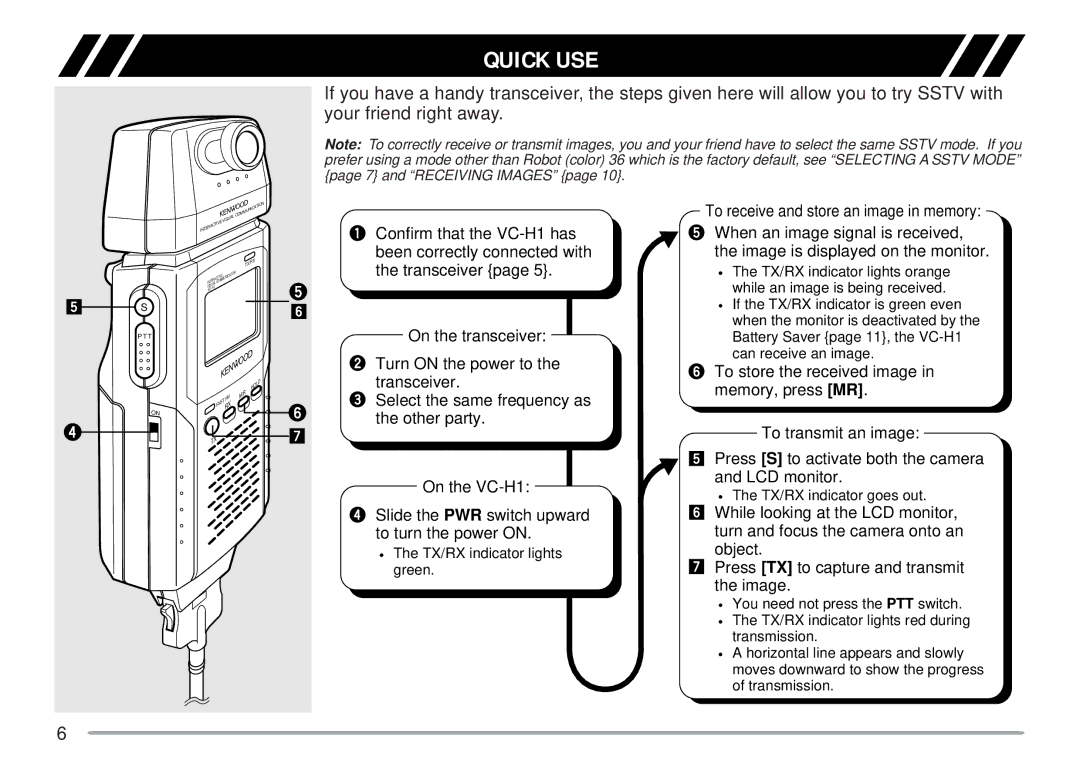
![]() Confirm that the
Confirm that the
On the transceiver:
Turn ON the power to the transceiver.
Select the same frequency as the other party.
On the
To receive and store an image in memory:
When an image signal is received, the image is displayed on the monitor.
•The TX/RX indicator lights orange while an image is being received.
•If the TX/RX indicator is green even when the monitor is deactivated by the Battery Saver {page 11}, the
To store the received image in memory, press [MR].
To transmit an image:
Press [S] to activate both the camera and LCD monitor.
• The TX/RX indicator goes out.
6
Slide the PWR switch upward to turn the power ON.
•The TX/RX indicator lights green.
While looking at the LCD monitor, turn and focus the camera onto an object.
Press [TX] to capture and transmit the image.
•You need not press the PTT switch.
•The TX/RX indicator lights red during transmission.
•A horizontal line appears and slowly moves downward to show the progress of transmission.