Lenovo 3000Y410 UG.book Page 50 Friday, September 14, 2007 1:37 PM
Replacing Memory
9.Make sure that the memory module is firmly fixed in the slot and does not move easily.
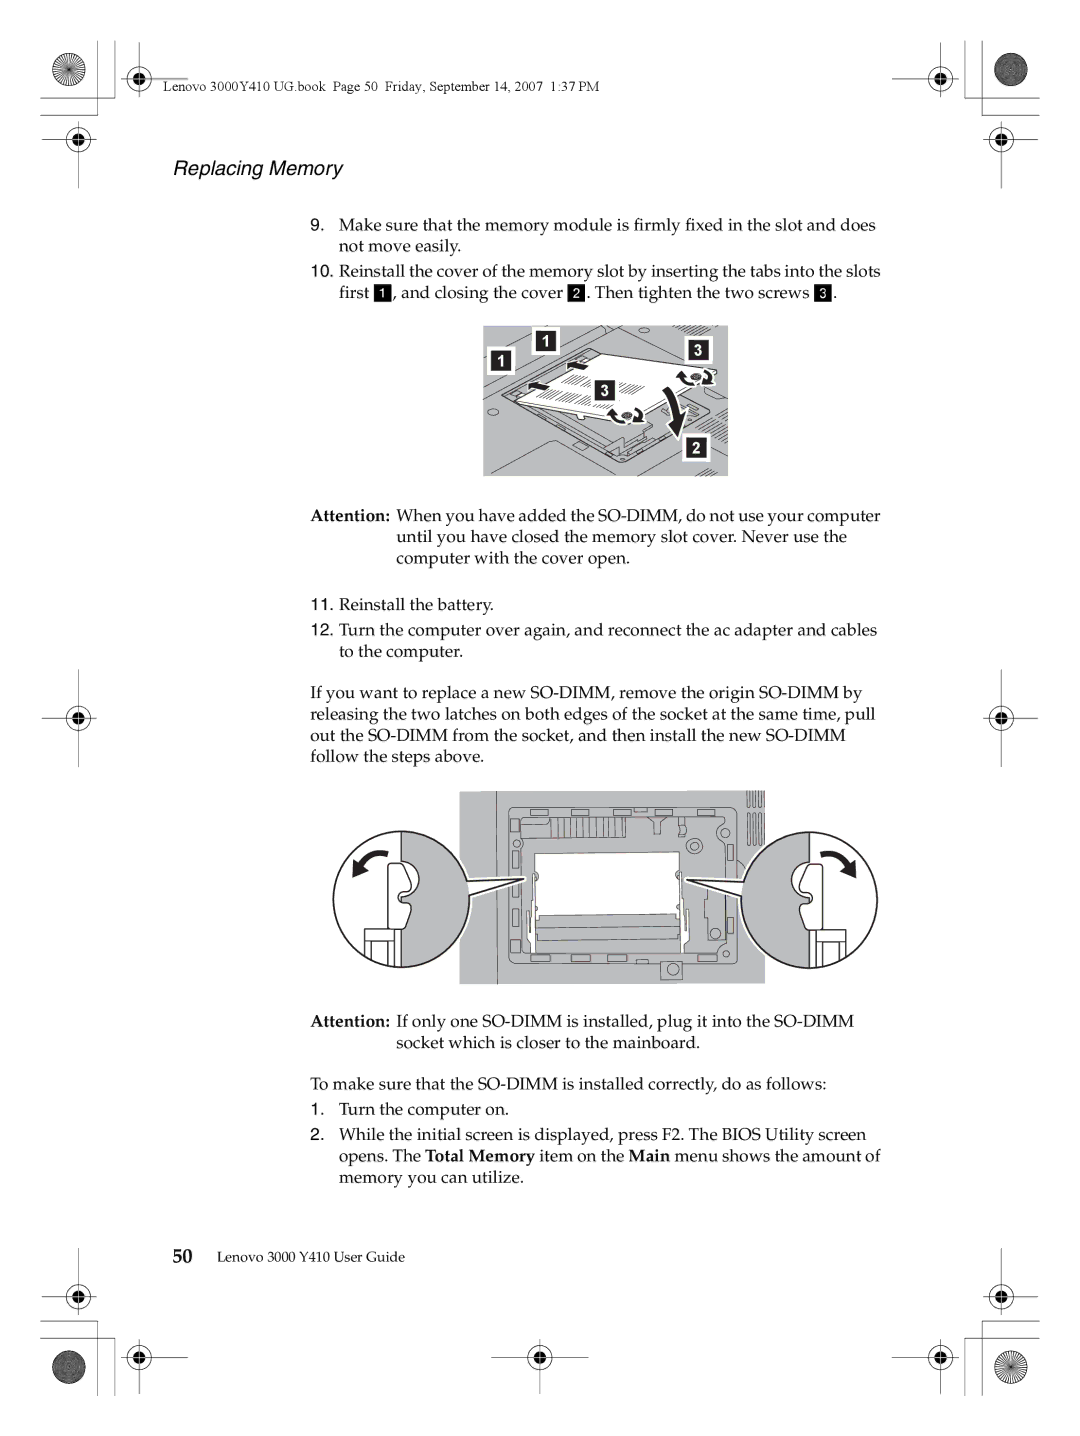
10.Reinstall the cover of the memory slot by inserting the tabs into the slots first a, and closing the cover b. Then tighten the two screws c.
1 | 1 | 3 |
| ||
|
| |
|
| 3 |
|
| 2 |
Attention: When you have added the
11.Reinstall the battery.
12.Turn the computer over again, and reconnect the ac adapter and cables to the computer.
If you want to replace a new
Attention: If only one
To make sure that the
1.Turn the computer on.
2.While the initial screen is displayed, press F2. The BIOS Utility screen opens. The Total Memory item on the Main menu shows the amount of
memory you can utilize.
50Lenovo 3000 Y410 User Guide