Room Air Conditioner
Contents
Code Type Code of Model Meaning
Details of LG Model Name2002
Meaning
Details of LG Model Name2003~
Indoor Unit
Functions
Remote Control
Airflow Direction Control Air Circulation
Room, Temperature Checking
PLASMAOptional Setting the Time or Timer Timer Selection
Unit
Product References
Model Name
1Ø, 220V, 60Hz
All Models
Dimensions
Outdoor Unit
9k Heat Pump
Cooling Only Models
Refrigeration Cycle Diagram
LS-Q096ABL, LS-Q096AEL LS-H096QNA0, LS-H096QNA0
Wiring Diagram
Operation Details
Cooling Mode Operation
Healthy Dehumidification Mode
Defrost Control
Heating Mode Operation
Fuzzy Operation for Cooling
Fuzzy Operation C/O Model
Fuzzy Operation H/P Model
Airflow Speed Selection
On-Timer Operation
Fuzzy Operation for Dehumidification
Fuzzy Operation for Heating
Off-Timer ↔ On-Timer Operation
Off-Timer Operation
Sleep Timer Operation
Chaos Swing Mode
Jet Cool Mode Operation H/P Model
Jet Cool Mode Operation C/O Model
Air Cleaner Operation
Forced Operation
Buzzer Sounding Operation
Remote Control Operation Mode
Protection of the evaporator pipe from frosting
Self-diagnosis Function
Display Function
Heating Model
Cooling Model
Piping length and elevation
Installation
Selection of the best location
Drill a hole in the wall
How to fix installation plate
Flaring work
For right rear piping
Indoor unit installation
Connection of piping Indoor
Tighten the flare nut with a wrench
Wrap the insulation material around the connecting portion
Tape the drain hose and the connecting cable
Insert the connecting cable into the indoor unit
Tighten the flare nut by hand
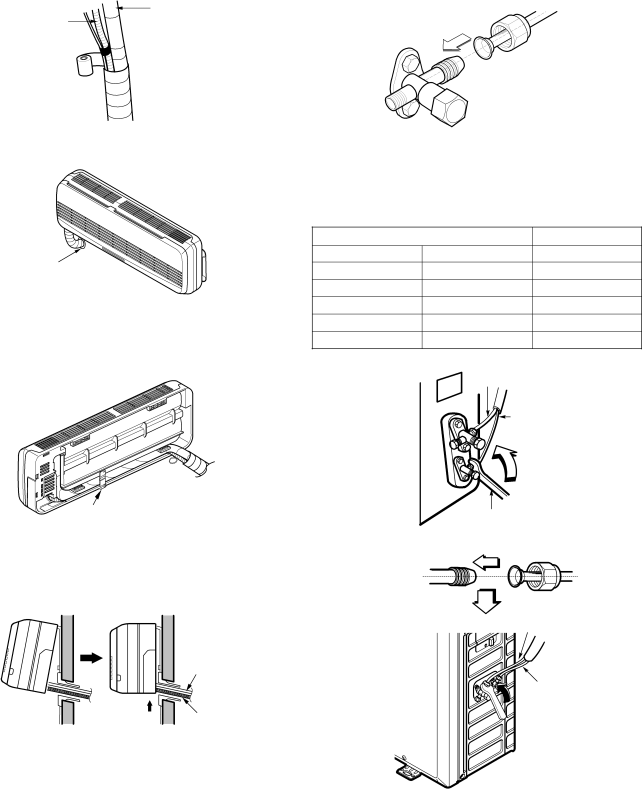
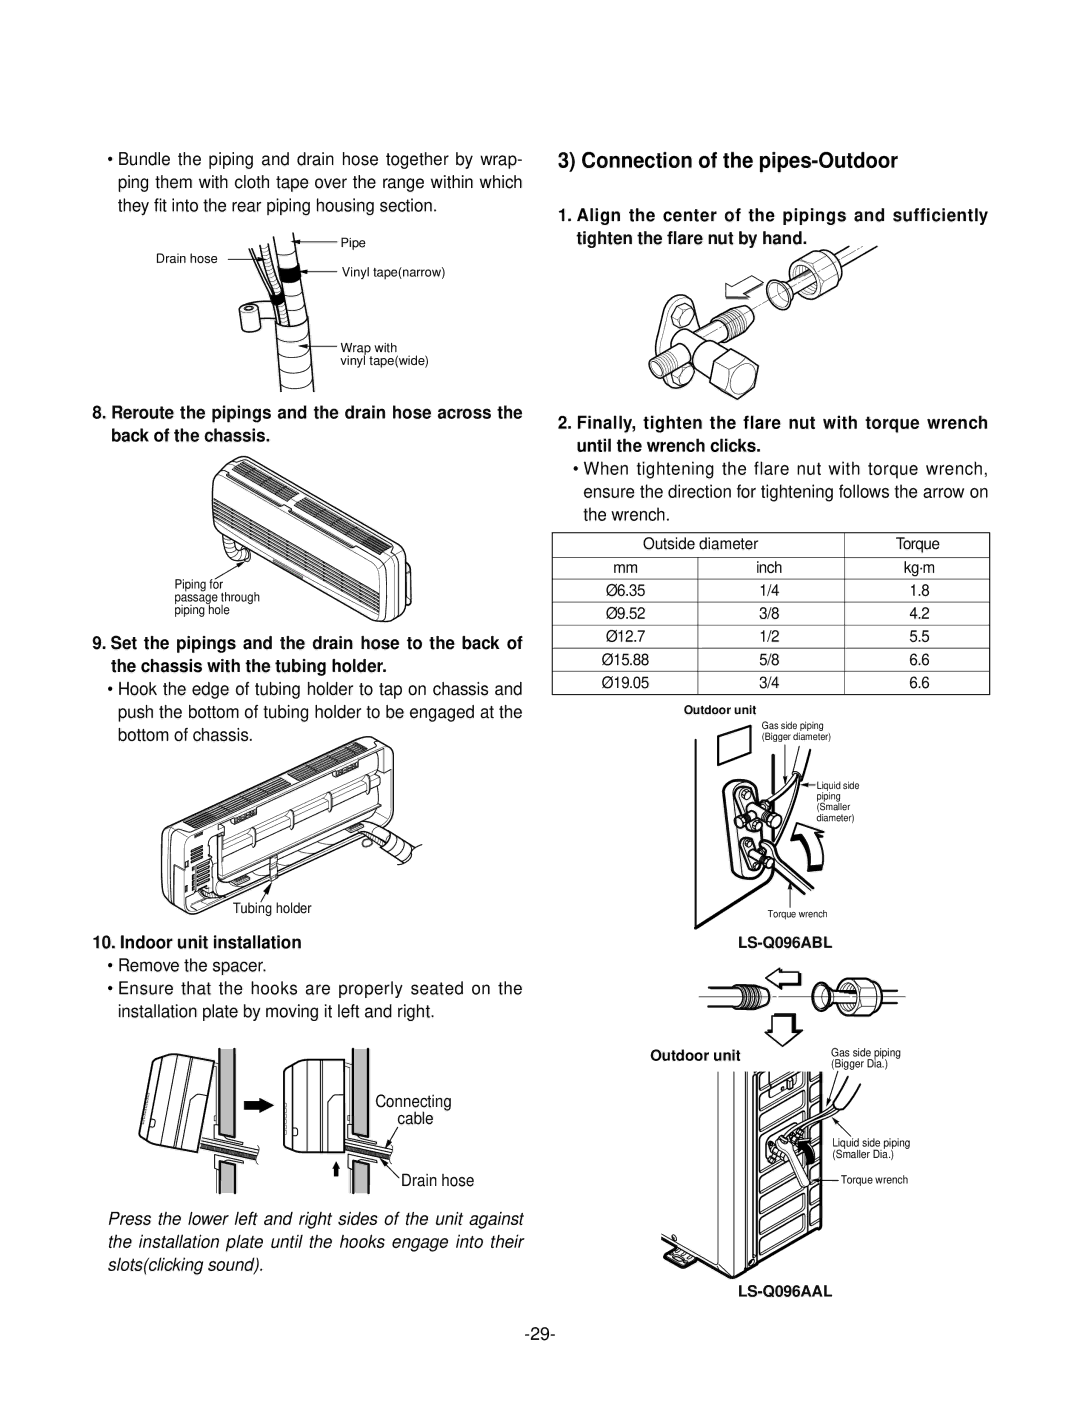
Connection of the pipes-Outdoor
Align the center of the pipings and sufficiently
Connect the cable to the Indoor unit
Connecting The Cable Between Indoor Unit and Outdoor Unit
Connect the cable to the outdoor unit
Form the piping
Checking the drainage
To remove the front panel from the indoor unit
To check the drainage
Pump Down Procedure
Prepare remote control
Settlement of outdoor unit
Evaluation of the performance
Operation
Name and Function-Remote Control
ON/OFF Timer Buttons
To remove the Grille from the Chassis
Disassembly of the parts Indoor unit
To remove the Control Box
When repair, do not damage the Caution label
To remove the Discharge Grille
To remove the Evaporator
To remove the Cross-Flow Fan
To remove the Motor Cover
Way Valve Liquid Side
Way, 3-way Valve
Purge the air from the system
Procedure
Check for gas leakage
Set the 2-way valve to the closed position
Air purging of the charge hose
Re-air purging
Gas leakage
Balance refrigerant of the 2-way, 3-way valves
All amount of refrigerant leaked
Evacuation
Purge the air from the charge hose
After Evacuation
Connect the charge hose to the charging cylinder
Trouble analysis
Cycle Troubleshooting Guide
Electronic Parts Troubleshooting Guide
Product is not operate with the remote control
Compressor/Outdoor Fan are unable to drive
When indoor Fan does not operate
When Vertical Louver does not operate
Way Relay
When Heating does not operate
Page
Electronic Control Device
Main P.W.B Assembly DC Part TOP View Bottom View
TOP View
6871A20227 TOP View
6871A20194 TOP View
6871A30009 TOP View
6871A20391 TOP View
6871A20390 TOP View
Schematic Diagram
LED Type
HVB Typeplasma
Heat Pump Model LED Type
Heat Pump Model HVB Type
Exploded View and Replacement Parts List
LS-Q076ABL LS-Q076BBG LS-Q076BEL
Parts ListIndoor
LS-Q096ABL LS-Q096BBG
CABLE, Flat
CABLE, Falt
Cover ASSEMBLY,MOTOR
LS-Q082AAL
LS-C082QMA0 LS-C082QNA0 LS-C096QGL0
LS-C096QLA0 LS-C096QNA0 LS-H096QGL1
W0CZZ
Parts ListOutdoor
552202 567502 561410 554160 447910 550140 430410 552203-2
TUBE,CAPILLARY Bend
Compressor
Base ASSEMBLY,OUTDOOR
Tube ASSY,CAPILLARY
LS-C082QMA0 LS-C082QNAO LS-C096QGL0
3041AR2415K
April