to Section TOC
to Master TOC
TROUBLESHOOTING & REPAIR
MAIN TRANSFORMER REMOVAL & REPLACEMENT (continued)
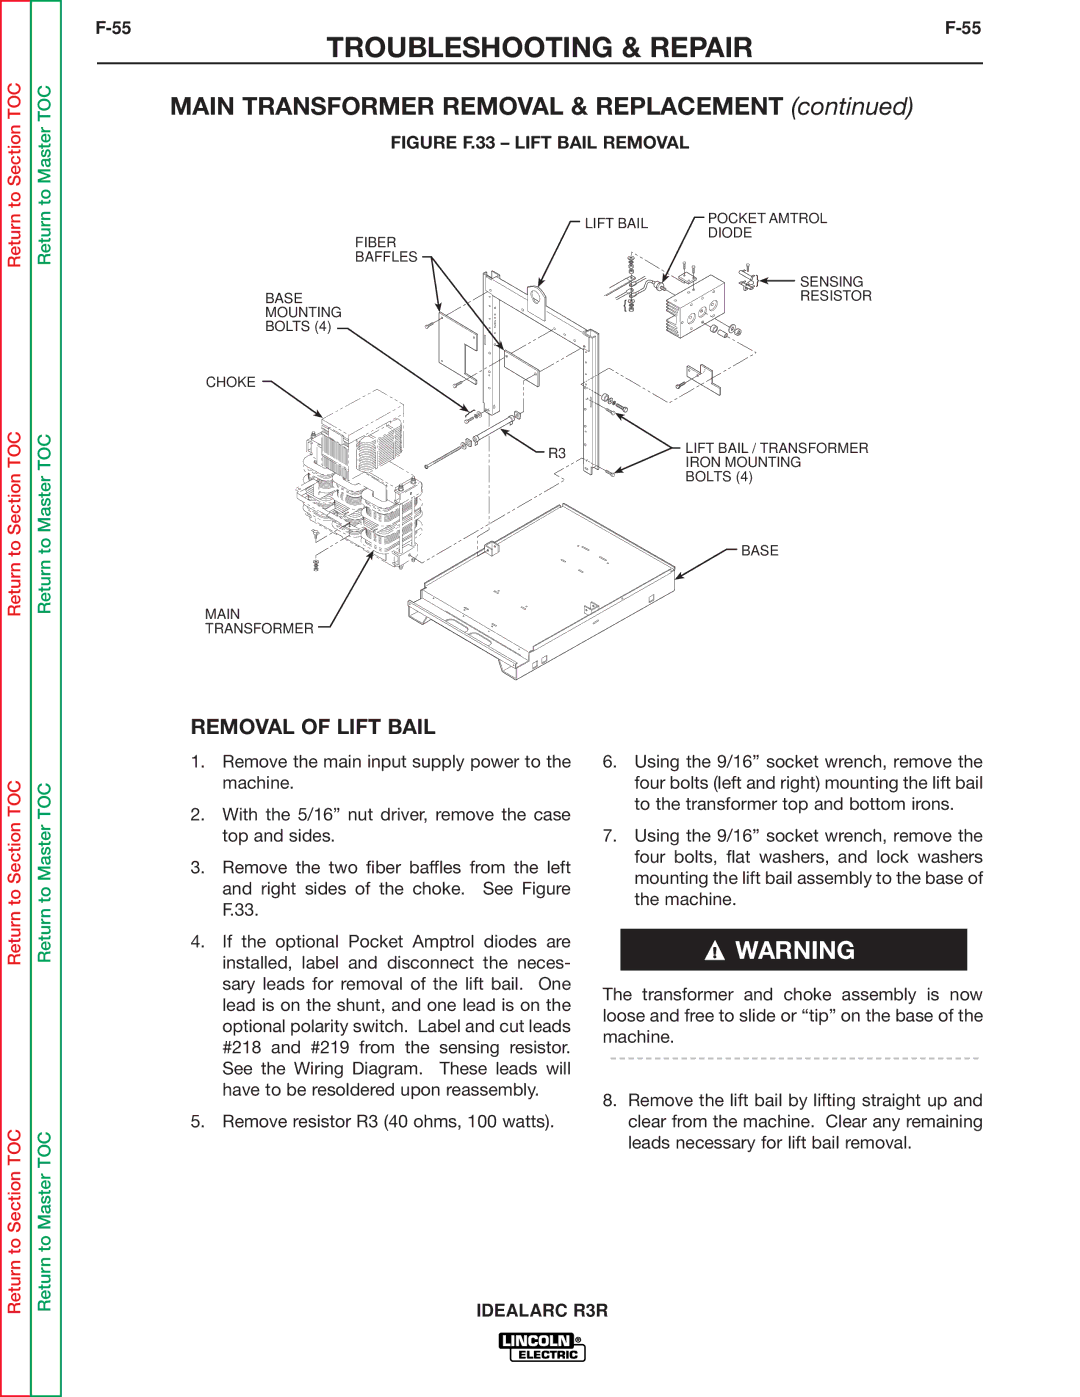
FIGURE F.33 – LIFT BAIL REMOVAL
Return
Return
FIBER BAFFLES
LIFT BAIL | POCKET AMTROL | |
DIODE | ||
|
BASE
MOUNTING
BOLTS (4)
CHOKE
{![]()
![]() }
}![]() SENSING RESISTOR
SENSING RESISTOR
Return to Section TOC
Return to Master TOC
MAIN TRANSFORMER
R3 | LIFT BAIL / TRANSFORMER | |
IRON MOUNTING | ||
| ||
| BOLTS (4) | |
| BASE |
Return to Section TOC
Return to Section TOC
Return to Master TOC
Return to Master TOC
REMOVAL OF LIFT BAIL
1.Remove the main input supply power to the machine.
2.With the 5/16” nut driver, remove the case top and sides.
3.Remove the two fiber baffles from the left and right sides of the choke. See Figure F.33.
4.If the optional Pocket Amptrol diodes are installed, label and disconnect the neces- sary leads for removal of the lift bail. One lead is on the shunt, and one lead is on the optional polarity switch. Label and cut leads #218 and #219 from the sensing resistor. See the Wiring Diagram. These leads will have to be resoldered upon reassembly.
5.Remove resistor R3 (40 ohms, 100 watts).
6.Using the 9/16” socket wrench, remove the four bolts (left and right) mounting the lift bail to the transformer top and bottom irons.
7.Using the 9/16” socket wrench, remove the four bolts, flat washers, and lock washers mounting the lift bail assembly to the base of the machine.
![]() WARNING
WARNING
The transformer and choke assembly is now loose and free to slide or “tip” on the base of the machine.
8.Remove the lift bail by lifting straight up and clear from the machine. Clear any remaining leads necessary for lift bail removal.
