Return to Section TOC
to Section TOC
Return to Master TOC
Return to Master TOC
OPERATION
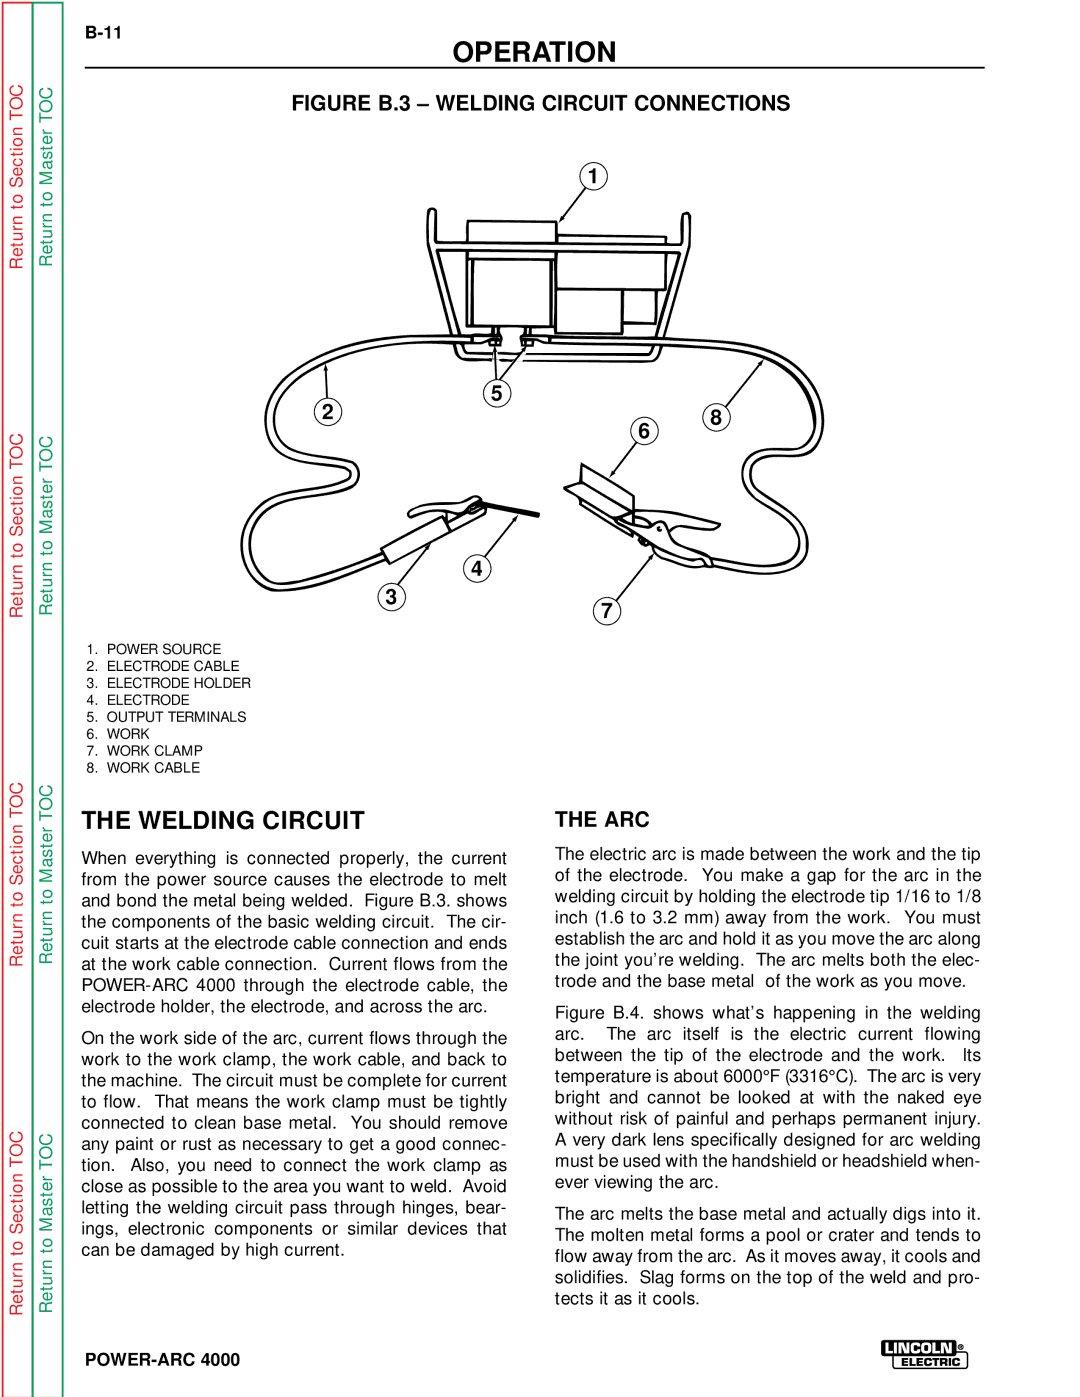
FIGURE B.3 – WELDING CIRCUIT CONNECTIONS
1
2 | 5 | 8 | |
6 | |||
|
|
4
Return
3
1.POWER SOURCE
2.ELECTRODE CABLE
3.ELECTRODE HOLDER
4.ELECTRODE
5.OUTPUT TERMINALS
6.WORK
7.WORK CLAMP
8.WORK CABLE
7
Return to Section TOC
Return to Section TOC
Return to Master TOC
Return to Master TOC
THE WELDING CIRCUIT
When everything is connected properly, the current from the power source causes the electrode to melt and bond the metal being welded. Figure B.3. shows the components of the basic welding circuit. The cir- cuit starts at the electrode cable connection and ends at the work cable connection. Current flows from the
On the work side of the arc, current flows through the work to the work clamp, the work cable, and back to the machine. The circuit must be complete for current to flow. That means the work clamp must be tightly connected to clean base metal. You should remove any paint or rust as necessary to get a good connec- tion. Also, you need to connect the work clamp as close as possible to the area you want to weld. Avoid letting the welding circuit pass through hinges, bear- ings, electronic components or similar devices that can be damaged by high current.
THE ARC
The electric arc is made between the work and the tip of the electrode. You make a gap for the arc in the welding circuit by holding the electrode tip 1/16 to 1/8 inch (1.6 to 3.2 mm) away from the work. You must establish the arc and hold it as you move the arc along the joint you’re welding. The arc melts both the elec- trode and the base metal of the work as you move.