Displaying PC images (VGA/DVI)
Your Spheros/Xelos has a digital visual interface (DVI) with which you can show PC images on the TV screen for example.
Connecting personal computers
Connect the PC directly to the socket labeled "DVI" on the back of the Signal Box. The digital audio signal can be connected to the input "Digital In 1 or 2". If your PC does not have a DVI interface, please use a VGA/DVI adapter cable. This is available from electronics and computer dealers. Connect the analogue audio output of the PC to the "AUDIO IN 2" socket. The TV set can be connected to the following standards: VGA (640x480 @85Hz), XGA (1024x768 @85Hz), SVGA (800x600 @85Hz) or SXGA (1280x1024 @75Hz).
DDC Function (Display Data Channel)
The DDC function automatically detects graphic resolutions supported by the TV set.
If you wish to use the DDC function, first connect the PC to the TV set via the VGA or DVI socket. Boot the PC. Regardless of whether the TV set is on or off, you can select the graphic resolution (e.g. XGA 1024 x 768 at 75 Hz) in the ÓPropertiesÓ menu on the PC.
Launch the program for displaying PC images
VGA menu
Rotate TV
Picture
Sound
VGA geometry
INFO Info
OK | MENU Back |
END End
OK ![]() Confirm
Confirm
In the ”Image” menu, you can select the contrast, brightness, sharpness, picture format, colour standard (not with DVI) etc. and adjust the light ratios to your personal preferences. To display pictures, you can select the format 4:3, since most camera pictures are taken in this format.
For an optimum display and maximum picture focus of standards VGA and SVGA, you can select "Original" under "Picture format". In this case the exact format values of the graphic card must be known and set in the menu "VGA geometry".
In the ÓSoundÓ menu, you can set the volume of the loudspeakers or headphones, or select the tone for
| Select ÓAutomatic yesÓ on a |
OK | computer with a conventional |
| graphics format. |
| Your Spheros will automatically |
OK | adjust to the supplied image |
| format. |
Special graphic format may require further settings to be made:
¥Set the picture width
¥Move the picture horizontally, to the left or right
¥Move the picture vertically, upwards or downwards
¥Set the phase position to give a picture that is as
¥ÓInput pixelsÓ allows you to set the horizon- tal resolution of the PC image.
¥ÓInput linesÓ allows you to set the vertical resolution of the PC image.
OK | Save settings |
Pressing the END key on the remote control hides the menu.
Selection possibilities for the "COMPONENT IN" socket: Choose the menu "Connections" and set it as follows: Connections: Connection plan ➔
AV
Press the (Zero) key and ÓAV SelectionÓ appears.
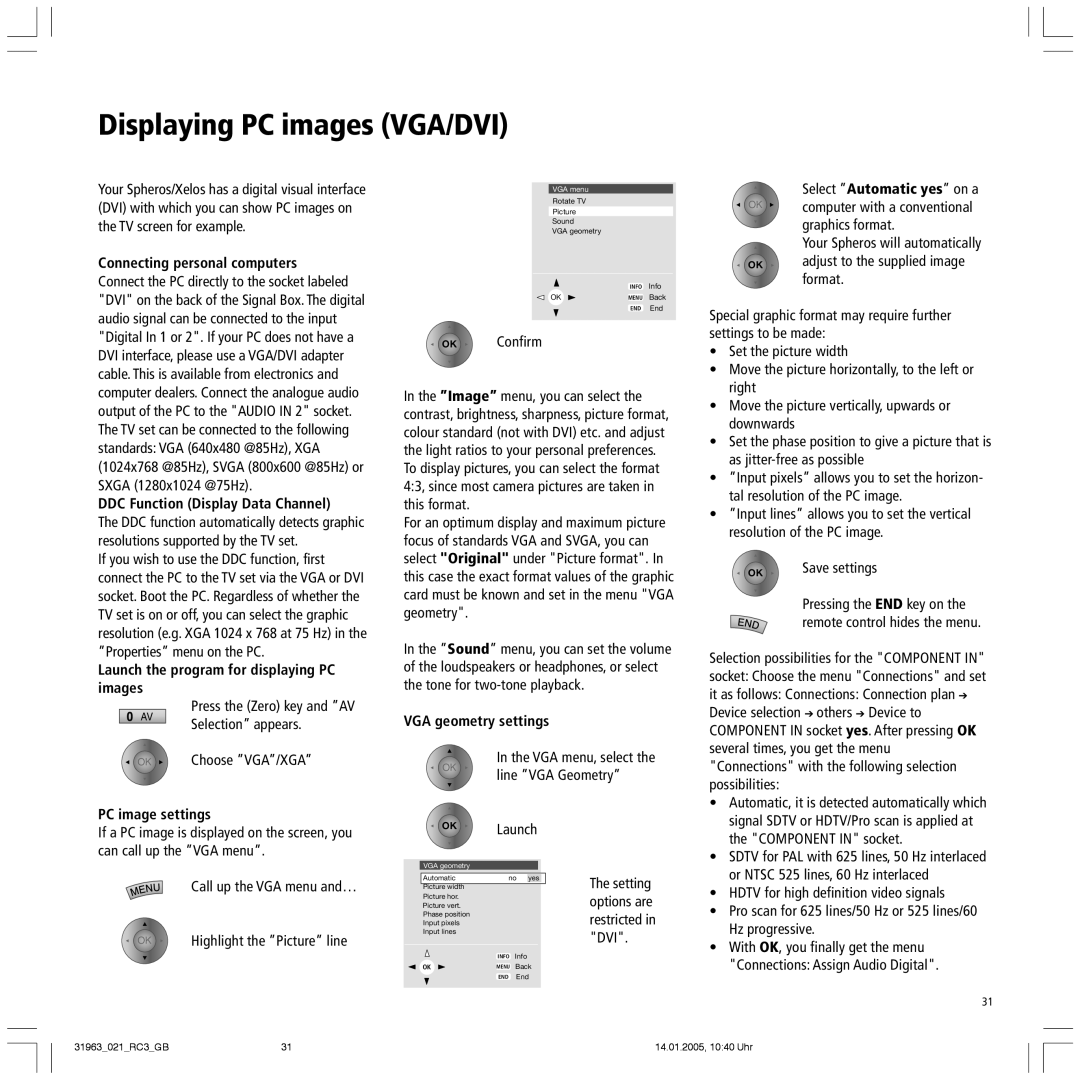
VGA geometry settings
Device selection ➔ others ➔ Device to COMPONENT IN socket yes. After pressing OK several times, you get the menu
OK ![]() Choose ÓVGAÓ/XGAÓ
Choose ÓVGAÓ/XGAÓ
PC image settings
If a PC image is displayed on the screen, you can call up the ÓVGA menuÓ.
OK
OK
VGA geometry
In the VGA menu, select the line ÓVGA GeometryÓ
Launch
"Connections" with the following selection possibilities:
¥ | Automatic, it is detected automatically which |
| signal SDTV or HDTV/Pro scan is applied at |
| the "COMPONENT IN" socket. |
¥ | SDTV for PAL with 625 lines, 50 Hz interlaced |
| or NTSC 525 lines, 60 Hz interlaced |
Call up the VGA menu andÉ
OK | Highlight the ÓPictureÓ line |
Automatic | no yes | The setting | |||
|
|
|
|
| |
Picture width |
|
|
|
| |
Picture hor. |
|
|
|
| options are |
Picture vert. |
|
|
|
| |
Phase position |
|
|
|
| restricted in |
Input pixels |
|
|
|
| |
Input lines |
|
|
|
| "DVI". |
|
|
|
|
| |
| INFO | Info |
| ||
OK | MENU | Back |
| ||
| END | End |
| ||
¥ | HDTV for high definition video signals |
¥ | Pro scan for 625 lines/50 Hz or 525 lines/60 |
| Hz progressive. |
¥ | With OK, you finally get the menu |
| "Connections: Assign Audio Digital". |
31
31963_021_RC3_GB | 31 | 14.01.2005, 10:40 Uhr |