GETTING STARTED
2.1 GETTING STARTED
Connect all the devices:
1)Install HDD:
The HDD must be installed before the DVR is turned on. Please refer to Appendix #1 for HDD installation instructions.
2)Connect cameras, monitors and external devices. Please refer to the section “1.5 REAR PANEL” for connection, and Appendix#2 for pin configurations of the external I/O port.
NOTE:
Be sure the cameras are connected and
3)Connect the AC power cord to power adapter and plug into an electrical outlet. The “ “ or “Power” LED will be on as red.
Press the “ “ or “Power” button. The “ “ or “Power” LED will be on as green. It takes approximately 10 to 15 seconds to boot the system.
4)Set the date and time on your DVR. Please DO NOT change the date or time on your DVR after the recording function is activated. The recorded data will be disordered and you will not be able to find the recorded file to backup by time search.
NOTE:
If users change the date or time accidentally when the recording function is activated, it’s recommended to clear all HDD data, and start recording again.
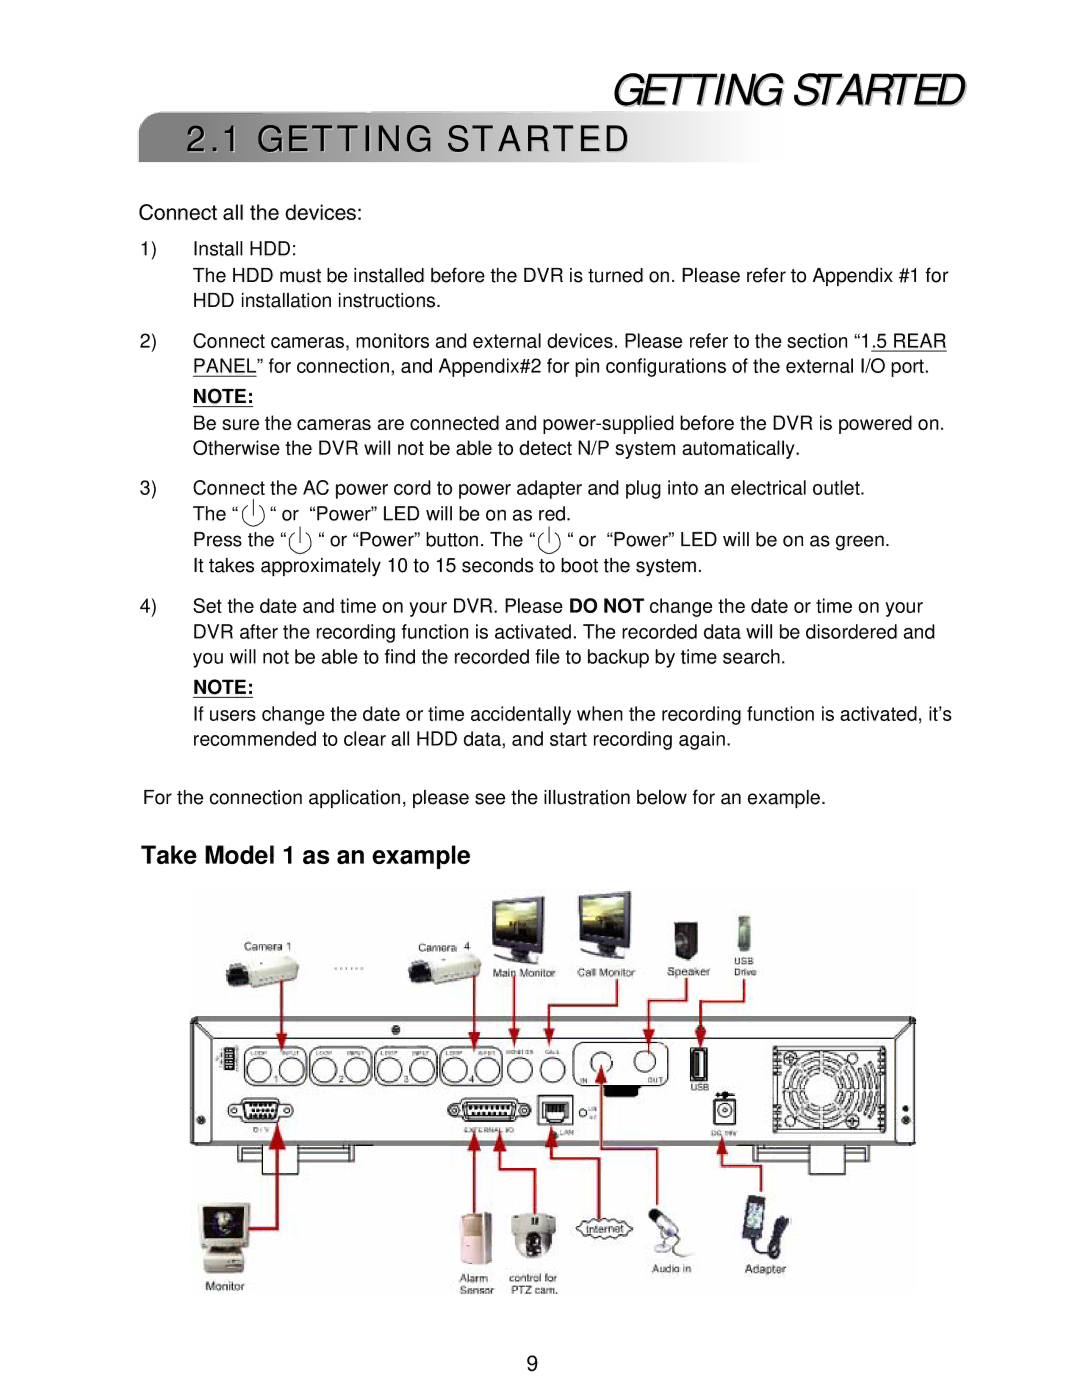
For the connection application, please see the illustration below for an example.
Take Model 1 as an example
9